How to Design Personalized Housewarming Mugs Using Online Mockup Generators
A personalized mug costs almost nothing to make but lands as one of the most-used housewarming gifts in any new kitchen — here's exactly how to design one from scratch.
A custom mug is one of those gifts that earns its shelf life. Unlike a candle that burns down or a bottle of wine that disappears in an evening, a mug gets used every single morning. It shows up on kitchen shelves, at desk setups, and in the hands of someone who will think of you every time they fill it. The challenge has always been making something that looks intentional rather than generic — and that's exactly what a well-chosen mockup generator solves.
This guide walks through the full process: picking the right tool, placing text and images on a curved surface without distortion, managing color accurately for print, exporting files that a printer will actually accept, and getting the finished product to your recipient in one piece. Whether you're making a single personalized gift for a close friend or preparing a small batch of realtor closing gifts, the workflow is the same.
Choosing Your Mockup Generator
The mockup generator market in 2026 has settled into a few reliable options, each with a different strength. Adobe Express sits in a useful middle ground: it offers more design freedom than most template-only builders while remaining far easier to learn than a professional tool like Illustrator. It works particularly well for producing multiple readable design variations quickly from a single starting template. Canva brings a larger library of contextual backgrounds and lifestyle photos, which matters if you want to show the finished mug in a kitchen or coffee-shop setting rather than against a plain white backdrop. Kittl and Mockey.ai lean toward print-on-demand sellers who need clean, commercial-use exports without watermarks.
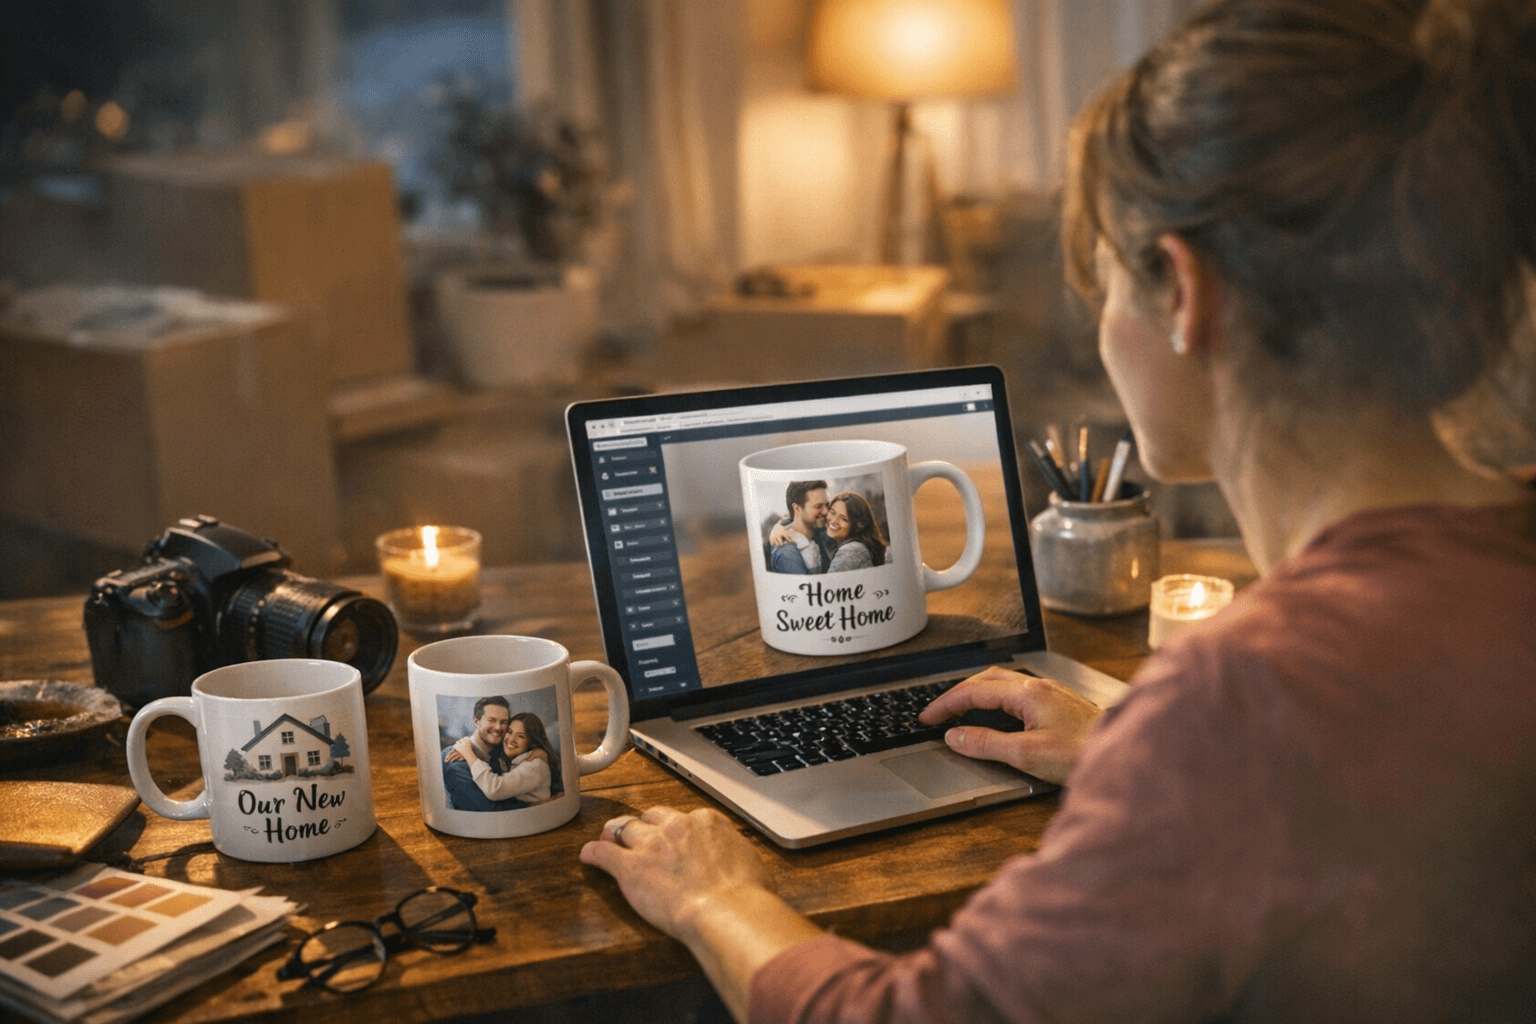
For anyone who wants to see their design in motion, mug3d.com offers a real-time 3D preview you can rotate before committing to a layout. Tools like Placeit and Mediamodifier round out the field for sellers who need mockups embedded directly into e-commerce listings. The core principle across all of them is the same: you upload your design, position it within the printable zone, and receive a realistic rendering that shows exactly how the finished mug will look before a single drop of ink is used.
Selecting a Template and Layout Type
Once you've opened a mug template, the first decision is layout: a single centered front design or a full wrap that runs left to right around the entire mug. Each choice has real consequences. A front-only layout keeps the design visible from the most common drinking angle but leaves the back of the mug bare. A full wrap gives you more surface area, but it requires that every element of the design holds up when viewed from any angle, including the awkward zone near the handle.
Before placing any type or imagery, note the printable region for your specific mug. Most 11-ounce ceramic mugs have a printable area that stops approximately half an inch from the handle on both sides. Layouts that bleed too close to this edge risk partial printing or visible cutoffs in the final product. Confirming the exact dimensions with your printer before you begin designing saves significant time later.
Placing Text and Images on a Curved Surface
Curved surface placement is where most first-time mug designers make their mistakes. Text that looks perfectly centered on a flat digital canvas can appear to lean or tilt once it wraps around a cylindrical form. Mockup generators solve part of this problem by rendering the warped preview automatically, but the design work still needs to account for how the eye reads type on a curve.
A few practical principles help here:
- Keep primary text in the horizontal center of the mug's height, roughly between 40% and 60% of the printable zone. Text placed too high drifts toward the rim; too low, and it competes with the base.
- Avoid very thin serif fonts at small point sizes. Sublimation and direct-to-film printing can soften fine details, and type that looks sharp on screen may blur slightly in the transfer process.
- For names, addresses, or short phrases (the most common personalization for housewarming mugs), a single line of bold, mid-weight sans-serif type at 36 points or larger reads cleanly from across a room.
- If you're including an illustration, house icon, or logo alongside the text, leave breathing room between the two elements. On a curved surface, even generous digital spacing can compress visually once printed.
The mockup preview is your primary proof-reading tool at this stage. Rotate the 3D view or toggle between front and side angles before approving the placement.
Color Choice and Pantone Considerations
Color accuracy on mugs is a genuinely tricky problem, and the honest answer is that what you see on a screen rarely matches what comes out of a sublimation press exactly. Calibrating for that gap is the work of the color step.
The most practical approach is to identify which elements in your design truly need color accuracy. For a personalized housewarming mug, that's usually a logo or brand mark, not the background field. For those precision elements, choose a target Pantone spot color, document its name and number, and then convert it to an approximate CMYK or RGB equivalent based on your specific printer's guidance. Most professional print services will provide a color profile or specify which color mode to work in.
A few other color considerations worth building into your workflow:
- White mugs show color most accurately. Colored mug bases (navy, black, sage) will shift all overlaid hues significantly.
- Sublimation printing on white ceramic produces the most vibrant, photo-accurate results of the common print methods. Screen printing offers flat, opaque color that works well for graphic designs with fewer tones. Direct-to-film and UV printing sit between the two in terms of detail reproduction.
- Request a physical proof before printing a full batch. A single test mug costs a few dollars and can save an entire order.
Export Settings for Printers
The export step is where many DIY projects quietly fall apart. Mockup generators produce preview images, which are optimized for screens, not presses. The file you send to a printer needs to meet different standards entirely.
Most sublimation and ceramic print services require:
- A minimum resolution of 300 DPI at the actual print size (not the mockup preview size, which is often lower)
- A PNG or high-resolution TIFF file, not a JPEG, to avoid compression artifacts that show up as pixelation along text edges
- An sRGB color profile unless the printer specifically requests CMYK
- Bleed allowance added outside the printable area if the design extends to the edge of the wrap zone
If you designed in Adobe Express or Canva, export at the highest available resolution and confirm the pixel dimensions match the printer's template specs before uploading. Some services provide downloadable dieline templates, which show the exact printable area, safe zone, and bleed margins as a reference layer. Using one eliminates guesswork entirely.
Packaging and Shipping the Finished Gift
A beautifully designed mug in a plain poly mailer is a missed opportunity. The unboxing moment matters, especially for housewarming gifts, which are often presented in front of other people.
Single-mug gift boxes sized for 11-ounce ceramic mugs are widely available and typically sold in packs of 24 or 36. They come with foam inserts or tissue paper wells that hold the mug securely without movement. Adding a ribbon and a short handwritten card elevates the presentation from "something I ordered online" to a considered, personal gesture. For realtor closing gifts, a branded box or a simple kraft paper box with a printed label reinforces the professional relationship without being over-formal.
For shipping, mugs are more fragile than they look. Wrap the boxed mug in at least two inches of bubble wrap before placing it in a shipping carton. Double-boxing (the gift box inside a larger corrugated box) is the safest method for anything traveling more than a short distance. Carriers that offer fragile handling should be selected when the order carries sentimental weight; a broken mug is worse than no gift at all.
Building a Repeatable Workflow
The real value of this process, particularly for small-batch sellers and realtors who give closing gifts regularly, is making it repeatable. Once you've settled on a template, locked in your color conversions, confirmed your printer's export specs, and sourced packaging that works, every subsequent mug becomes a 20-minute project rather than a two-hour one. Keep a simple checklist that covers layout choice, Pantone references, export resolution, and packaging materials. Save your approved template file somewhere accessible.
The personalized housewarming mug has endured as a gift category precisely because it manages to be simultaneously useful and specific to a person or place. The mockup workflow just makes the gap between that intention and a finished, professional-looking product much smaller than it used to be.
This article was produced by Prism’s automated news system from verified source data, official records, and press releases, then run through automated quality and moderation checks before publishing. The system is built and supervised by the people who set the standards it runs under. Read our full AI policy.
Did this article answer your question?