DIY vs Buy: Materials, Assembly and Performance Tips for Counterflow Wort Chillers
Counterflow chiller options, materials and step-by-step assembly tips to help you decide whether to DIY or buy, and how to maximize chilling speed, sanitation, and longevity.
Counterflow wort chillers deliver fast, single-pass cooling and reliable sanitation, making them a high-impact upgrade for homebrewers weighing DIY savings against commercial convenience. A properly built CFC can chill 5-10 gallons of wort from near boil to below 80°F in one pass, and with optimized water flow and a longer coil can reach pitching range of 60-70°F depending on inlet water temperature.
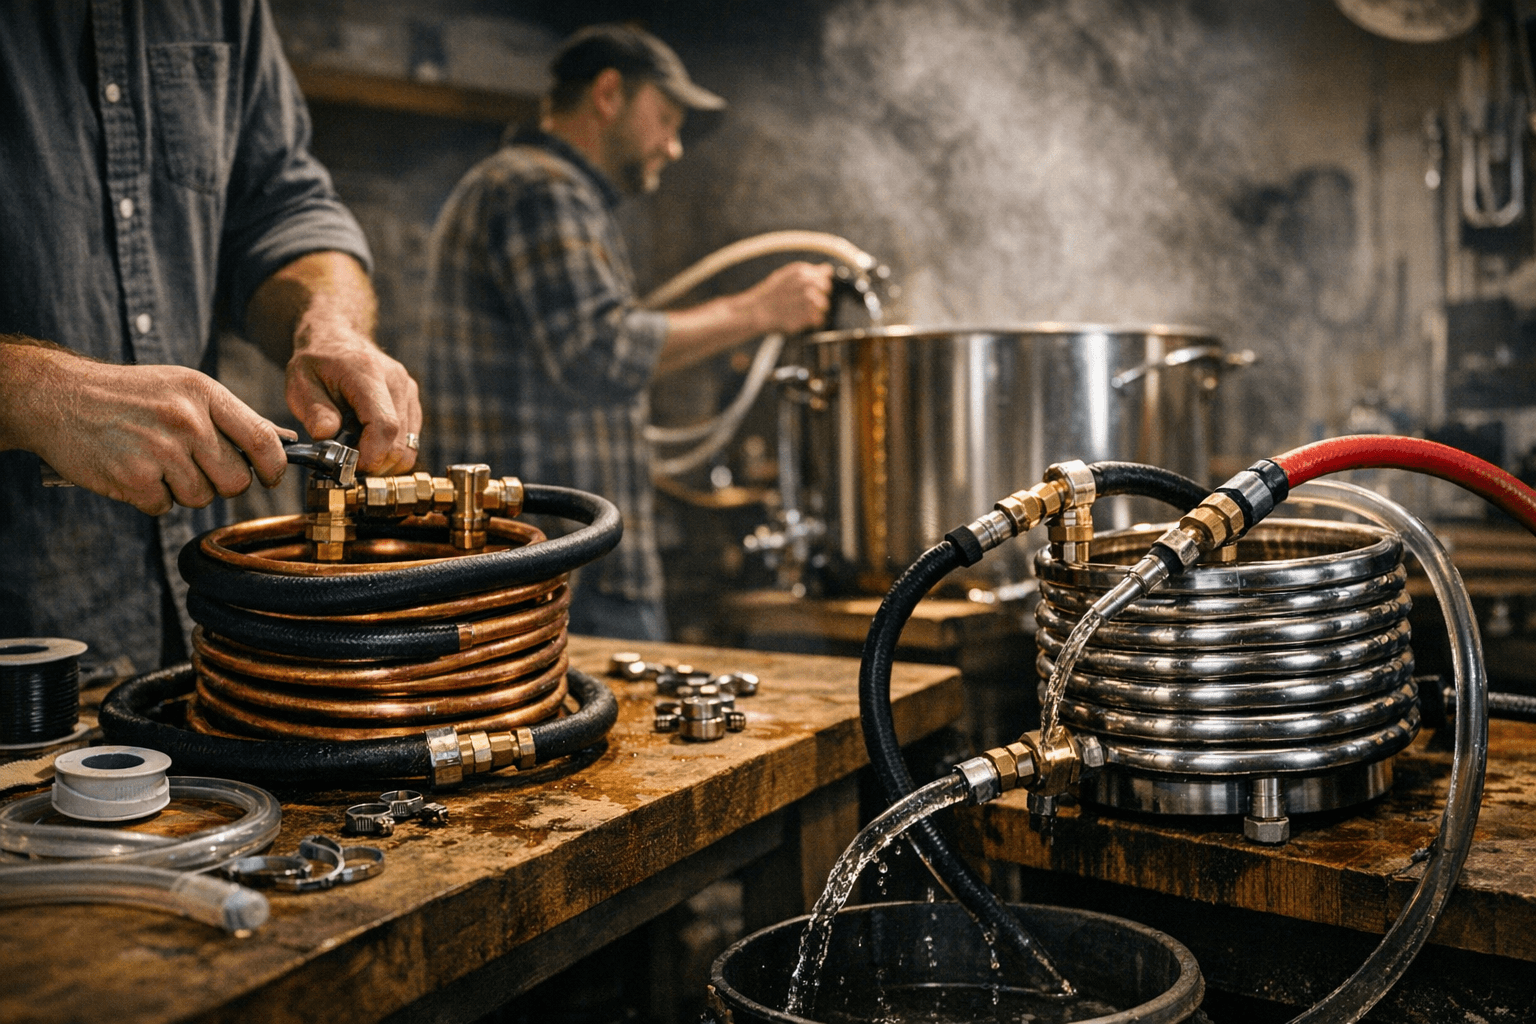
Design choices shape cost, durability, and performance. Copper offers excellent thermal conductivity and lower price for a budget build using 1/2" inner copper tubing in lengths from 10 to 20 feet and a 3/4" or 1" outer jacket. Stainless steel costs more up front but handles pressure better, eases long-term sanitation, and resists corrosion in aggressive water. Choose 3/8" or 1/2" stainless for the wort path and 3/4" or 1" stainless housing for a premium, welded or tri-clamp assembly.
Construction follows straightforward principles. Straighten and cut the inner tube to the desired length and attach fittings at both ends for keg or kettle connections. Coil the outer tube so it snugly overlaps the inner coil or slide a smaller inner coil into a larger outer tube. Assemble concentric tubes and seal ends with compression fittings, O-ring end caps, or tri-clamp ferrules that allow disassembly. Mark the water inlet at the inner end of the outer tube so cold water flows counter to hot wort. Pressure test the water side and inspect for leaks and any abrasive contact points before first use.
Sanitize new tubing with an alkaline cleaner to remove manufacturing oils, then flush and run boiling water or steam through the wort side. A no-rinse sanitizer on the water side is optional. During operation, ensure counterflow arrangement so the coldest water meets the coolest wort, and use moderate-to-high garden hose pressure for the water side. Slow to moderate wort flow increases residence time; control it with a pump or a ball valve. Use a hop strainer or wort filter at the kettle output after whirlpooling or dry hopping to reduce clogging risk, and keep connections tight to minimize oxygen pickup. For finished wort, consider headspace purge with CO2.
Maintenance extends service life. Flush both sides with hot water after each brew, periodically circulate a brewery cleaner to remove hop and protein buildup, and inspect copper for pinhole leaks or thinning. Stainless assemblies need less frequent tube replacement but check gaskets and clamps. Watch for common problems: poor cooling usually means low water flow or too-short tubing, leaks call for re-sealing fittings or replacing O-rings, and clogging is addressed with better hop filtration or larger-diameter inner tubing.
Safety matters. Protect against contact burns, use braided hoses and insulation where needed, and consider water chemistry when choosing copper to avoid potential leaching. Whether you build a 10-foot copper coil for budget savings or invest in a tri-clamp stainless unit for durability, a well-executed CFC will cut chill time, improve sanitation, and pay dividends in brew day efficiency.
This article was produced by Prism’s automated news system from verified source data, official records, and press releases, then run through automated quality and moderation checks before publishing. The system is built and supervised by the people who set the standards it runs under. Read our full AI policy.
Did this article answer your question?