Miniature painting photos improve with macro lenses and proper lighting
A sharp macro setup turns a painted mini into a readable image. The biggest gains come from light, lens choice, and a repeatable shooting rig.
Painted miniatures can look immaculate on the desk and muddy in a photo. The fastest way to fix that gap is not a fancier paint scheme, but a better camera setup: macro glass, controlled light, and a background that keeps the model visually clean.
Why the camera matters before the edit
Mini photography has been part of the hobby for a long time. Hobbyists were photographing Citadel miniatures in the early days of the Games Workshop hobby, when film made it hard to capture fine detail. Digital cameras changed that completely, and the barrier to getting a usable shot is much lower now.
CoolMiniOrNot forum users have asked whether scoring is based on the mini or the photo.
Start with a rig that repeats
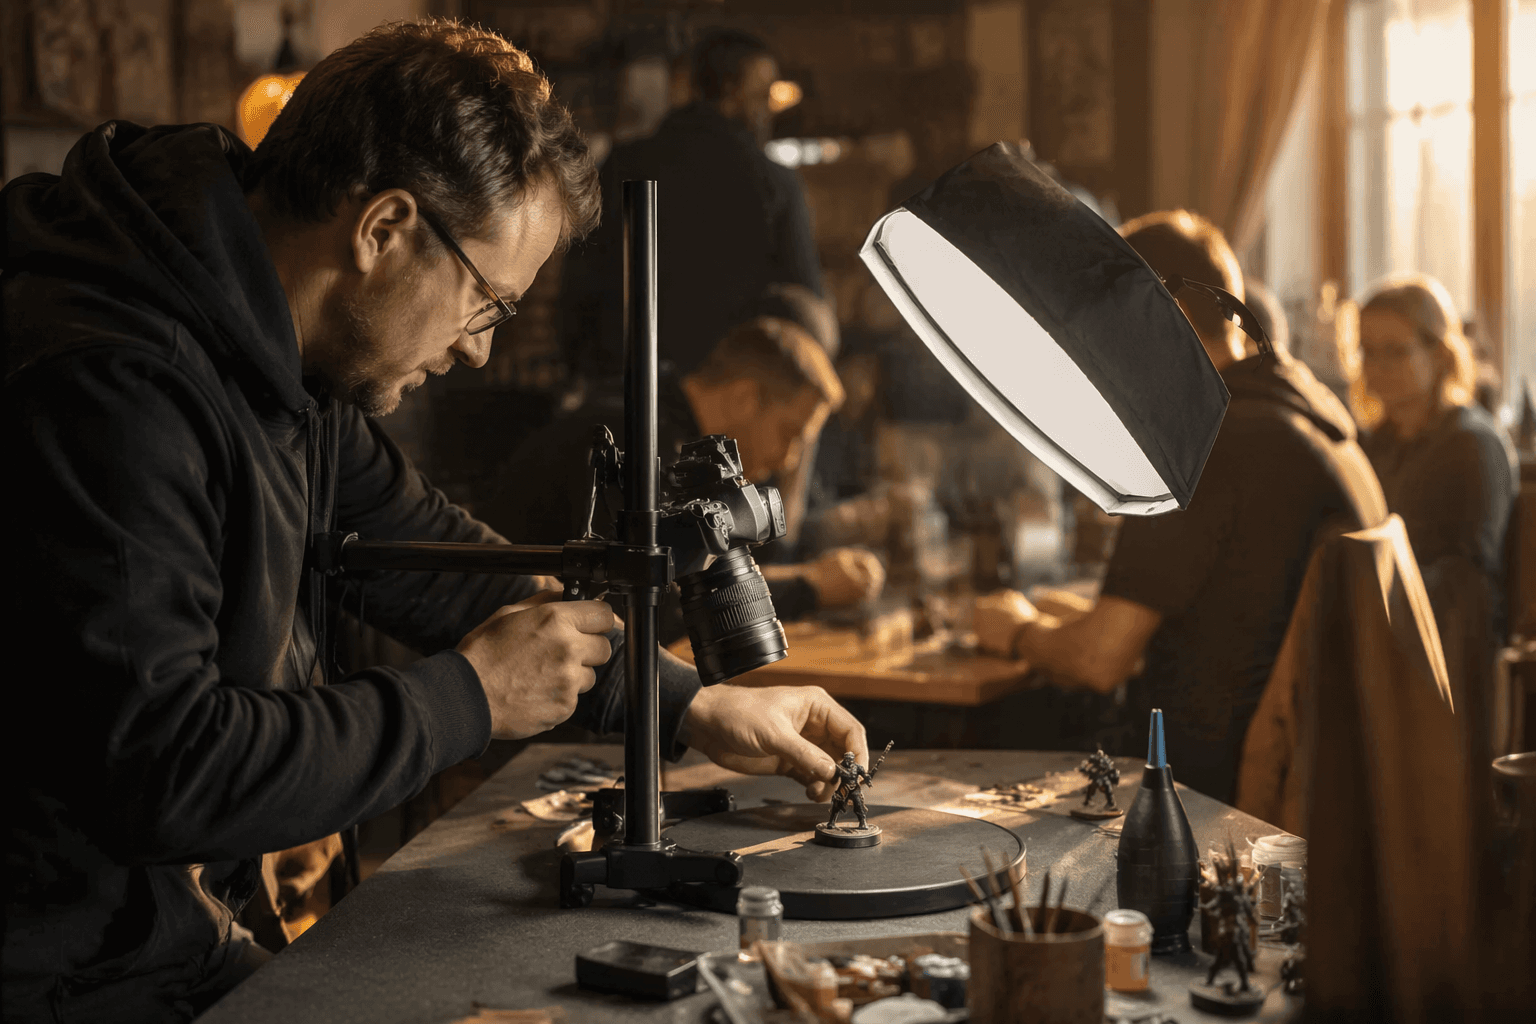
The most useful setup begins with a DSLR or mirrorless camera and a macro lens, preferably 105 millimeters. That focal length gives you enough working distance to avoid crowding the miniature while still keeping details sharp. The camera should sit about 30 centimeters above the model, aimed at a slight upward angle so the face, armor, or focal point does not collapse into a flat top-down view.
If you shoot one marine, then a full squad, then a contest entry, the same height, lens, and angle make every image feel like it belongs to the same project. They also keep army progress logs, commission portfolios, and showcase shots visually consistent.
Jackson’s Art sets the threshold lower: a phone camera can be good enough if you use it carefully. It is a useful fallback, but the 105 millimeter macro setup gives you more control when the goal is crisp detail and a dependable archive.
Build light that does not fight the paint
Good miniature photos usually fail because the light is harsh, uneven, or too color-shifted. A cardboard light box lined with white paper softens reflections and keeps the miniature from getting blown out by a single bright source. Add LED lights at 45-degree angles, and the shadows become readable instead of carving the model into dark wedges.
Aim for at least 800 lumens and a color rendering index above 90, so the paint reads with cleaner color and fewer surprises. That kind of light helps preserve the difference between a warm highlight, a cool shadow, and a subtle glaze transition that would otherwise disappear under a cheap lamp.
A matte white poster board can turn the background into a seamless infinity curve. That keeps the eye on the miniature instead of on a horizon line, and it avoids the reflections that show up when glossy surfaces bounce light back into the frame.
Use the settings that protect detail
Apertures around f/11 to f/16 keep more of the miniature in focus, which is especially important when swords, backpacks, banners, and base elements all sit on different planes. ISO 100 keeps noise low and helps preserve the fine texture in cloth, armor trim, and weathering.
If the model has a lot of depth, focus stacking becomes the next step. Focus bracketing or focus stacking is a standard technique for subjects that need more depth of field, including macro and product photography. Canon, Nikon, and Sony document it. Sony describes it as combining multiple photographs into one composite with greater depth of field, and Nikon notes that aperture and starting focus position are important factors in getting the stack to work cleanly.
That makes focus stacking especially useful for display bases, banners, and large centerpiece models where one frame cannot hold everything sharp. It solves a common miniature-photo failure: one crisp face and one blurry sword hilt.
Edit for truth, not drama
Once the frames are captured, RAW processing keeps the file from baking in mistakes too early. Global exposure and contrast adjustments are the safest first moves because they correct the overall image without carving up individual colors or highlights. The goal is to make the photo closer to what the miniature looks like under good light, not to turn it into a poster.
Blended plasma coils, smooth skin, and layered armor panels often break down when local edits are too aggressive. A careful workflow protects the subtle shifts between midtone and highlight.
Why the photo changes how the hobby judges the work
Warhammer World’s Legends of Paint guidance for 2025 to 2026 judges entries individually against overall criteria, and each miniature must be built and painted by the entrant.
Warhammer Community’s 2026 Golden Demon coverage places the U.S. leg of the competition in Milwaukee, Wisconsin at AdeptiCon.
This article was produced by Prism’s automated news system from verified source data, official records, and press releases, then run through automated quality and moderation checks before publishing. The system is built and supervised by the people who set the standards it runs under. Read our full AI policy.
Did this article answer your question?