Model Train Beginners Learn How to Build Stable Benchwork Bases
The smartest first layout choice is the benchwork itself: a 4x8, shelf, or modular base each changes space, stability, and how far your railroad can grow.
Choose the base before you choose the railroad
The first big decision in model railroading is not track, scenery, or locomotives. It is the benchwork underneath everything else, because a level, rigid base keeps track aligned, wiring dependable, and scenery from turning into a repair project later. That is why a first railroad should be treated as a building project with a purpose, not just a table with plywood on top.
For beginners, the choice usually comes down to three practical paths: a simple 4-by-8 table, a shelf layout, or a modular approach. Each one solves a different problem. The 4-by-8 gives you a straightforward start, the shelf layout saves floor space, and modular sections make sense when portability or future expansion matters most.
Why the first table matters so much
Benchwork is the foundation of the railroad, and the NMRA’s beginner guidance makes that plain. Once the layout moves beyond trains on the floor, modelers need a more permanent home for the railroad, and that means framing, legs, and a stable deck. The NMRA notes that many builders start with simple framing for a 4-foot by 8-foot sheet of plywood, supported by leg bracing, because it is a manageable first step that still feels like a real railroad.
The practical benefits go well beyond strength. A dedicated table gives you a level surface for track, room for scenery and control panels, and storage underneath. It also makes later changes easier to understand, because you are working from a defined structure instead of improvising every time a section of track drifts out of line.
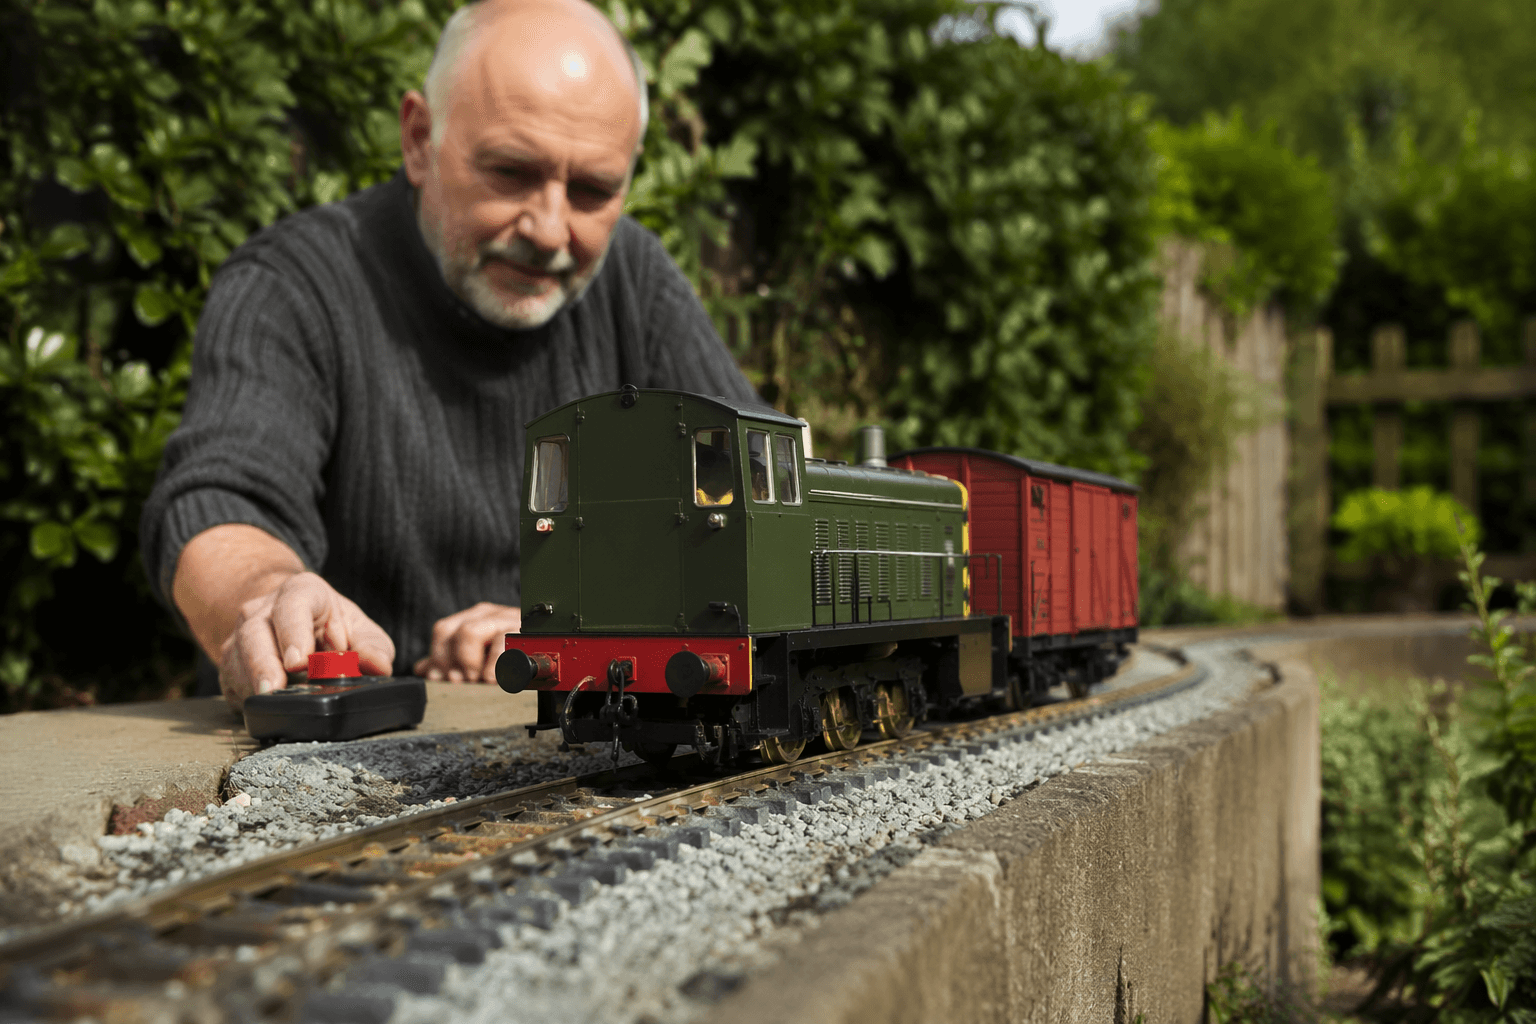
The 4-by-8 table: the easiest place to get moving
A 4-by-8 layout remains the classic beginner answer for a reason. It fits the size of a plywood sheet, keeps the carpentry simple, and gives you a compact work area that is big enough to learn on without overwhelming the room. Model Railroad Hobbyist forum advice captures the appeal well: the 4-by-8 is a test bed, a place to get your feet wet and figure out what you actually enjoy before building something larger.
That test-bed idea matters because the first layout does not have to be the last layout. Temporary attachment methods, such as caulk and nails, let you revise track later without destroying the whole railroad. A beginner 4-by-8 can also grow in useful ways, especially if you design it as a continuous loop with a passing siding and a small yard. That combination is simple to build, but it leaves space for switching, scenery, and future changes.
How shelf layouts change the equation
A shelf layout serves a different kind of room. Instead of claiming the center of the floor, it runs along the wall and uses the room more efficiently, which is a major advantage when space is tight. That makes it attractive for modelers who want longer runs or more complex scenes without needing a giant rectangle in the middle of the room.
The tradeoff is that shelf layouts demand more planning about depth, reach, and support. They are usually better when you already know what kind of operating pattern you want, because a narrow railroad can be wonderfully efficient but less forgiving if you later want to add broad scenery or deeper industrial areas. For many layouts, a shelf approach becomes the bridge between a starter railroad and a more serious operating plan.
Why modular layouts are built for growth
Modular benchwork takes a different path again. Instead of one permanent table, you build sections that can be moved, joined, stored, or shown separately. That makes modular construction a strong option for club meets, public displays, and modelers who expect the railroad to travel or evolve over time.
The strength of modular work is future expansion. It is easier to add another section later when the benchwork is designed as pieces from the start. The cost is more complexity up front, because joints, alignment, and transport all need to be thought through before the first cut is made. If the first goal is a home railroad that stays put, a 4-by-8 or shelf layout is usually simpler. If the goal is flexibility, modular construction earns its keep.
Pick the scale with space in mind
Benchwork choice and scale choice are tied together. The NMRA’s scale guidance says HO is often a better operating scale for switching, while N scale is useful when space is limited. Bachmann Trains says the most important factor in choosing a scale is available space, and it notes that HO is among the most popular scales worldwide.
That advice matters because scale changes what fits on the benchwork. Bachmann points out that N scale railcars can measure about 4 inches by 3/4 inch, which shows how much smaller the equipment is compared with HO. It also means N can give you more room to work with long trains in limited space. HO, by contrast, remains a strong choice when you want good detail and easier handling, especially on a layout that includes switching.
The key point is simple: do not let the benchwork decide your scale by accident. Decide how much room you truly have, then match the scale to that space.
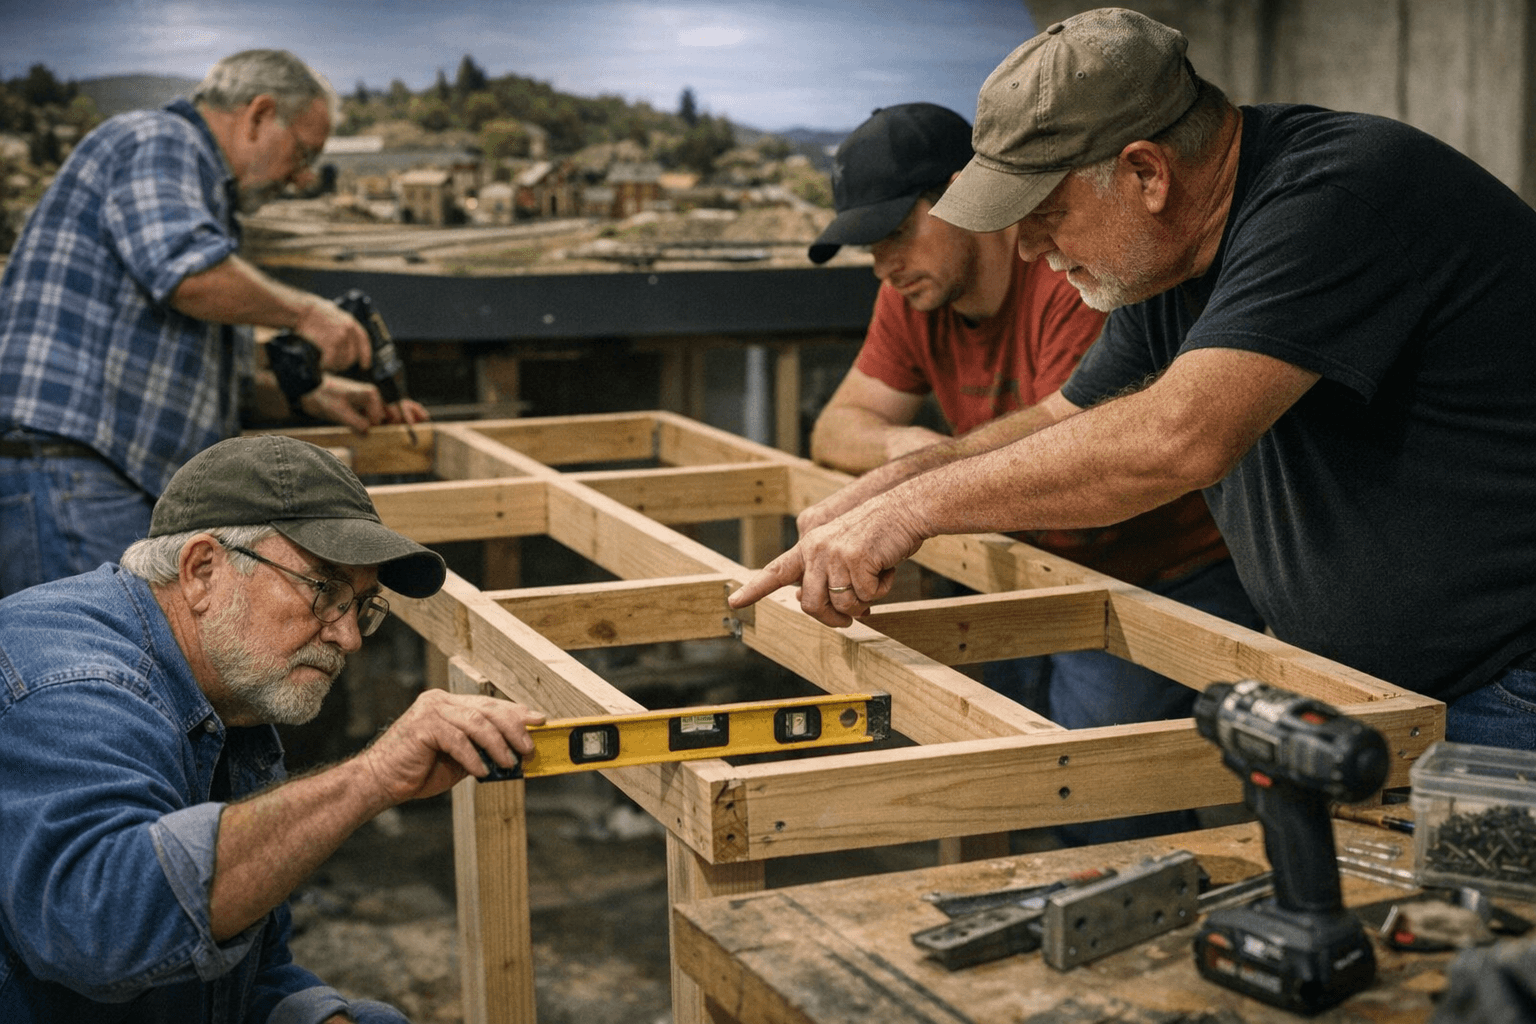
Build the frame so it stays true
Once the layout style is chosen, the benchwork details matter. The NMRA says a comfortable benchwork height for most modelers is roughly 38 to 52 inches. That range is useful because it keeps the railroad at a height where you can work comfortably without crouching or reaching awkwardly.
For open-grid benchwork, the NMRA recommends 1x4 framing with cross braces spaced about every 16 to 24 inches. For decking, it says 5/8-inch to 3/4-inch plywood is suitable. It also notes that 2-inch foam board has become popular because it is lightweight, sound-deadening, and easy to carve for below-grade scenery.
Those measurements are the difference between a railroad that feels solid and one that flexes every time you lean on it. Stability at this stage pays off later in smoother track, quieter operation, and fewer headaches when you start adding scenery or control panels.
Plan the railroad in zones, not just rectangles
A strong layout base should also be divided mentally into working areas. Think in zones for scenery, operations, staging, electronics, and storage. That approach helps you avoid the common beginner mistake of filling every inch with track and leaving no room for realistic scenery, access, or wiring.
It also makes layout style easier to match to the job. A continuous loop is great for running trains, a point-to-point plan supports more realistic operations, around-the-walls benchwork is efficient in a room, modular sections help with shows and club use, and folding or portable designs solve storage problems. The best base is the one that leaves room for the railroad you actually want to operate.
Use the planning tools before you buy wood
Before a first sheet of plywood is cut, plan on paper or with software. Bachmann’s HO track-planning book walks readers through layout styles, wiring, and track-planning techniques, and it includes six in-depth layouts plus 20 additional designs. That kind of planning help matters because it turns a blank room into a set of choices you can compare before spending money.
The best beginner move is still the same one the NMRA and experienced hobbyists keep pointing toward: start simple, keep it stable, and leave room to revise. A 4-by-8 test bed with a passing siding and small yard can teach more than an overbuilt dream layout, and it gives you a foundation that can expand when your skills do. In model railroading, the smartest first build is the one that lets the next build happen cleanly.
This article was produced by Prism’s automated news system from verified source data, official records, and press releases, then run through automated quality and moderation checks before publishing. The system is built and supervised by the people who set the standards it runs under. Read our full AI policy.
Did this article answer your question?