How to Paint Warhammer 40k Miniatures, From Basics to Advanced Techniques
From basing your first Intercessor to mastering glazes, painting 40k minis is a craft with a clear learning path — here's how to walk it.

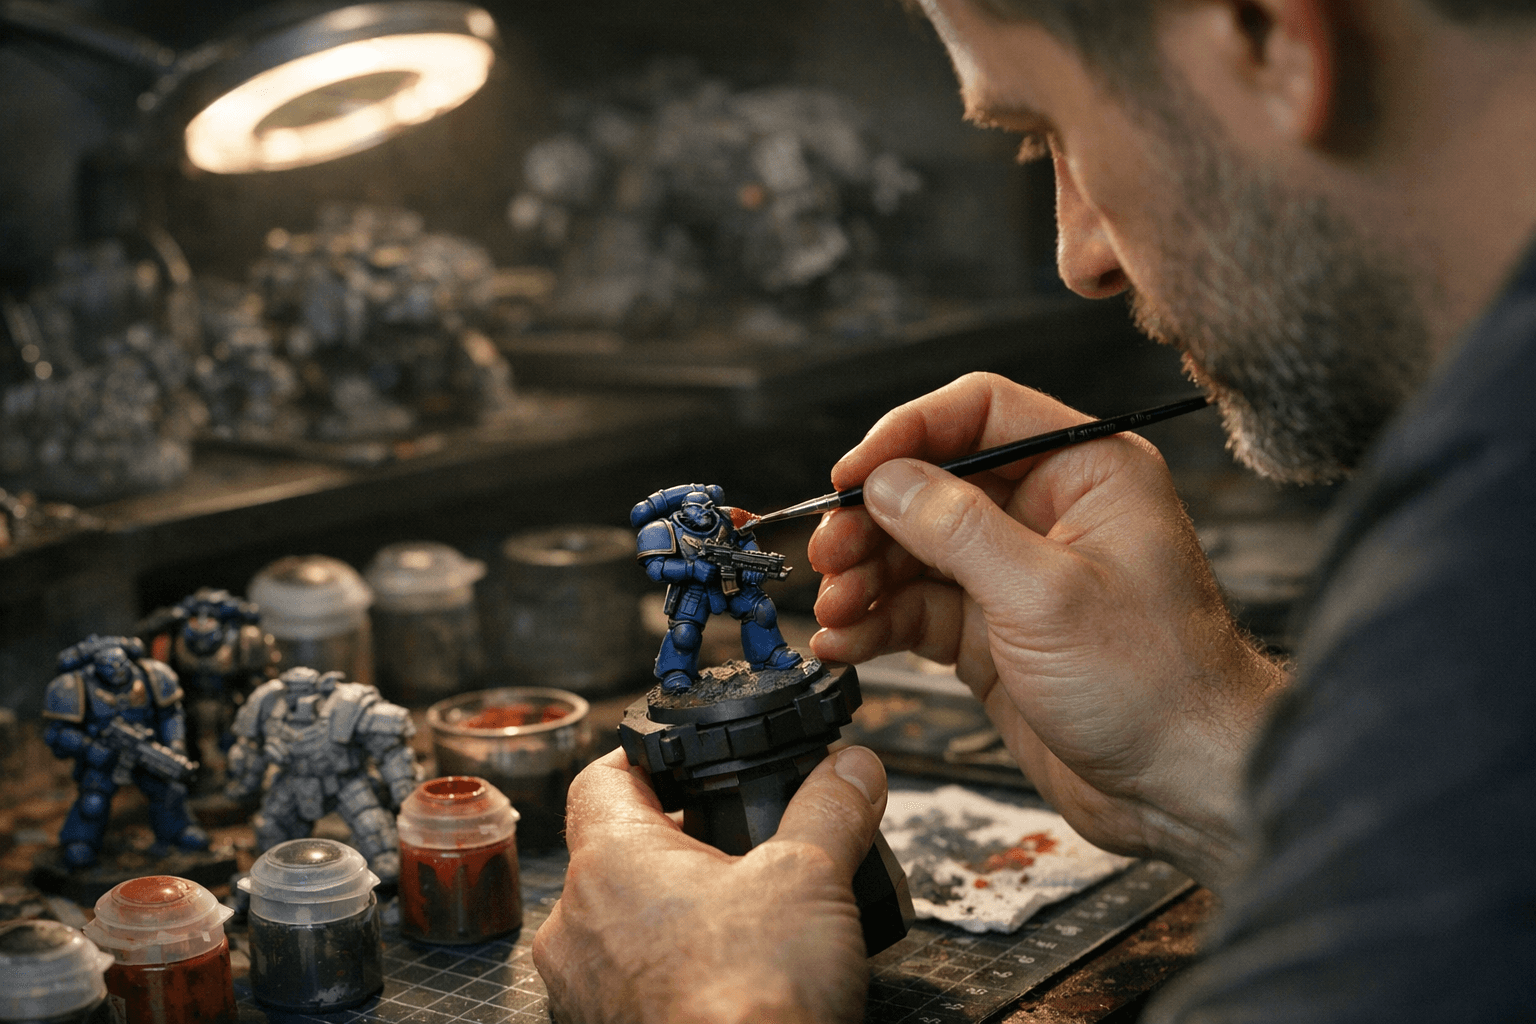
Pick up any painted Warhammer 40k miniature and you're holding somewhere between two and twenty hours of focused human attention. The hobby has a reputation for being intimidating — and honestly, that reputation isn't entirely wrong. The gap between a bare grey plastic Space Marine and a Golden Daemon entry can feel insurmountable. But here's the thing most veterans will tell you: every painter who now blends NMM or freehands squad markings started by dunking a brush in Abaddon Black and hoping for the best. The process is learnable, and it has a shape.
This guide walks through that shape, from the moment you crack open your first box to the point where you're reaching for an airbrush and wondering why you ever did it any other way.
Getting your workspace and supplies sorted
Before a single brush touches plastic, the workspace matters more than most beginners expect. Good lighting is the single biggest quality-of-life upgrade you can make: natural daylight bulbs reveal the true colour of your paints and catch details your eyes will otherwise miss. A daylight lamp rated around 5000-6500K is the standard recommendation across the community.
For supplies, the core kit is simpler than the hobby shop shelves suggest:
- Brushes: A size 1 and a size 0 synthetic or kolinsky sable brush cover 90% of base coating and detail work. Army Painter, Raphael, and Winsor & Newton Series 7 are the names you'll hear most.
- Paints: Citadel's range is the most widely documented for 40k specifically, with base paints, layer paints, shades, and contrast paints each filling a distinct role. Vallejo and Scale75 are popular alternatives with excellent consistency.
- Palette: A wet palette keeps acrylics workable far longer than a dry one. Redgrass Games and Masterson's Sta-Wet are community staples.
- Clippers, files, and plastic glue: These live in the prep stage, but having them at your desk saves constant trips.
- Primer: Either rattle-can or brush-on, primer is non-negotiable. It gives paint something to grip and prevents chipping. Chaos Black and Corax White are the two most common Citadel options; Vallejo Surface Primer in grey is a flexible middle ground.
Preparation: the step everyone rushes
Mould lines are the silent killer of paint jobs. They're the faint raised seams left by the manufacturing process, and paint does not hide them — it highlights them. Running a craft knife or file along every edge before priming is tedious work, but it's the difference between a miniature that looks finished and one that always seems slightly off.
After mould lines, check for gaps between assembled parts. Liquid Green Stuff or plastic putty fills joins between torsos and arms, shoulder pads and bodies. Prime only once the model is clean, filled, and fully dry.
Priming and base coating
Priming in thin, even coats from about 30cm away prevents the obscuring of detail that haunts overly thick primer applications. If you're using a rattle can, don't spray in temperatures below 10°C or above 30°C — humidity and cold both cause the grainy "frosting" effect that is very difficult to recover from.
Base coating is the process of laying down the foundational colours across each area of the model. Thin your paints to roughly skimmed-milk consistency. Two thin coats beat one thick coat every time; thick paint fills recesses and obscures sculpted detail. Work in a logical order: large armour panels first, then secondary colours, then small details. This way, mistakes on detail areas don't require repainting large sections.
Shading and washes
This is where flat base colours transform into something that reads as three-dimensional. Citadel's Shade range, led by Nuln Oil (for metallics and dark armour) and Agrax Earthshade (for browns, leathers, and bone), does the heavy lifting by flowing into recesses and creating natural-looking shadow. Apply shades either all over the model for speed, or selectively into recesses only for a cleaner result — the latter takes more time but avoids the tide marks that all-over washes sometimes leave on flat surfaces.
Army Painter Quickshade Inks and Vallejo Game Wash are the main alternatives, both with devoted followings.
Layering and highlighting
Once your shade is fully dry, layering rebuilds the colour on raised surfaces. You're essentially undoing some of the darkening the shade applied, but selectively, leaving shadow in the recesses. Edge highlighting — drawing a thin line of lighter colour along the corners and edges of armour panels — is the defining visual style of most 40k painting and is worth practising on spare sprues before attempting on a finished model.
The progression for a highlight on, say, Ultramarine blue armour runs something like: Macragge Blue base, Nuln Oil shade, Calgar Blue layer, Fenrisian Grey edge highlight. Each step refines the previous one.
Contrast paints: the game-changer for speed
Citadel's Contrast range, released in 2019, genuinely changed how many painters approach the hobby. Applied over a light primer (Wraithbone or Grey Seer are the dedicated undercoats), a single coat of Contrast paint shades and colours simultaneously, achieving in one step what traditionally required base coat plus shade. They're not a shortcut to Golden Daemon; they're a tool with a specific look that suits some colour schemes and armies better than others. Tyranid chitin, robes, and organic textures are particular strengths.
Basing
Basing transforms a painted miniature into a scene. The standard process moves through texture paste (Citadel's Astrogranite, Stirland Mud, and Armageddon Dust are the main options), a drybrush of a lighter colour, a wash to tie it together, and static grass or tufts to finish. Bases do more visual work than most beginners realise: a well-based model looks dramatically more complete, even if the paint job itself is intermediate.
Advanced techniques: glazing, drybrushing, and airbrushing
Glazing is the practice of applying very thinly diluted paint, almost a stain, over an already-highlighted area to shift its hue or warm/cool a tone. It's used extensively in competition painting to create smooth colour transitions and is the foundation of techniques like object source lighting (OSL), where a model appears lit by a nearby light source.
Drybrushing is the inverse of glazing in feel: a brush loaded with paint and wiped almost entirely clean is dragged across raised surfaces, depositing tiny amounts of pigment that catch every texture. It's fast, effective for fur, rubble, stone, and battle damage, and forgiving enough for beginners.
Airbrushing opens a different set of possibilities: smooth gradients, fast base coating of large models and vehicles, and zenithal priming (spraying white primer from above to pre-shade a model before paint touches it). The learning curve for airbrush maintenance, paint thinning, and pressure settings is real, but most painters who make the investment describe it as the single upgrade that most changed their work. Entry-level options from Badger, Iwata, and H&S Infinity sit at price points the hobby community has thoroughly documented.
The path through all of this isn't linear, and it doesn't need to be. Plenty of painters spend years becoming exceptional at traditional brush techniques before ever considering an airbrush. Others start with contrast paints and batch-paint entire armies before slowing down to learn finer methods. What the craft rewards is simply time on brush, and the willingness to ruin a few test models in service of learning something new.
This article was produced by Prism’s automated news system from verified source data, official records, and press releases, then run through automated quality and moderation checks before publishing. The system is built and supervised by the people who set the standards it runs under. Read our full AI policy.
Know something we missed? Have a correction or additional information?
Submit a Tip