Beginner's Guide to Choosing a Lathe, Tools, and First Projects
Most beginners overspend on tools before their first shaving hits the floor. Here's the 30-day roadmap that fixes the five costliest mistakes from the start.
Your first lathe: the decision that shapes everything
The single question every new turner asks first is also the one with the most expensive wrong answers: which lathe should I buy? For most people starting out, a benchtop or small floor lathe is the right call. What matters most is variable speed control, a stable headstock bearing arrangement, and documented access to replacement parts and local service. Variable speed is not a luxury; it is a safety feature. Spindle work runs at higher RPMs than bowl blanks, and forgetting to dial down before mounting a wide blank is one of the most common causes of workshop accidents.
On the used-versus-new question: a used lathe from a known brand with accessible parts is often the smarter buy than a bargain new machine with orphaned components. A secondhand high-speed steel (HSS) tool set is also worth considering since HSS retains far more usable steel than most beginners will ever grind away. The one item to buy new without compromise is your sharpening system.
The minimal starter kit: five tools, three safety items, one non-negotiable
Resist the pull of a 20-piece starter set. The five tools that cover virtually every cut a beginner will encounter are a 3/8" or 1/2" spindle gouge, a bowl gouge, a parting tool, a skew chisel (or a round-nosed scraper as a more forgiving alternative), and a round-nosed scraper. That is the entire core kit recommended across Woodcraft's Getting Started series, ToolsRadar, and BobVila buying guides. Every specialty tool beyond that list can wait until a specific project demands it.
The three safety items are non-negotiable from day one:
- A full face shield, not just safety glasses. Wood catches and flies at face level.
- Dust extraction or serious ventilation. Fine wood dust is a respiratory hazard that accumulates invisibly.
- A sharpening system: either a bench grinder fitted with a quality wheel or a dedicated sharpening jig such as a Wolverine or Tormek-style setup.
The sharpening system deserves its own emphasis. A blunt gouge is harder to control, requires more force, and is more likely to catch and dig. Sharpening is not an afterthought; it is the skill that unlocks every other skill.
Five mistakes that waste the most beginner money
Understanding where beginners routinely overspend or misallocate saves real dollars in the first 30 days.
1. Buying a full tool set before learning which five tools actually get used. Most of a 10- or 15-piece set will sit unused for months, if ever.
2. Skipping a proper sharpening system to save money upfront. Dull tools chew through blanks, produce frustrating catches, and force you to buy more wood to practice on.
3. Starting on bowl blanks before spindle control is solid. Bowl turning amplifies every bad habit built on a spindle. The sequence matters.
4. Choosing a lathe without variable speed. Fixed-speed machines are a constant friction point and a genuine safety liability when you move from small spindles to larger bowl blanks.
5. Turning alone without any community access, when the American Association of Woodturners (AAW) maintains more than 365 local chapters and 16,000 members globally, many of which offer access to club lathes, shared tool libraries, and hands-on critique.
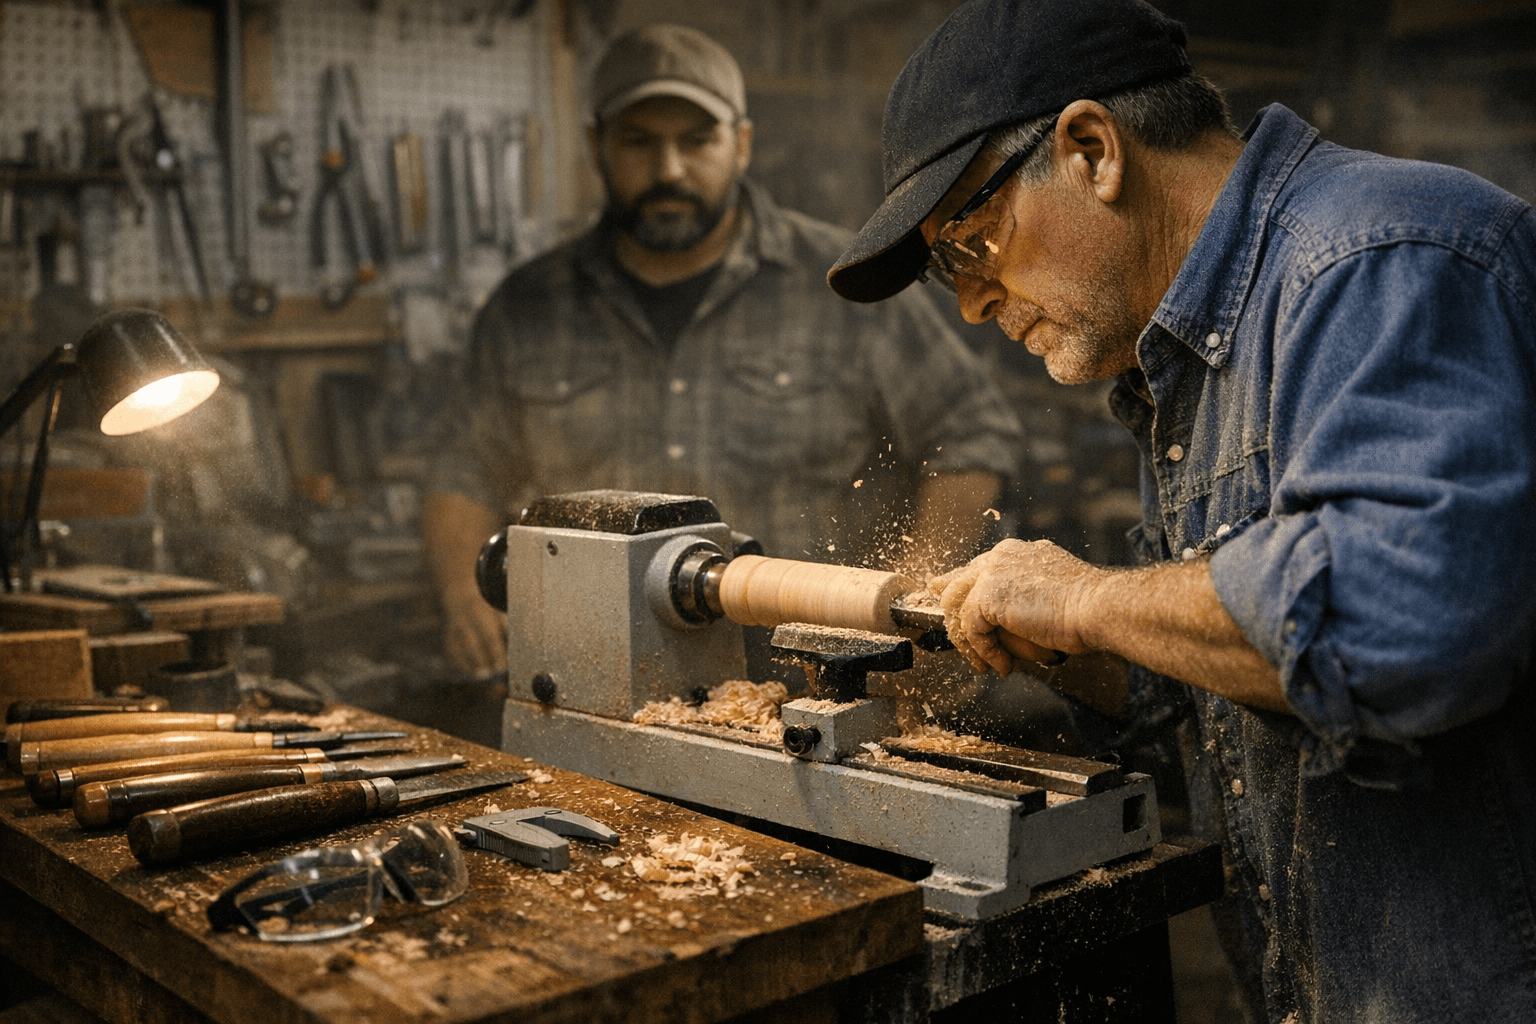
Project 1 (days 1-10): spindle turning and the square-to-round cut
Every progression in this craft starts the same way: between centers, with a roughing gouge or spindle gouge, turning a square blank into a cylinder. This is the square-to-round cut, and it teaches you more about tool angle, bevel contact, and hand position than any amount of reading. Start with mallets, honey dippers, or simple handles. These are short, forgiving projects that produce a finished object in a single session, which matters enormously when you are building confidence.
Mallets are particularly useful because their weight gives you immediate feedback on symmetry. Honey dippers introduce the cove cut and fine-detail shaping in a small, low-stakes format. Repeat these projects. Sanding and finishing economy, one of the practical skills that separates efficient turners from wasteful ones, gets ingrained through repetition on small spindle work.
Project 2 (days 11-20): the simple bowl and the hollowing cut
Once square-to-round feels controlled and consistent, move to a simple bowl from a green or partially dried blank. Green wood is more forgiving on tools and easier to cut, which is exactly what you want when learning the hollowing cut for the first time. The outside profile of the bowl builds on the shaping work from spindle practice; the inside introduces a fundamentally different skill: cutting into end grain and across the face of the bowl in a controlled arc.
This is where a bowl gouge earns its place in the kit. The tool is different from a spindle gouge in grind, geometry, and use, and learning to sharpen it correctly is its own milestone. Short workshops and retailer demo nights run by local clubs are particularly valuable at this stage because watching an instructor set the bevel angle and demonstrate hand position in real time is faster than any video tutorial. The Marc Adams School and many AAW chapter nights offer exactly this kind of hands-on instruction.
Project 3 (days 21-30): the lidded box and the chucking skill
A lidded box is the project that consolidates everything and adds the one skill the first two projects cannot teach: precision chucking and fit. A box has two parts that must meet cleanly. That requires accurate parting cuts, disciplined use of a chuck (typically a multi-jaw chuck), and an understanding of how wood moves as it dries. Waste reduction becomes a real consideration here: a well-planned box loses very little material to parting cuts and remounting.
The lidded box also introduces the concept of a jam chuck, a shop-made friction fit that holds a piece for finishing cuts on its base without marring the surface. Mastering this sequence, tenon, chuck, hollow, part, reverse chuck, finish, gives you a transferable framework for hollow forms and more complex work that follows.
The community advantage
Joining an AAW-affiliated local chapter before you buy your first tool, not after, changes the entire trajectory. Club members can help you evaluate used lathes before purchase, lend tools for a project so you know whether you need them, and offer critique that solo trial-and-error simply cannot replicate. Many chapters also maintain shared tool libraries and club lathes that let you practice on equipment before committing to a purchase.
Track your progress with photos and short notes after each session. The difference between a session on day 5 and day 25 is visible in those records in ways you cannot feel in the moment. The 30-day sequence from spindle to bowl to lidded box is not a curriculum; it is a minimum viable path that makes every tool purchase, every sharpening session, and every blank you put on the lathe count toward a specific, learnable outcome.
This article was produced by Prism’s automated news system from verified source data, official records, and press releases, then run through automated quality and moderation checks before publishing. The system is built and supervised by the people who set the standards it runs under. Read our full AI policy.
Did this article answer your question?