Checklist for Precise Minimalist Geometric Tattoos: Tips for Clients and Artists
A practical, step‑by‑step checklist to help clients and artists get precise minimalist geometric tattoos—focused on small scale, clean linework, and dotwork outcomes.

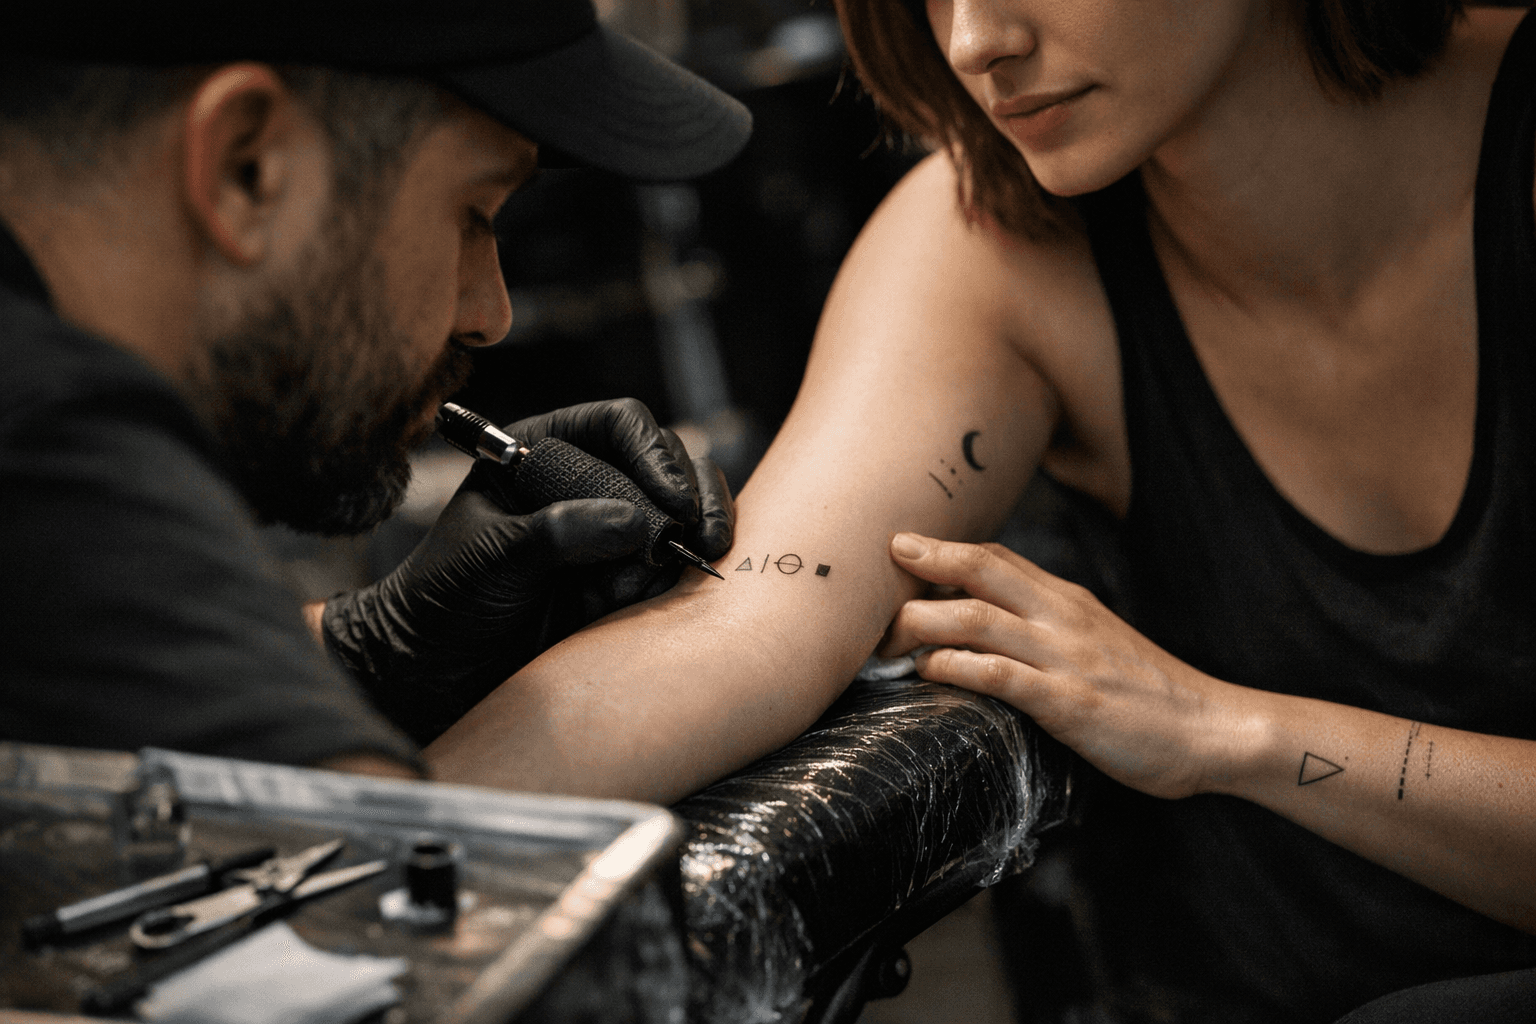
This checklist is written for two audiences: clients planning a minimalist or small‑scale geometric tattoo and tattoo artists executing precise linework, dotwork, and small sacred geometry pieces. Use each step to reduce surprises, protect line integrity, and speed healing for tiny, high‑precision work.
1. Design brief and reference files
Start with a one‑page brief that states size, placement, and the exact geometry style (linework, dotwork, sacred geometry). Clients should provide reference images and, when possible, a vector (.svg or high‑resolution PDF) so artists can scale without pixelation; artists should request these files up front to avoid guesswork. Clear briefs cut back on redraws and ensure the geometric proportions you want are preserved at small scale.
2. Confirm final size and line weight
Decide final dimensions in millimeters before any stencil is made—small geometric pieces commonly range from 10–40 mm for minimalist placements. Match line weight to size: for a 15–20 mm token, plan single‑needle or 3RL equivalents; for 30–40 mm, 5RL may be safe. Recording these numbers in the consult prevents a design that looks crisp on paper but blurs on skin.
3. Choose placement with skin topography in mind
Map the canvas: radial stretch zones (wrists, knuckles) and high‑motion areas (inside elbow, fingers) will distort sharp geometry faster. Prefer flatter, low‑movement spots for sacred geometry and tight linework—forearm, upper back, ribcage areas with relatively even stretch. Measure and photograph the intended site at rest and at motion to confirm the design keeps its symmetry.
4. Stencil creation and precise transfer
Generate a scale‑accurate stencil from vector files and print at 100% size; do not eyeball scaling on the fly. Use sticky stencil paper and test a small transfer patch to check line visibility on the client’s skin tone. A crisp transfer preserves key anchor points so line intersections remain exact during tattooing.
5. Needle selection and machine settings
Select needles and machines tuned for precision: single needles or tight round liners for thin lines and cartridges or coil machines adjusted to lower amplitude for control. Set voltage and stroke so the needle penetrates consistently without over‑punching; for small, dense dotwork, shorter stroke and lighter pressure preserve fidelity. Note the exact needle grouping and machine settings in your client file for future touchups.
6. Line technique: single pass and consistent depth
Aim for a single, deliberate pass where possible—multiple retraced lines increase blowouts on small pieces. Consistent machine speed and hand speed maintain even depth; practice with line drills focusing on 2–4 mm segments to build reproducible control. When a second pass is unavoidable, keep it parallel and measured to avoid thickening the line beyond the original weight.
7. Dotwork technique and spacing
Plan dots as a grid or radial pattern with exact spacing in millimeters; for small sacred geometry, 0.5–1 mm spacing is common to keep patterns readable. Use tight, controlled pokes with micro‑rotary settings or single‑needle technique; maintain consistent dot depth to avoid variances in healing. Document the spacing and needle choice so the dotwork can be replicated across multiple sessions or touchups.
8. Measuring tools and symmetry checks
Use physical tools—compass, calipers, rulers—and digital overlays on the vector to verify symmetry at each stage. Check three anchor axes (horizontal, vertical, rotational) and mark reference points on the skin with a removable marker. Recheck measurements after the stencil transfer and immediately before starting each critical run of lines.
9. Session pacing, breaks, and micro‑touchups
Plan sessions in time blocks that suit small pieces: many precise minimalist tattoos fit within 30–90 minutes, but schedule extra time for careful setup and symmetry checks. Include planned short breaks to reassess stencil alignment and client comfort; fatigue increases shaking and risks line wobble. Reserve a documented micro‑touchup window (often 4–8 weeks post‑healing) and communicate that small geometric tattoos commonly need very small retouches to keep lines crisp.
10. Ink choice and pigment concentration
Select inks known for stable black and fine‑line retention; avoid overly dilute mixes that can spread under the skin. For dotwork shading, use a controlled range of dilutions and record the ratios so you replicate tonal steps across the design. Consistent pigment concentration supports predictable healing and long‑term legibility for tiny geometry.
11. Client skin prep and contraindications
Advise clients to hydrate and avoid sunburn or heavy exfoliation before the appointment; dry, flaky skin complicates reliable stencil transfer and line healing. Screen for thin‑skin areas and medications that thin blood or impede healing—small dots and lines are more sensitive to bleeding and scabbing. A short pre‑session checklist for clients reduces on‑chair surprises and improves final precision.
12. Aftercare tailored to minimalist geometry
Recommend aftercare that minimizes scab thickness—thin, breathable coverings and short‑term topical barrier creams rather than heavy ointments that can swell ink laterally. For small, precise work, thicker scabs cause more pull on surrounding lines; keeping scab formation minimal preserves fine details. Provide a written aftercare plan with days 1, 3–7, and 7–30 milestones and explicit signs that warrant a studio follow‑up.
13. Portfolio standards and clear pricing
Artists should photograph healed work at macro scale with a ruler for scale reference and include closeups of line intersections and dotwork grids. Clients should ask to see healed examples of small‑scale geometric pieces on similar skin tones and placements. Price these jobs to reflect time invested in setup, precision work, and expected touchups rather than simply by square inches.
14. Studio environment: light, magnification, and sterile workflow
Bright, shadow‑free lighting and at least 3–4× magnification reduce eye strain and reveal micro‑errors early. Maintain sterile workflow and single‑use disposables; minute contaminations have outsized consequences on tiny work because there's limited room for corrective passes. Make magnification and calibrated lighting a nonnegotiable part of any setup for precise geometric tattoos.
Conclude with the core principle: small scale demands big discipline. Whether you’re the client booking the consult or the artist setting needles, document sizes in millimeters, keep vector files, record needle and machine settings, and schedule a short retouch window. Following this checklist preserves the geometry’s precision and gives minimalist pieces the longevity and clarity they deserve.
Know something we missed? Have a correction or additional information?
Submit a Tip