Essential Safety and Workflow Checklist for Hobbyist Resin 3D Printing
A practical safety and workflow checklist for desktop resin 3D printing outlines PPE, ventilation, curing, cleaning, and post-processing to keep prints repeatable and hobbyists safe.
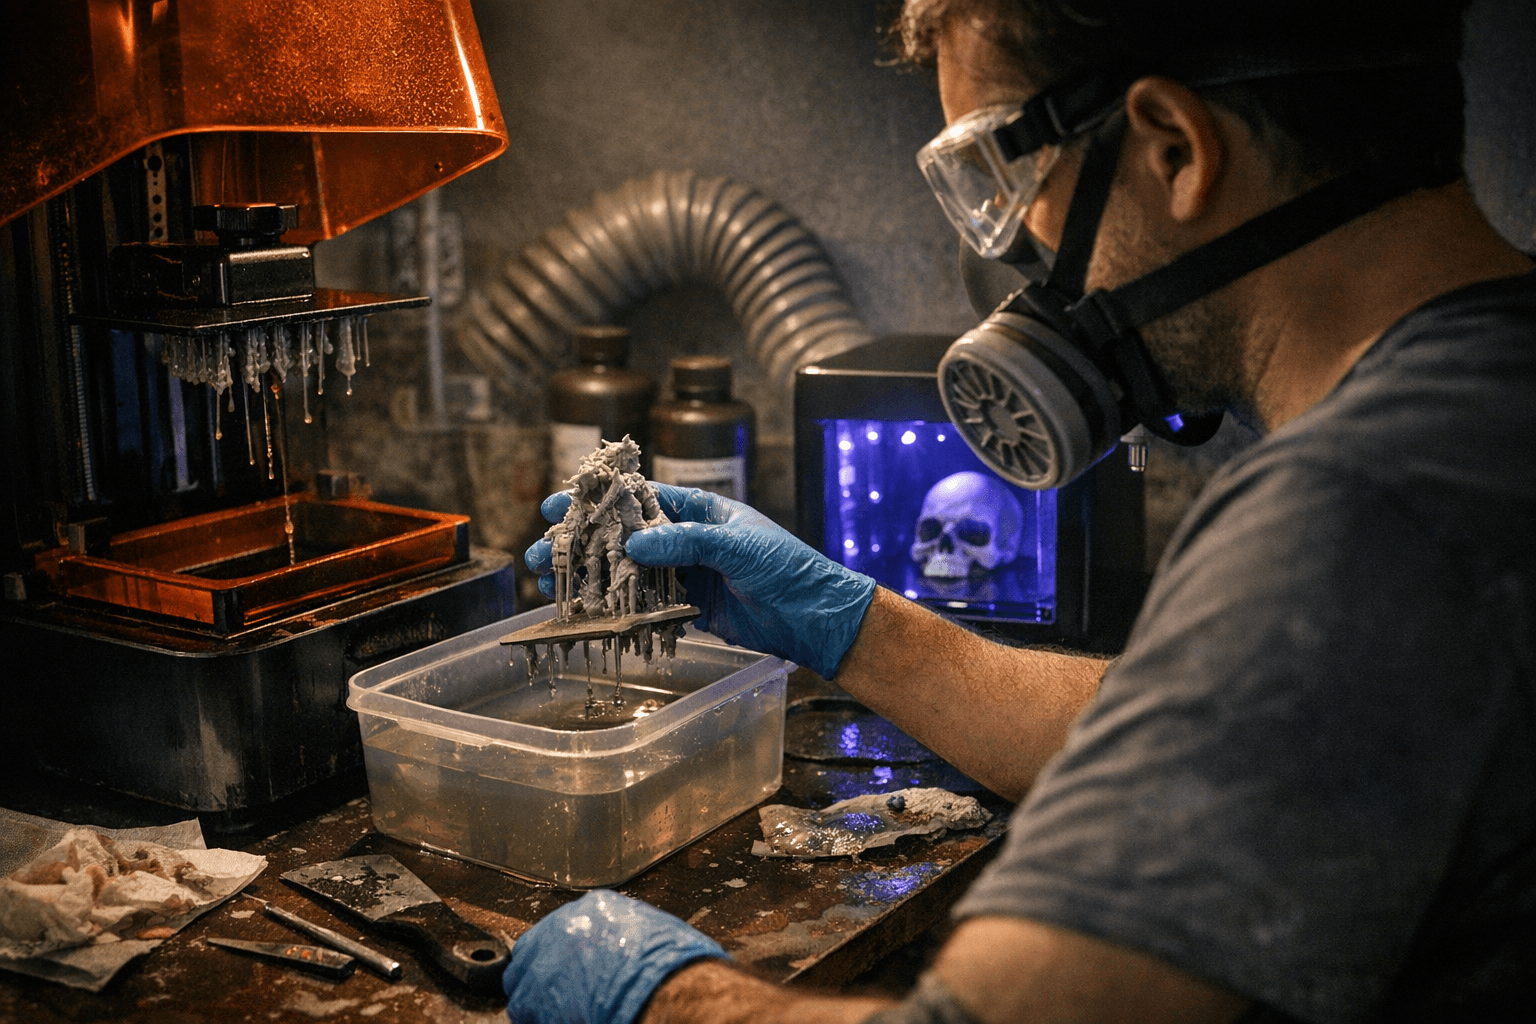
A concise, practical checklist distills safe, repeatable practices for desktop SLA, DLP, and MSLA resin printing, focusing on the steps that cut risk and improve print quality. Work in a well-ventilated area and keep nitrile gloves on when handling uncured resin; wear safety glasses for splash protection and use a filtered respirator if you are sensitive to fumes. These basic precautions reduce skin contact and inhalation risk while you iterate on supports and exposure settings.
Handle uncured parts as chemically active "green" pieces until they are fully post-cured. Rinse prints with isopropyl alcohol (IPA) or the wash solvent recommended by the resin manufacturer to remove excess monomer, then cure fully in a UV chamber or in sunlight to reduce residual monomer that can cause irritation and weaken parts. After curing, remove supports gently to minimize support scarring, sand hardened surfaces for smoother finishes, and prime with paints formulated for resin to get durable, vivid coatings.
Dispose of used solvents and resin-contaminated waste according to your local regulations; do not pour IPA or contaminated rinse water down drains. If skin contact with uncured resin occurs, wash immediately with soap and water and replace contaminated gloves and clothing. Store resin bottles in a cool, dark place with lids closed to slow chemical degradation and avoid heat exposure that can change viscosity and cure behavior.
For consistent prints, follow a practical workflow: design → slice with appropriate exposure settings → print with proper support placement → rinse and remove excess resin → UV cure → post-process (sanding/painting). Pay attention to slicer exposure values and local peel forces during the print stage, as small adjustments to exposure and support density can turn a failed peel into a clean part. Keep notes on successful exposure and support configurations so you can reproduce results across resin batches.
Adopting these habits saves time, reduces waste, and protects health as more makers adopt resin printing for miniatures, functional parts, and detailed prototypes. Lock down ventilation and PPE first, then focus on a repeatable wash and cure routine to move parts out of the green state and into finished work. Consistent practices make troubleshooting easier and let you spend less time chasing layer lines and more time refining models and finishes.
Know something we missed? Have a correction or additional information?
Submit a Tip