How to Add Oils to Miniature Painting Workflows Safely and Effectively
Learn practical steps to introduce oil paints into your miniature workflow safely, covering setup, materials, techniques, drying, cleaning, and varnish compatibility.

Add oils to your miniature painting toolkit to unlock rich glazes, subtle blends, and realistic weathering, without sacrificing safety or speed. Below is a step‑by‑step approach that covers workspace, materials, workflow integration, techniques, drying behavior, cleaning, varnishing, and community-tested tips.
1. Why add oils to your workflow
Oils excel at glazing, subtle edge blends, and weathering effects that are hard to recreate with acrylics alone. Use them to add depth and controlled grime, or to push soft transitions on small surfaces where acrylics dry too fast. The key value for the community is versatility: oils let you achieve effects quickly when paired with the speed of acrylic underpainting.
2. Workspace setup: lighting, ventilation, and solvents
Set up bright, neutral lighting so you can judge thin oil glazes and subtle shifts in value; daylight-balanced LEDs work well. Prioritize ventilation, even low‑odor products need airflow, and keep an extraction fan or an open window nearby. Stock odorless mineral spirits or other odorless thinners for thinning and brush cleaning, but store them sealed and away from heat sources.
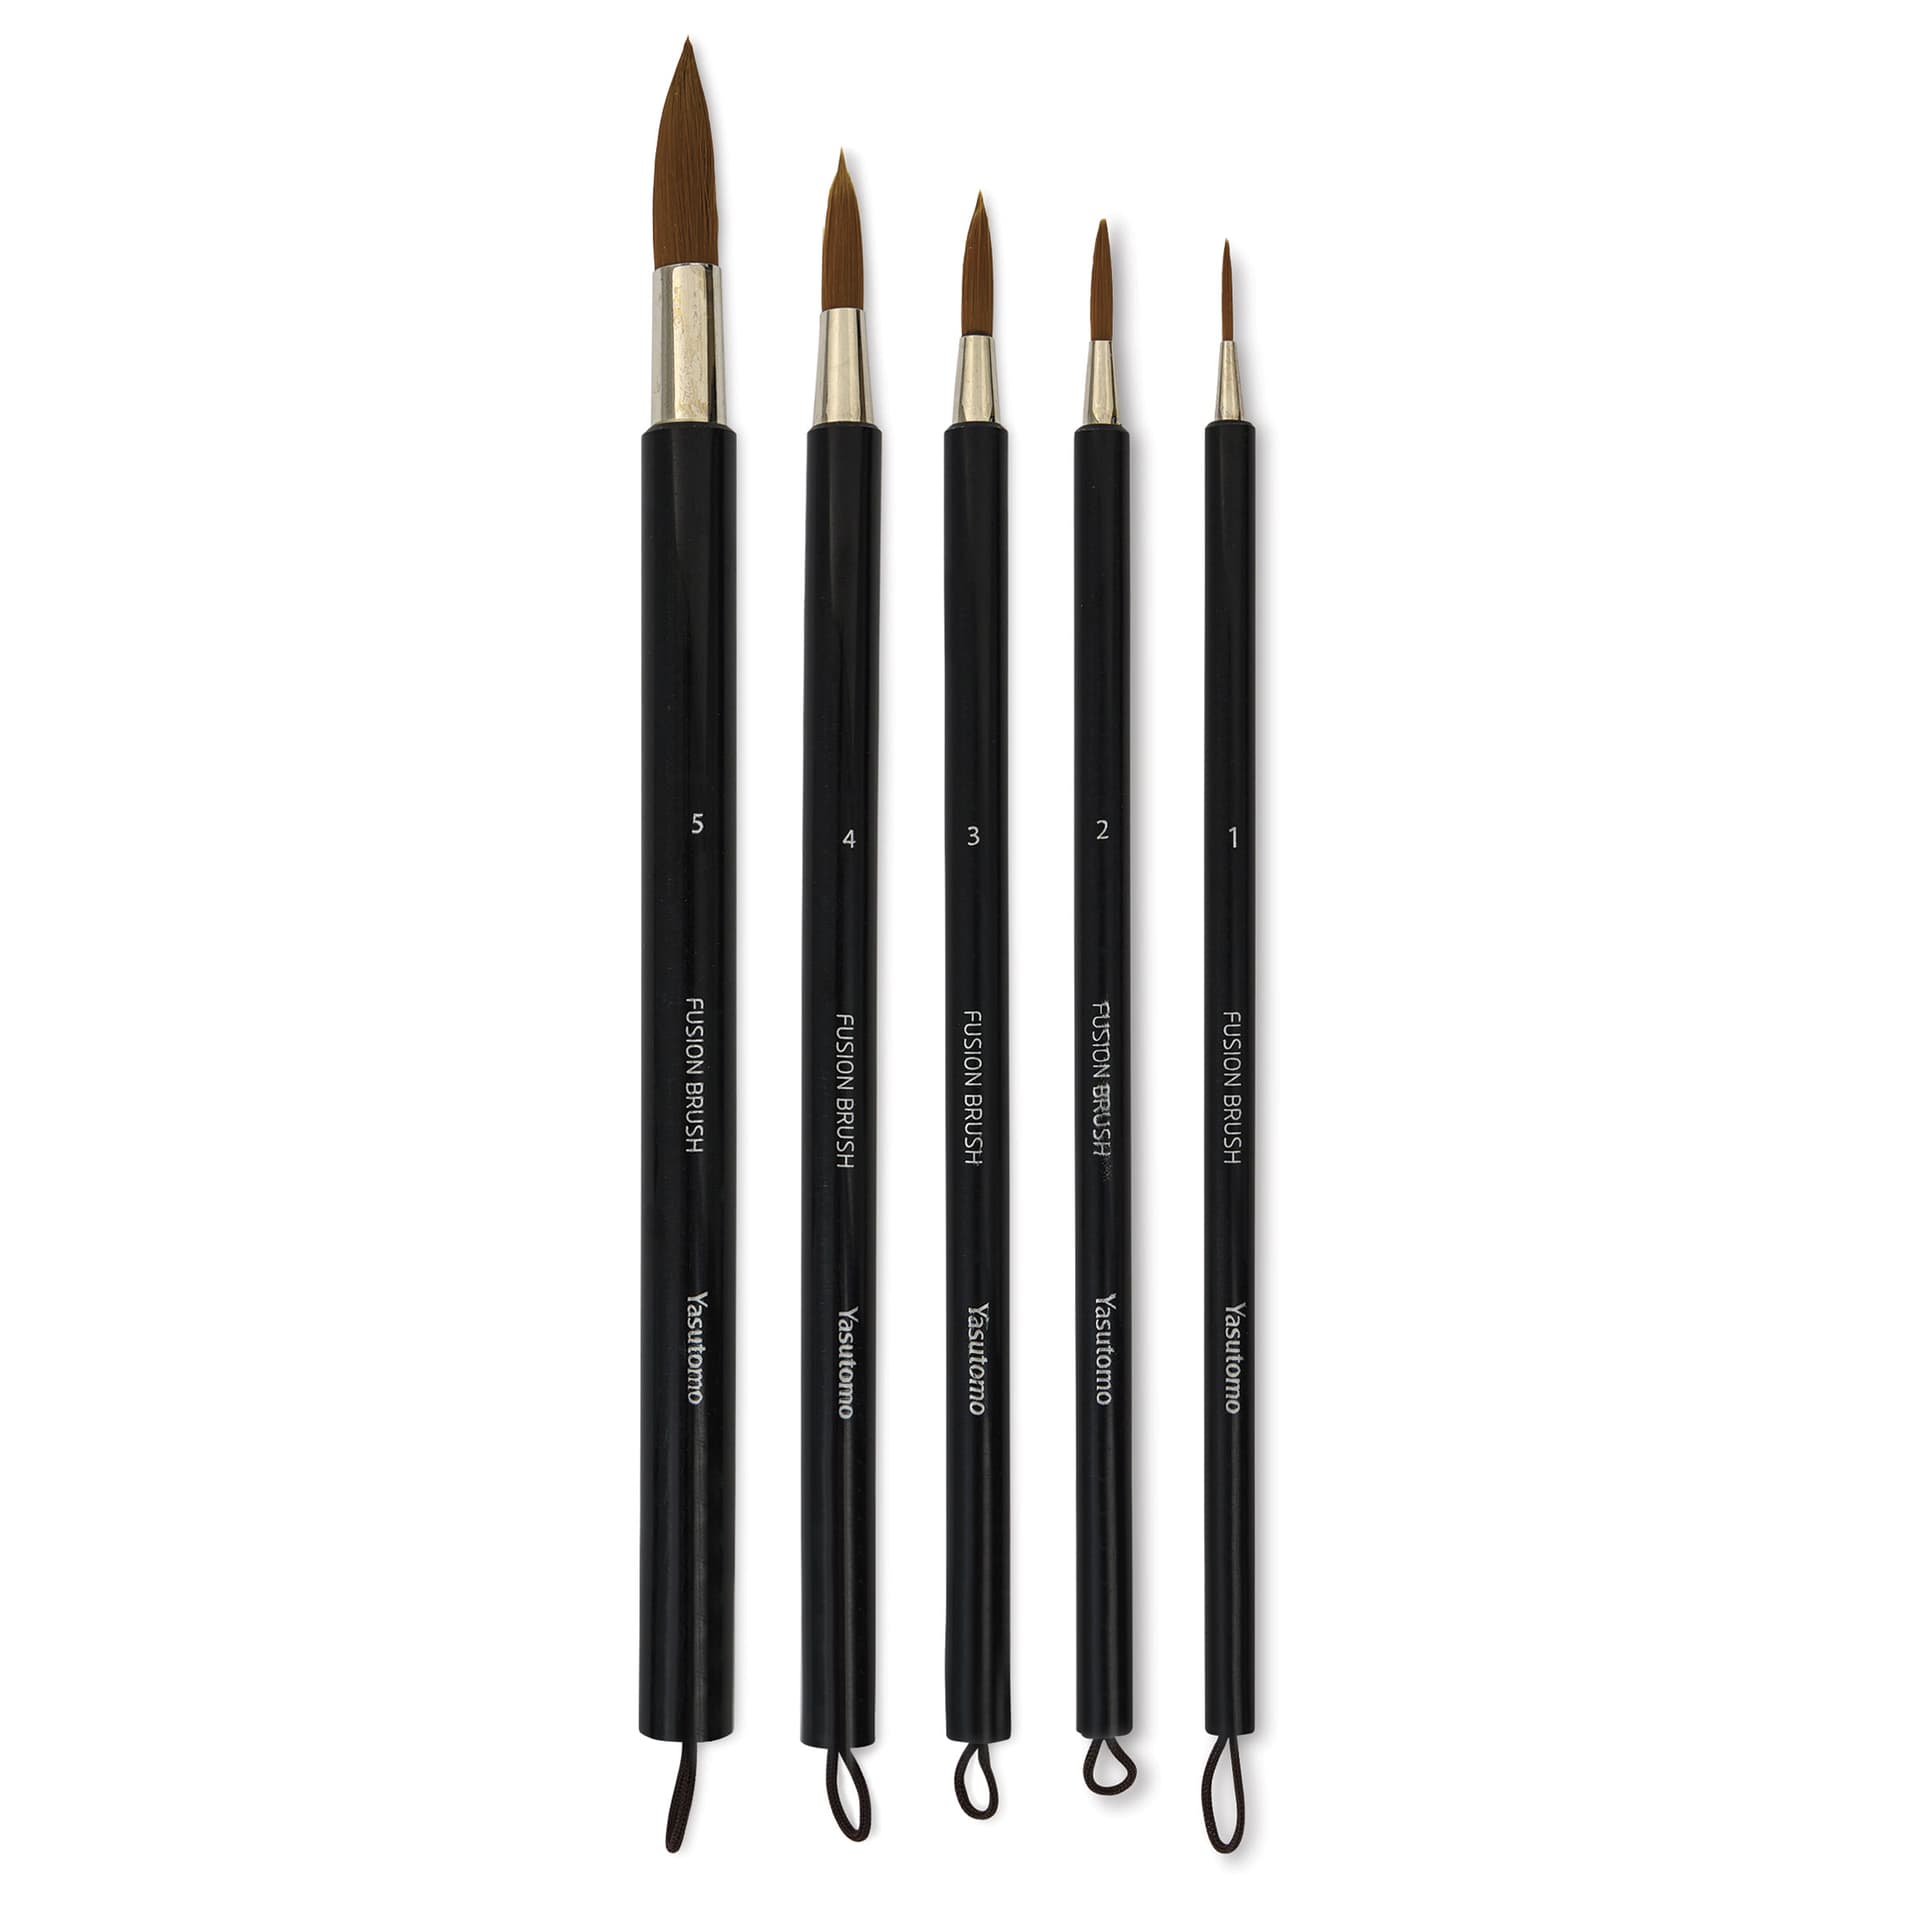
3. Recommended materials: brushes, palette, and palette knife
Choose soft natural‑hair brushes for oil work because they hold and release oily mediums smoothly; reserve them for oils to avoid contaminating acrylic brushes. Use a glass or disposable palette for oils and a palette knife for controlled mixes and scraping; oils can be left on a glass palette overnight and covered. Keep a limited oil color palette to learn how oils layer, fewer colors reduce muddiness and help you predict glazing and weathering outcomes.
4. Prep: cleaning and priming miniatures
Begin with a clean, degreased miniature, wash parts if needed to remove mold release and oils from casting. Prime with an acrylic primer that’s fully cured before applying oils; this gives a predictable tooth and lets you use fast acrylic basecoats if desired. Testing primer‑to‑oil adhesion on a spare casting is a must before committing to a full piece.
5. Fat‑over‑lean and thin layers: foundational oil technique
Follow the fat‑over‑lean principle: start with lean (thinner, faster‑drying) oil layers and progressively increase oil content in upper layers to avoid cracking and poor adhesion. Work in thin glazes for color shifts and build up saturation slowly rather than laying down thick, buttery passages. Thin, controlled layers reduce drying time and keep details crisp on small miniatures.
6. Using oils for glazing and subtle blends
Oils are ideal for glazing and creating soft, luminous transitions that are tough with quick‑drying acrylics, use paper‑thin washes to glaze local color or introduce subtle warm/cool shifts. Because oils remain workable longer, you can feather edges and pull pigments across small surfaces to avoid hard paint lines. Glazes are also excellent for localized color correction after acrylic underpainting.
7. Weathering: oil washes, streaking, and grime
Apply oil washes and streaking for believable grime, rust runs, and grime gradients; oils blend naturally on the surface and can be softened with clean thinner. Use directional streaks with a fine brush or a soft natural‑hair brush dragged vertically to simulate rain streaks and run‑offs, then lift or soften with thinner where needed. These techniques are community favorites for transport and battlefield effects because they read well at gaming distance and are easy to tweak.
8. Combining acrylic underpainting with oils for speed
Speed up projects by doing the blocking, base colors, and high‑contrast layering in acrylics, then switch to oils for final glazes, subtle blends, edge highlights, and weathering. Acrylics give you fast coverage and structural contrast; oils let you refine tones and add atmosphere without repainting everything. This hybrid workflow is a pragmatic compromise for painters who want table‑ready results faster while keeping the visual benefits of oils.
9. Drying times and scheduling work
Expect acrylics to be touch‑dry in minutes to hours, while oil glazes can take hours to become tacky and days to reach more stable dryness; full cure may take weeks depending on thickness and medium. Plan sessions around these windows: use acrylic phases to build and finish during single sittings, then return after oil glazes have sufficiently set for additional layering or final varnishing. Use the slower drying time of oils to your advantage for finishing passes, but build a schedule that accounts for longer waits between oil stages.
10. Post‑work cleaning: brushes and disposal
Clean oil brushes with odorless mineral spirits or the recommended odorless thinner, following up with mild soap and warm water to remove residual oils. Work rags and paper towels soaked in solvent are a fire hazard, store them in a sealed metal container or allow them to dry flat outdoors before disposal. Maintain a small, dedicated oil kit (brushes, palette, palette knife, solvent jar) to keep contamination with acrylic supplies to a minimum.
11. Varnishing and compatibility warnings
Be cautious when sealing a piece that has received oil work: varnish adhesion can be compromised if oils haven’t fully cured or if excess solvent remains. Test varnish compatibility on a spare casting or an inconspicuous area, if the oil layer hasn’t cured, varnish may wrinkle, bloom, or fail to adhere. As a rule, allow extended curing after final oil layers or use barrier coats recommended by the paint and varnish manufacturers.
12. Safety essentials and solvent choices
Use odorless mineral spirits or odorless thinners to reduce fumes, but never treat “odorless” as harmless, keep ventilation, avoid skin contact, and never eat or drink near your workspace. Consider nitrile gloves for skin protection and keep solvents in labeled, sealed containers. Community safety is practical: better airflow, fewer spills, and good storage keep your hobby space safe and approachable for group painting nights.
13. Test, iterate, and share results with the community
Always try new oil techniques on spare castings before applying them to prized models, it saves time and teaches how specific thinners and pigments behave on your chosen primer and basecoat. Share successful combos, drying schedules, and solvent choices with your local group or online clubs; the miniature community thrives on practical tradecraft and small tweaks that yield big visual returns. Testing also helps you learn how varnishes respond post‑oil so you can avoid finishing mishaps.
Practical wisdom to take home: start small, a single spare figure, a limited color set, and disciplined ventilation, then build the technique into your routine. Oils give you a painter’s superpower for glazes and weathering, but the payoff comes from smart prep, respect for drying times, and safe solvent handling. Try a hybrid workflow (acrylic base, oil finishes), test on a spare casting, and you’ll be adding subtlety and realism to your tabletop forces without slowing down your painting tempo.
Know something we missed? Have a correction or additional information?
Submit a Tip