Polar Dive USA Publishes Step-by-Step Chiller and IcePod DIY Setup Instructions
Polar Dive USA posted a hands‑on tutorial showing unboxing, hose routing, and how to get a chiller circulating with an IcePod or any other tub, including how to siphon when there’s no drain.

Polar Dive USA’s new step‑by‑step tutorial is built to take a first‑time owner from unboxing to a running chiller-and-pod setup, with clear hose routing for an IcePod drain valve and an alternate method for buckets, bathtubs, or other tubs. The video claims to walk viewers through unboxing, hose routing, and initializing filtration systems so new owners can get a Polar Dive chiller cooling a 105‑gallon (400 L) pod.
1. What the tutorial covers
The video presents a hands‑on walkthrough demonstrating unboxing, hose routing for connecting a Polar Dive chiller to an IcePod, and initializing filtration systems. The stated purpose is practical assembly and start‑up so customers can "assemble chillers, connect hoses, and initialize filtration systems" without guessing how parts fit together. It is intended for both owners of Polar Dive pods and people who want to adapt the chiller to other tubs.
2. Unbox and confirm included parts
Polar Dive’s chiller package "comes with pump and filter," so the first step is to confirm those components are present before you power the unit. Check hoses, clamps, and any quick‑start documents that accompany the chiller; the tutorial emphasizes verifying the pump and filter are installed and ready to connect. If the pump or filter is missing, do not attempt to run the unit until replacements arrive, those are the core components that move and clean the water.
3. Connecting to your Polar Dive / IcePod (1 drain valve)
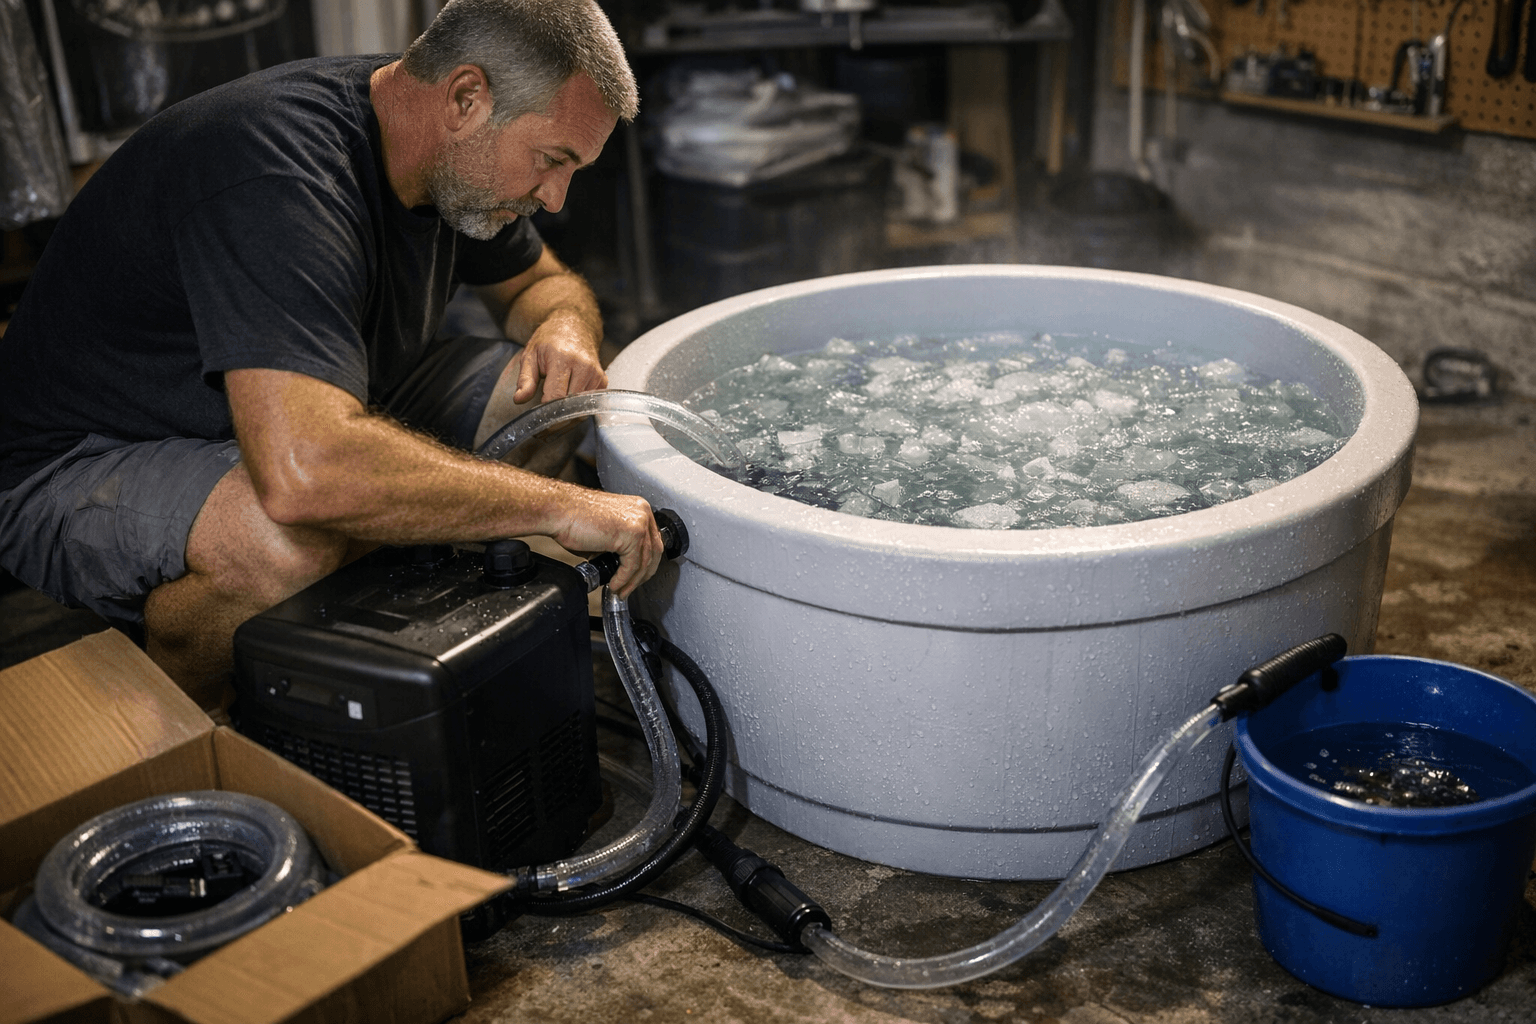
Follow the site’s exact connection wording: “You simply connect the hose entering the water filter side of the chiller, to the drain valve on your IcePod. And the second hose coming from the chiller outlet, goes into the IcePod over the top ring/edge.” This means one hose attaches to the pod’s bottom drain and feeds water into the chiller’s filter side; the outlet hose returns cooled, filtered water by sitting over the top ring or edge of the pod. Proper seating at the drain and a secure over‑edge return reduce splashing and help maintain circulation.
4. Connecting the chiller to any other ice bath, bathtub, or bucket
If you’re not using a Polar Dive pod, the site is explicit: “You can also connect the chiller to any ice bath, bathtub, bucket - you name it. The chiller comes with pump and filter, so you simply put both hoses from the chiller into any body of water to start cooling it.” In practice that means place the inlet and outlet hoses directly into the water and position them so the inlet is submerged and the outlet returns water without creating major turbulence. This straight‑into‑the‑tub method is the intended quick alternative when no bottom‑valve hookup exists.
5. When to siphon and how it matters
Polar Dive’s instructions warn: “If your tub doesn't have a bottom valve to connect it to, you will need to siphon water into the inlet hose to start the circulation, please refer to youtube on how to siphon - this is necessary as the pump can not start the circulation of water if there are air in the hoses.” In short: priming the inlet hose by siphoning removes air so the chiller’s pump can draw water; without that primer the pump will be starved of water and circulation won’t start. The tutorial points viewers to siphoning demonstrations on YouTube for the mechanical technique of getting that first flow.
6. Initializing filtration and circulation
After hoses are connected and the inlet is primed (either via bottom‑valve hookup or siphon), start the chiller so its included pump and filter begin circulating and cleaning water. The video demonstrates how the pump moves water into the filter side then returns it through the outlet hose, which is exactly why Polar Dive bundles a pump and filter with the chiller. Watch the unit for a short period after start‑up to confirm steady flow and no large air bubbles, which indicate incomplete priming.
7. How to drain a Polar Dive pod
For routine draining, Polardiveusa explains: “There is a draining tap located at the bottom of the Polar Dive. Use a normal garden hose and a 1/2-inch male thread-to-hose adaptor (available at your neighborhood home supply store) to drain it. In some cases, depending on how the pod is configured, you can even open the tap without a hose attached.” That means keep a 1/2‑inch male thread‑to‑hose adaptor on hand for convenient drainage; depending on your pod configuration you may be able to simply open the tap and let water out without attaching a hose.
8. Pod dimensions, capacity and weight to plan placement
Polar Dive / IcePod size facts matter for site selection: the pod measures Diameter 32 inches (80 cm) and Height 30 inches (75 cm), holds Capacity 105 gal (400 L), and weighs Weight 9 lb (4 kg) empty. Those numbers tell you the filled weight will be substantial and require a level, sturdy surface and, for indoor installs, a drain or plan for water routing. Use the dimensions and 105‑gallon capacity to judge footprint, lifting, and where the chiller and hoses will sit relative to the pod.
9. Ice guidance and freeze management
Polar Dive recommends adding “15–40 pounds (7–18 kg) of ice to the Polar Dive, depending on the water's beginning temperature. The temperature of your tap water, the climate in which you reside, and the desired level of cold all influence how much ice is required. It might not even be necessary to add ice if you reside in a colder climate.” For setups outdoors in cold weather, note the company’s engineering claim: “You may set up the pod indoors or outdoors, even in below-freezing temperatures, because we engineered it to be weather and UV resistant.” Still, they advise: “The water turns to ice much more slowly because to the insulating layer, but stirring the water at least once a day is still advised to prevent it from freezing solid.”
10. Filtration, hoses and routing tips built from the instructions
The core routing is explicit: inlet hose → chiller filter side via the pod drain; outlet hose → over the top ring/edge returning cooled water. Because the chiller includes pump and filter, the system is designed to operate as a self‑contained circulation/filtration loop once primed. Route hoses to avoid kinks and keep electrical components dry and on a stable surface; confirm inlet submersion and outlet placement so flow is smooth and consistent.
11. Accessories & supplies: what the site signals and what we don’t know
The site excerpt includes a heading “Accessories & Supplies” but the excerpted text does not list items under that heading. The presence of the heading signals Polar Dive sells or recommends accessories, but the specifics are not provided in the material at hand. If you’re planning a build or install, the explicit, copy‑ready detail to bring is a 1/2‑inch male thread‑to‑hose adaptor and garden hose for draining, plus the ice amounts (15–40 lb / 7–18 kg) referenced for sessions.
12. What the tutorial and FAQ don’t cover (follow‑up checklist)
The excerpt and video summary leave gaps owners will want answered: publication platform and date, presenter identity, exact chiller model shown, electrical safety guidance (GFCI and cord placement), PRO vs MAX differences, price, warranty, and whether the chiller pump/filter are removable. These are items to check with Polar Dive USA or look for in the full video description before you buy or power a system.
- Confirm the chiller package includes the pump and filter.
- Have a 1/2‑inch male thread‑to‑hose adaptor and garden hose for draining.
- Plan for 15–40 lb (7–18 kg) of ice per session unless you live in a cold climate.
- Be ready to siphon the inlet hose if your tub has no bottom valve; the pump cannot start circulation with air in the hoses.
13. Quick practical checklist before you start (short, action‑ready)
These are all explicit items drawn from Polar Dive’s guidance and the tutorial’s stated steps.
14. Bottom line for DIY owners
Polar Dive USA’s tutorial frames the chiller-and-pod setup as an approachable DIY task: unbox, confirm the pump and filter, route one hose to the pod drain and return the outlet over the top edge, or place both hoses into any tub if you don’t have a drain, just siphon to prime. With a pod that holds 105 gal (400 L) and an ice recommendation of 15–40 lb per session, the company’s guidance gives new owners the concrete pieces they need to get cooling; check the full video or contact Polar Dive USA for model specifics, detailed safety notes, and supply lists before you power up.
Know something we missed? Have a correction or additional information?
Submit a Tip

