Practical Beginner’s Guide to Making Safe, Effective Bath Bombs
Learn the core ingredients, step-by-step method, safety rules, and storage tricks to make reliable homemade bath bombs. This guide walks you through mixing, molding, curing, essential-oil precautions, and community-minded tips so you can create bath bombs that fizz, scent, and store well.
1. What a bath bomb is and why it matters
A bath bomb is a compacted mixture that fizzes and disperses scent, oil, and sometimes color or botanicals when it hits water. You get a sensory, skin-softening addition to bath time that’s inexpensive to make at home, great for gifts, and ideal for local markets or community craft swaps. Understanding the basic chemistry, an alkaline powder (baking soda) reacting with an acid (citric acid) when wet, helps you avoid premature fizzing and produce consistent results.
2. Essential ingredients and their roles
Core ingredients include baking soda (sodium bicarbonate), citric acid, and cornstarch; each has a clear function. Baking soda provides the fizz and softening action, citric acid creates the effervescent reaction with water, and cornstarch helps bind and soften the water. Optional additions that improve feel and variety include Epsom salt for muscle ease, a carrier/emollient oil (coconut, jojoba, or almond) to moisturize, essential oils for fragrance, and optional colorants or botanicals to enhance appearance.
3. Equipment and a simple setup
You don’t need fancy gear, just a few common tools will do the job reliably. Get a mixing bowl, a whisk or spoon for dry blending, measuring cups/spoons, small spray bottle for your wet mix, and molds (silicone or metal) for shaping. Lay down newspaper or a silicone mat for clean-up and set aside a dry, draft-free area where molds can sit undisturbed while drying.
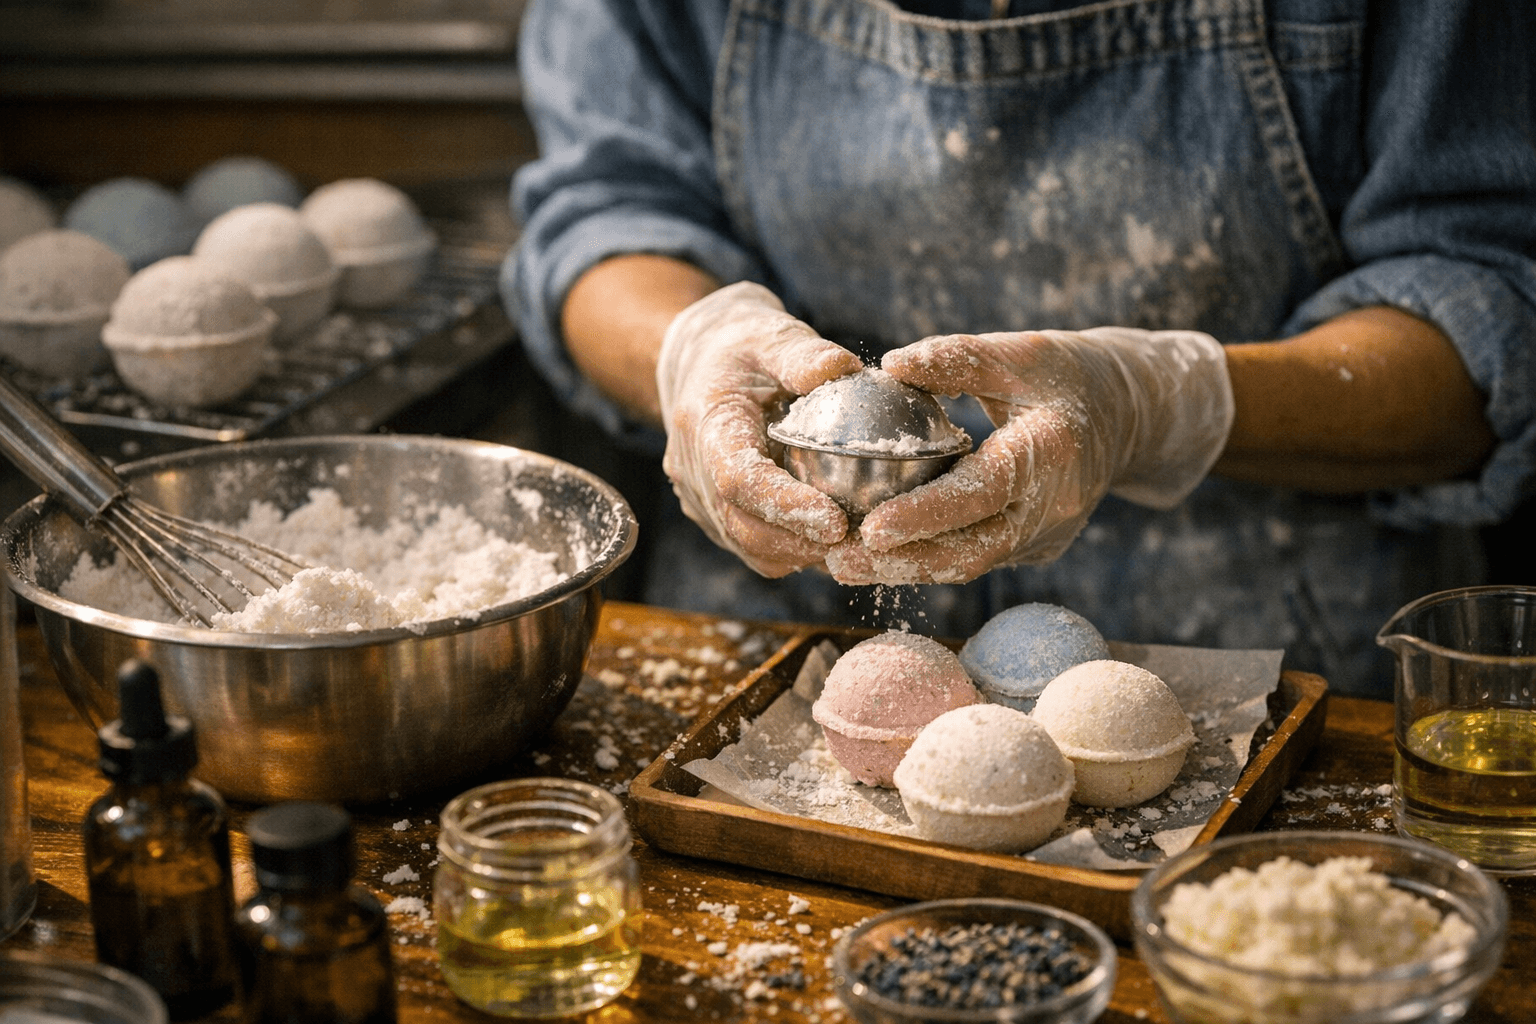
4. Preparing and mixing dry ingredients
Measure and combine your baking soda, citric acid, and cornstarch thoroughly until uniform in texture to avoid pockets of acid or base. If you’re using Epsom salt, fold it in with the dry mix so it distributes evenly and dissolves properly in the bath. Even, thorough blending is the best safeguard against erratic fizzing and uneven color or scent release.
5. Blending oils, colorants, and fragrance
Mix your carrier oil and any liquid colorants or fragrance separately before combining with dry ingredients; this makes distribution easier and more consistent. If you use essential oils, dilute them into the carrier oil so the scent disperses and skin contact is gentler. For liquid colorants, a few drops are usually enough, overdoing color can stain tubs or skin, so test small batches first.
6. Combining wet and dry slowly to avoid premature fizzing
Add the wet mixture to the dry ingredients a little at a time, use a fine spray bottle or drizzle slowly while whisking, to prevent the citric acid and baking soda from reacting prematurely. You want the mixture to hold together like damp sand when squeezed, not to foam in the bowl. Working slowly gives you control and produces a firmer, better-packed bomb.
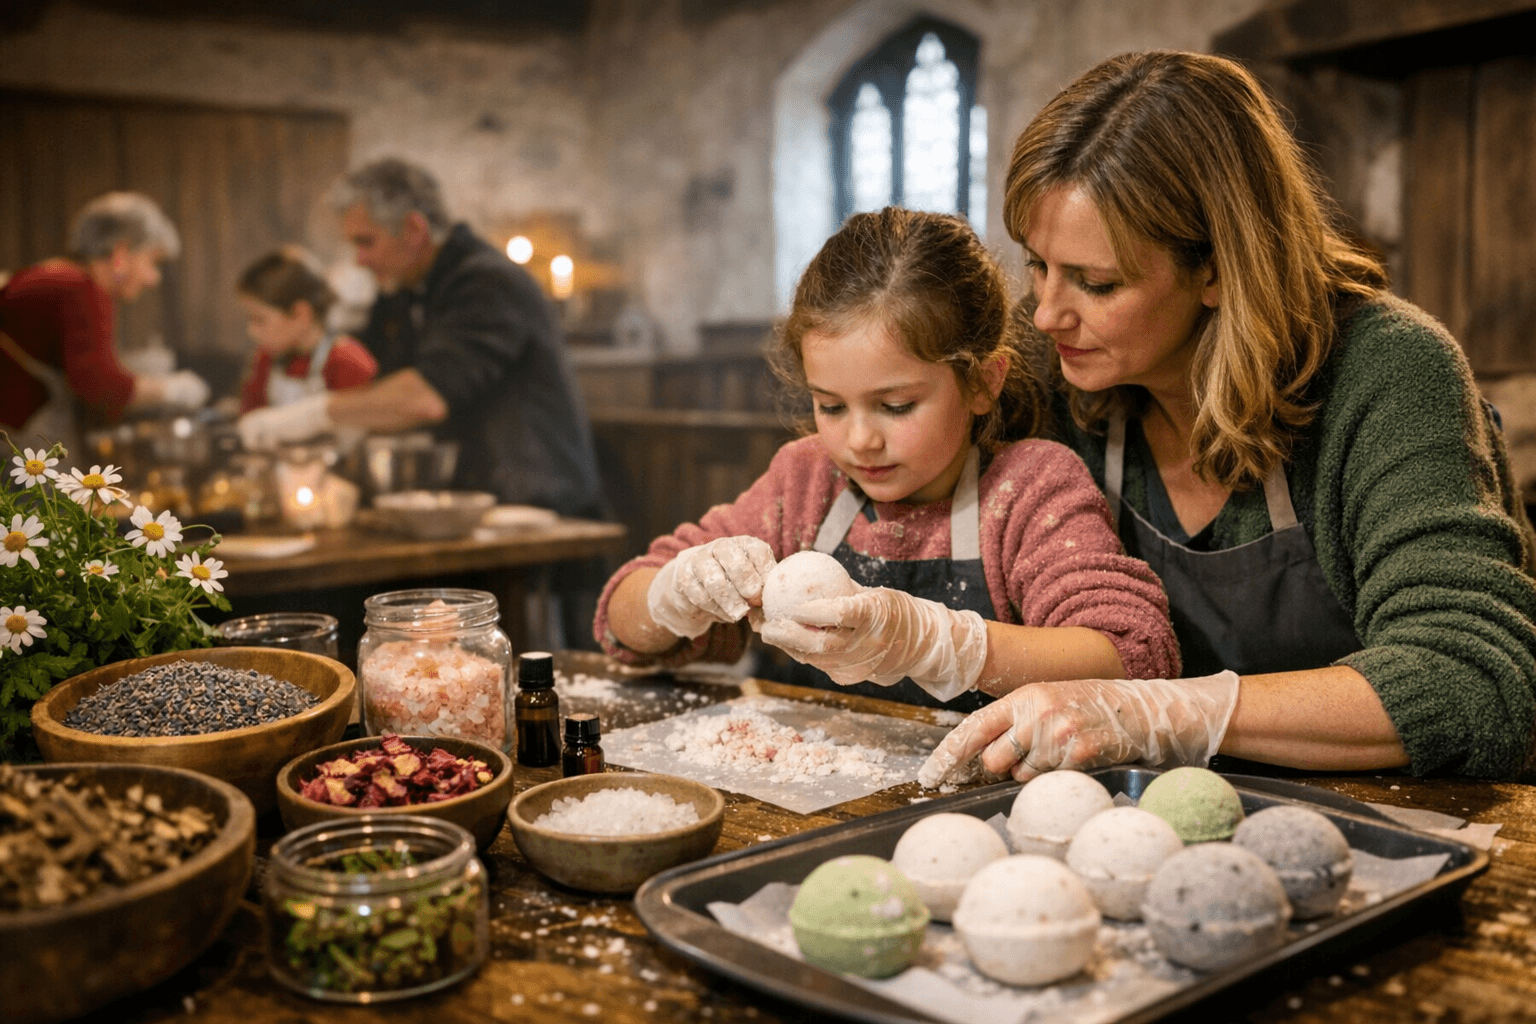
7. Packing molds and shaping techniques
Firmly pack the dampened mixture into your molds, pressing out air pockets for compact, long-lasting bombs. Overfill slightly and level or press the two halves together if using sphere molds, then tap out gently and allow to set. Proper packing determines how the bomb holds together and how evenly it dissolves in the tub.
8. Drying and curing times to get right
Let bombs sit in their molds for a minimum of 2–4 hours to harden enough to remove without crumbling; many makers prefer to cure them for about 24 hours for full firmness and longevity. After unmolding, place bombs on a dry surface away from humidity to finish drying; extra cure time helps them hold shape and extend shelf life. Patience at this stage reduces breakage and keeps fizz performance consistent.
9. Essential-oil safety and dilution guidance
Essential oils can sensitize skin or cause photosensitivity in some cases, so always dilute essential oils into your carrier oil before adding them to the mix. Research each oil for known risks, some oils are not suitable for sun exposure, and use conservative amounts when making products intended for skin contact. If you or someone you’re gifting to has sensitive skin, opt for fragrance-free bombs or use gentle carriers and low concentrations.
10. Storage, packaging, and humidity control
Store bath bombs wrapped individually in tissue or plastic wrap and inside an airtight container to keep them dry and protected from bathroom steam or seasonal humidity. Avoid storing them in the bathroom where moisture will trigger fizzing or reduce shelf life; a cool, dry cupboard is better. For gifting or sales, individual wrapping plus a sealed box helps prevent accidental activation and preserves scent.
11. Troubleshooting common problems
If your bombs crumble, they may be too dry or incompletely packed, moisten slightly and pack more firmly next time, or allow longer curing. If bombs fizz prematurely during mixing, you likely added liquid too quickly; mix more slowly, use a spray bottle, and work in a lower-humidity environment. Discoloration or tub staining usually means too much colorant, scale back and test small batches before full production.
12. Practical, community-minded uses and accessibility tips
Make small batches for craft fairs, community swaps, and neighborly gifts to get feedback and build local interest without large upfront investment. Offer fragrance-free or low-scent options for people with sensitivities, and label ingredients clearly to be inclusive of allergy concerns. Sharing recipes, troubleshooting tips, and small demos at local libraries or community centers helps others learn safely and boosts local maker culture.
- Tip: Start with plain, unscented test bombs to check your process, then add fragrance and color once you’re confident in packing and curing.
- Tip: Keep a simple log of what you changed between batches, ingredients, humidity, and packing pressure, so you can reproduce successful bombs reliably.
Know something we missed? Have a correction or additional information?
Submit a Tip