Safe DIY Bath Bomb Techniques for Small Runs, Workshops, Gift Sets
Two practical small-batch formulas (one detailed evergreen blend, one workshop-friendly basic), exact measurements, needle and hydrosol safety, and clear packing/drying tips for small runs and gift sets.

1. Who this guide is for
“This evergreen guide is written for hobbyists who already have some experience with basic bath-bomb ingredients and want a concise, practical resource they can return to when planning small runs, workshops or gift sets. It focuses on concise, actionable advice rat” This article follows that brief: distilled, workshop-ready techniques and two ready-to-mix recipes pulled directly from the sources so you can plan batches, class timing, and gift-set presentation without guessing.
2. LearningHerbs evergreen formula (detailed recipe)
LearningHerbs provides a full evergreen-scented formula with botanical names and exact drop counts, useful when you want a signature scent for a small run or themed gift set. Ingredients: • 1 cup baking soda • 1/2 cup citric acid • 1/2 cup Epsom salt • 1/2 cup cornstarch • 2 tablespoons olive oil • Fir needle essential oil (Abies balsamea): 25 drops • Black spruce essential oil (Picea mariana): 15 drops • Scotch pine essential oil (Pinus sylvestris): 15 drops • Witch hazel (or other hydrosol) in a spritzer bottle • Evergreen needles (optional) LearningHerbs also lists Mountain Rose Herbs as a vendor recommendation for herbs.
3. LearningHerbs method snippets and packing instructions
LearningHerbs’ method emphasizes dry-mix integrity and immediate molding once consistency is right. “Blend the baking soda, citric acid, Epsom salts and cornstarch together in a large bowl. Stir well and break up any clumps within the mixture.” “In a small bowl blend together the olive oil and essential oils.” “Drizzle them onto the previous dry mixture. Stir well.” On molding: “Once you have the desired consistency, immediately start pressing it into molds. If using evergreen needles, place a couple in the center of your measuring cup. Less is better here as lots of needles can be a bother to clean up after your bath. Pack the measuring cup with the mixture. Use the heel of your hand to pack it in firmly and to create a relatively level space at the top.” These steps favor firm hand‑packing and a spritzing approach for liquid binders.
4. NestingWithGrace basic small-batch recipe (workshop-friendly)
NestingWithGrace offers a compact, repeatable small-batch formula that’s ideal for classroom demos or quick gift sets. Ingredients: • 1 cup baking soda • 1/2 cup citric acid • 2 tablespoons Epsom salts • 3 tablespoons melted coconut oil • 4 drops essential oil (per batch as given) • 1 teaspoon water or more if necessary • Molds or a large ice cream scoop This lean recipe uses few drops of essential oil and smaller Epsom-salt quantity so it’s fast to scale or to hand out as a printable recipe in workshops.
5. NestingWithGrace step-by-step method, shaping and timing
NestingWithGrace gives a clear process and an explicit troubleshooting cadence for moisture control. “In a large bowl combine baking soda, citric acid, and epsom salts. Stir well.” “In a smaller bowl combine coconut oil and essential oil” “Slowly whisk in wet ingredients into dry. It should reach a crumbly consistency.” “Your mixture is ready when you can mold it into a shape and it sticks without coming apart. If it is too crumbly, add in water, 1 tsp at a time. Mixture should be dry but able to hold a shape.” For shaping: “To shape your bath bombs either pack them into your molds or a large ice cream scoop .” Drying and finish: “Remove carefully and place on a baking sheet to dry for about 8-12 hours.” “Enjoy in your bath!”
6. Reconciling recipe differences for practical decision-making
Both recipes are presented exactly as written; they intentionally differ and each has practical uses. LearningHerbs includes cornstarch (1/2 cup), 1/2 cup Epsom salt, and 2 tablespoons olive oil plus a 55‑drop evergreen oil blend, this is the more complex scented formula for a signature product. NestingWithGrace lists 2 tablespoons Epsom salts, 3 tablespoons coconut oil, and 4 drops of essential oil, a simpler, lower‑oil approach that’s faster to scale for hands‑on classes. Use LearningHerbs for a premium evergreen run and NestingWithGrace for quick demos or kid‑friendly workshops.
7. Liquid binders: spritzing hydrosols versus measured water
You have two explicit approaches to add binding moisture and each changes workshop flow. LearningHerbs lists “Witch hazel (or other hydrosol) in a spritzer bottle” and notes: “I’ve also made this with various hydrosols. Witch hazel is often used for DIY bath bombs but I’ve also had success using many others, including Douglas-fir hydrosol and lavender hydrosol.” That spritz method gives fine control and minimizes premature fizzing. NestingWithGrace uses a measured-water approach and instructs to “add in water, 1 tsp at a time” if the mix is too crumbly; this is simple for beginners but requires careful pacing to avoid activating the citric acid.
8. Molding, packing and demolding, workshop workflow tips
Both sources give tactile tips you’ll use in class and when packing gift boxes. Use LearningHerbs’ firm‑packing technique: “Use the heel of your hand to pack it in firmly and to create a relatively level space at the top.” If adding evergreen needles, follow the exact note: “place a couple in the center of your measuring cup. Less is better here as lots of needles can be a bother to clean up after your bath.” For demolding, NestingWithGrace recommends a simple trick: “I found that when I pressed the bath bomb up, rather than down, that worked best to get it out without breaking.” Include a baking-sheet staging area so molded bombs dry undisturbed.

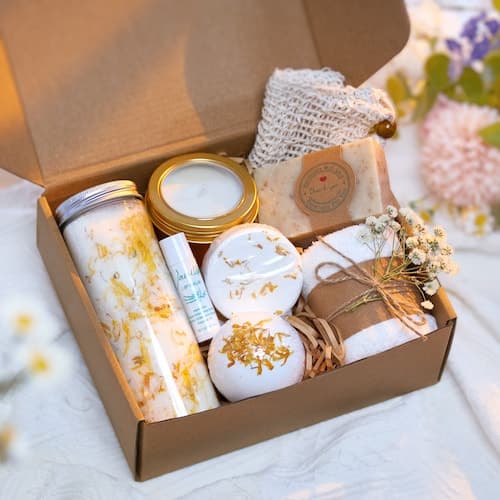
9. Drying, storage and presentation for gift sets
Plan at least one overnight cure window: NestingWithGrace directs to “Remove carefully and place on a baking sheet to dry for about 8-12 hours.” Once cured, presentation doubles as storage: “After they dry for about 8-12 hours keep in a glass jar as decor too!” For small-run packaging, label scent and ingredient differences (cornstarch present vs absent; olive vs coconut oil) so buyers with sensitivities can choose.
10. Safety flags and sourcing checks (must-follow)
Two hard safety flags appear in the sources. LearningHerbs warns: “For the optional needles in this recipe, you can use practically any evergreen needles, with a few cautions. While most evergreen needles are safe to use, the needles from the yew tree (Taxus spp.) are not. Be sure to know the identity of your needles to make sure they are safe.” It also advises: “If you would like to use the needles from your Christmas tree or holiday wreath, check with your supplier to make sure the trees or boughs weren’t sprayed with any strange chemicals.” For scent purity, NestingWithGrace says: “I recommend not using oils that have perfumes in them, that are not all natural. I use Young Living exclusively and I am a distributor, find out more about oils HERE).” Treat both warnings as mandatory checklist items when sourcing materials for workshops or gift production.
11. Troubleshooting checklist (quick fixes you can teach)
Keep this list on a laminated card at your demo table: • Clumped dry mix, “Stir well and break up any clumps within the mixture.” (LearningHerbs) • Too crumbly, “If it is too crumbly, add in water, 1 tsp at a time.” (NestingWithGrace) • Premature activation, use a spritzer bottle for hydrosols and mist lightly to avoid fizzing. • Needle cleanup, use only “a couple” of evergreen needles per mold to reduce customer cleanup (LearningHerbs).
12. Equipment and sourcing checklist for small runs and workshops
Pack this into your workshop kit: • Two mixing bowls (large for dry, small for wet) • Measuring cups and spoons (use a measuring cup for packing where LearningHerbs suggests) • Spritzer bottle for witch hazel or hydrosol • Molds or a large ice cream scoop • Baking sheets for 8–12 hour drying • Glass jars for display/storage • Optional evergreen needles and herbs (Mountain Rose Herbs recommended by LearningHerbs for herbs) • Essential oils (note NestingWithGrace’s purity recommendation and brand mention).
13. Full verbatim ingredient lists and method snippets (quick appendix)
LearningHerbs ingredient list and method excerpts appear exactly as provided above in sections 2 and 3. NestingWithGrace’s ingredient list and stepwise method are quoted exactly above in sections 4 and 5, including: “In a large bowl combine baking soda, citric acid, and epsom salts. Stir well.” and “Your mixture is ready when you can mold it into a shape and it sticks without coming apart. If it is too crumbly, add in water, 1 tsp at a time. Mixture should be dry but able to hold a shape.”
14. Final practical takeaway
If you want a branded evergreen product for a holiday small run, use LearningHerbs’ detailed formula and the 55‑drop evergreen blend with hydrosol spritzing and firm hand‑packing. If you’re running workshops or making quick gift sets, use NestingWithGrace’s smaller‑oil, easy‑to‑scale recipe, teach the 1‑tsp water fix and demold-by-pressing-up trick, and schedule an 8–12 hour dry window between molding and packaging. Both approaches are fully documented in the sourced steps above, pick the workflow that matches your class length, cleanup tolerance, and presentation goals, then standardize measurements and safety checks before you run your first session.
This article was produced by Prism’s automated news system from verified source data, official records, and press releases, then run through automated quality and moderation checks before publishing. The system is built and supervised by the people who set the standards it runs under. Read our full AI policy.
Did this article answer your question?