BGR Spotlights Five 3D-Printed Gadgets Built to Simplify Miniature Painting
BGR's five Printables-sourced 3D-printed tools tackle miniature painting's most persistent frustrations — from fumbling with glued fingers to ruined brushes left rolling off the desk.
If you've ever dropped a half-painted Space Marine because your fingers cramped up, or watched a perfectly good sable brush dry out bristle-first on the table, you already understand the problem BGR's recent roundup is trying to solve. The five tools featured aren't flashy resin-printed dioramas or elaborate terrain pieces. They're workbench utilities, sourced from Printables designers, each aimed at one specific failure point in the miniature painting workflow. Here's what they actually fix, how to print them right, and honestly, who doesn't need them.
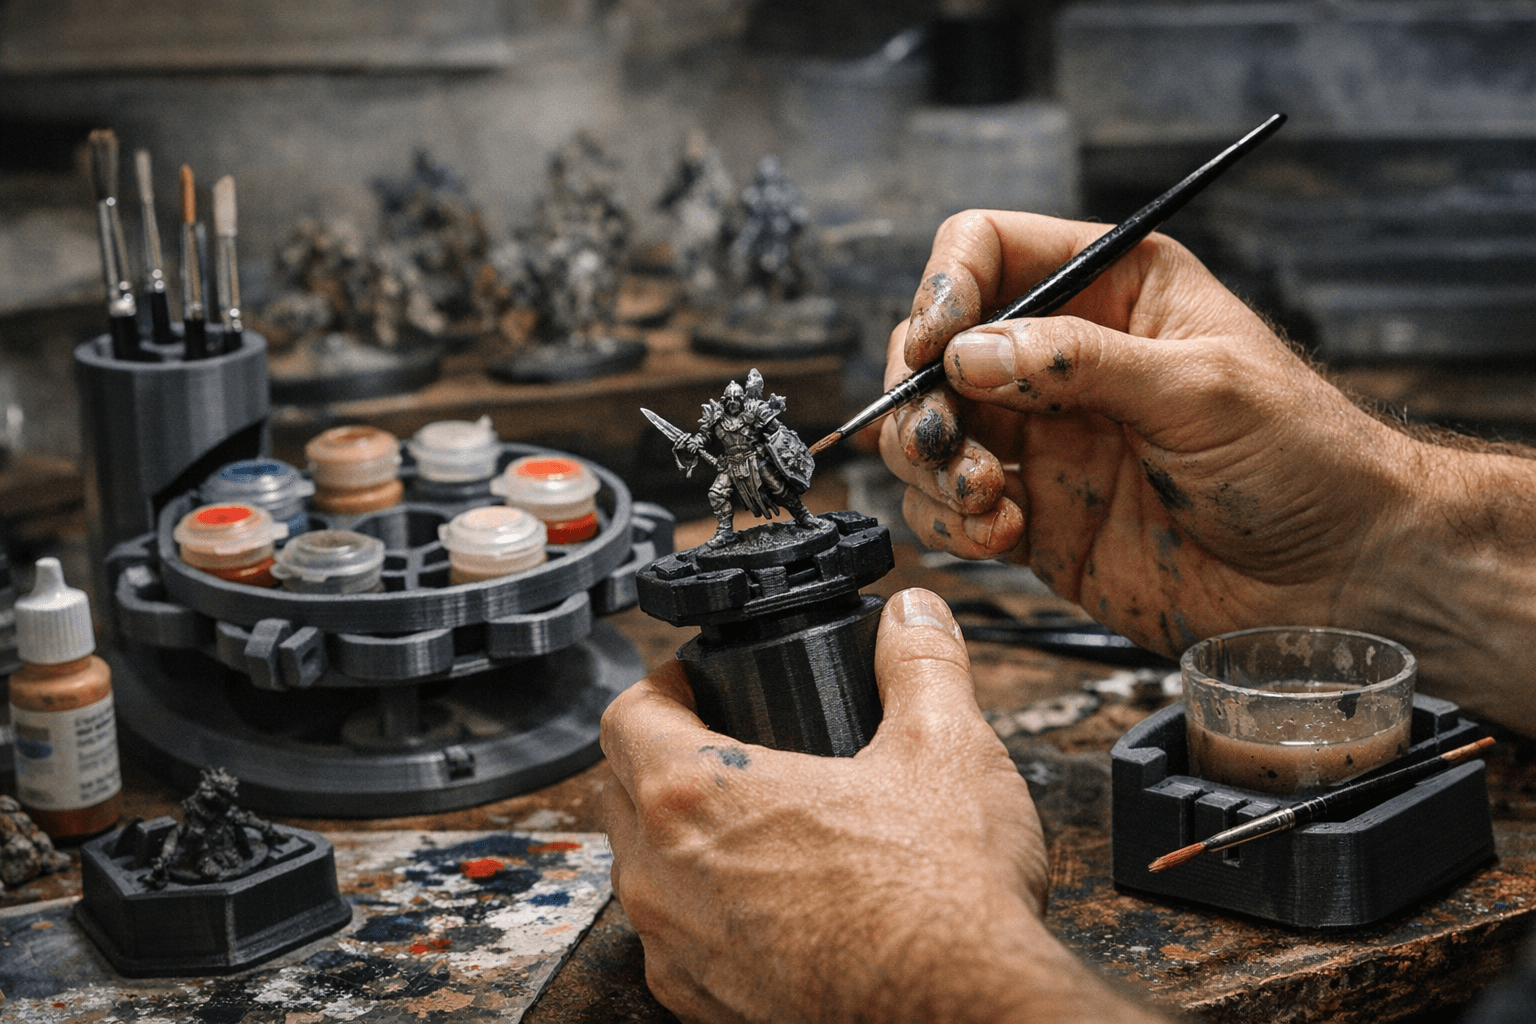
The Modular Vise: Solving the Holding Problem
Printables user 3D Printing Dude designed the tool that should be first on every painter's print queue: a compact, modular vise made from composite 3D-printed parts. In its completed form, the vise uses three adjustable firm grips at the top with various "teeth" for stopping points, all controlled by a tension dial on the bottom. Rotate the dial and the grips lock a miniature in place by its base, handling round bases up to 50mm in diameter, and accommodating square and oval profiles too.
The measurable benefit here is simple: no more paint-covered fingers, no more dropped models mid-highlight. The parts do need to be printed separately and assembled, but 3D Printing Dude describes it as straightforward as building a Lego set.
- Print settings: 3 walls, 20% infill, 0.2mm layer height. Print the teeth components with a brim to ensure proper bed adhesion.
- Material: PLA works for casual use, but PETG holds up better against the repeated mechanical stress of the tension dial over time.
- Cleaning: Wipe the grip teeth with a damp cloth after each session. Paint buildup in the teeth will reduce gripping precision.
- Who should skip it: If you're already happy with a cork-and-poster-tack setup and only paint single models at a time, the assembly overhead probably isn't worth it. This vise shines when you're batch-painting a squad.
The Spray Painting Rack: Solving the Speed Problem
Printables user Sam designed an assortment of 3D-printed, hand-held painting racks specifically to make spray priming and base coating faster and more uniform. The plans cover four distinct rack designs, giving you options depending on how many models you're running through a spray session at once. Instead of awkwardly holding individual miniatures on sticks or skewers, the rack lets you prime a batch in one pass with consistent coverage.
The speed gain is real, especially for anyone painting army-scale Warhammer 40K or Age of Sigmar projects where you might have thirty infantry models to prime in a single session.
- Material: Standard PLA is fine here. These racks don't encounter moisture or mechanical stress, just spray paint overspray.
- Cleaning: A quick wipe-down with isopropyl alcohol removes paint buildup between sessions. Don't let primer cake up on the contact points or your bases won't seat cleanly.
- Who should skip it: Single-model painters or those using brush-on primer won't see much value. This tool earns its place the moment you're doing batch runs.
The Wet Palette: Solving the Drying Control Problem
Printables user Michael Ramos designed a 3D-printed wet palette as a straightforward, low-cost alternative to commercial options like the Redgrassgames Everlasting or Artis Opus palettes. The rectangular design works specifically with generic cellulose sponges, which you can find at any big-box store, along with standard parchment paper. An optional printable gasket attaches to keep wet paints fresh overnight, though Ramos notes clearly that the gasket is only effective while the palette sits flat on a table and isn't designed for transport.
The consistency benefit is the main draw. Acrylics on a standard dry palette can skin over in minutes under warm studio lighting, forcing you to constantly re-wet and reblend. A wet palette extends working time dramatically, which directly improves layering and wet-blending results.
- Material: PETG is the smart call here over PLA. PETG handles repeated moisture exposure without warping, which is exactly the condition a wet palette operates under.
- Cleaning: Remove the sponge and parchment paper after each session. Rinse the printed body with warm water. Letting paint residue dry inside the body will stain and eventually degrade the surface.
- Who should skip it: Heavy metallic and contrast paint users. Wet palettes actively work against you with metallics, which need a slightly dryer surface to behave predictably, and they make ink and contrast paint difficult to control. Keep a standard dry palette alongside this one if your style mixes techniques.
The Swatch Board: Solving the Color Consistency Problem
Printables user PH got frustrated doing what every painter has done: squeezing a color onto scratch paper only to be confused by how different it looks dried versus wet, or how it reacts to a wash. Their solution is a 3D-printed swatch board built around a grid of low reliefs — slightly raised sections that hold paint and act as proper swatches once applied. Under each swatch is a small plaque sized to write the paint's ID number for quick reference.
PH's approach goes further than a simple color test. Each swatch was painted with full technique: base color, inking, and dry brushing, so the board shows you what that color does through a complete painting process, not just what it looks like wet out of the bottle.
- Material: White or light grey PLA gives the most accurate color readback from your swatches. Dark filament will shift how colors appear, undermining the whole point.
- Maintenance: These boards are reference tools, not consumables. Keep them away from direct sunlight, which yellows PLA and shifts apparent swatch colors over time.
- Who should skip it: Painters who work from a single paint range and have their palette memorized don't need this. It's most valuable when you're managing a large, mixed collection across Citadel, Vallejo, Reaper, and similar ranges.
The Brush Box: Solving the Organization Problem
Printables user howeln designed a brush storage box that holds up to seven brushes, each secured in individual channels with deliberate clearance on both ends so bristle tips never contact the box walls. A magnetic cover, secured by four small magnets purchased separately online, keeps everything protected between sessions.
Seven brushes is a realistic working set for most painters: a base brush, a couple of detail brushes in different sizes, a dry brush, a wash brush, and a couple of spares. The channel design is the detail that matters here. It's not just storage; it's protection. A brush tip crushed against a hard surface even once can lose its point permanently, and replacement detail brushes from brands like Winsor & Newton Series 7 or Raphael 8404 aren't cheap.
- Material: PLA works without issue. These boxes see no moisture or heat stress.
- Print settings: Standard 15-20% infill is more than sufficient. The magnetic cover functions best when you purchase neodymium magnets; standard ferrite magnets won't provide reliable hold.
- Cleaning: Wipe the interior channels periodically with a dry brush. Paint dust and dried medium accumulate in the channels and can transfer to clean brush ferrules.
- Who should skip it: If you already have a dedicated brush roll or a commercial brush case, this is redundant. Its real value is for painters who don't yet have any organized brush storage and are constantly finding their kolinsky rounds rolling under the desk.
Taken together, these five tools address the complete painting session from start to finish: holding the model, priming the batch, managing paint consistency, keeping color records straight, and protecting the tools you've invested in. None of them require advanced design skills or a premium printer to execute. What they do require is about an afternoon of printing time and the discipline to actually set up your workspace properly before the next model hits the vise.
This article was produced by Prism’s automated news system from verified source data, official records, and press releases, then run through automated quality and moderation checks before publishing. The system is built and supervised by the people who set the standards it runs under. Read our full AI policy.
Did this article answer your question?


