Richard Steer Guides Beginners Through Painting BEF Infantry for Flames of War
Richard Steer's No Dice No Glory walkthrough breaks down BEF infantry painting into practical, timed steps — perfect for anyone cracking open the Dunkirk starter set.

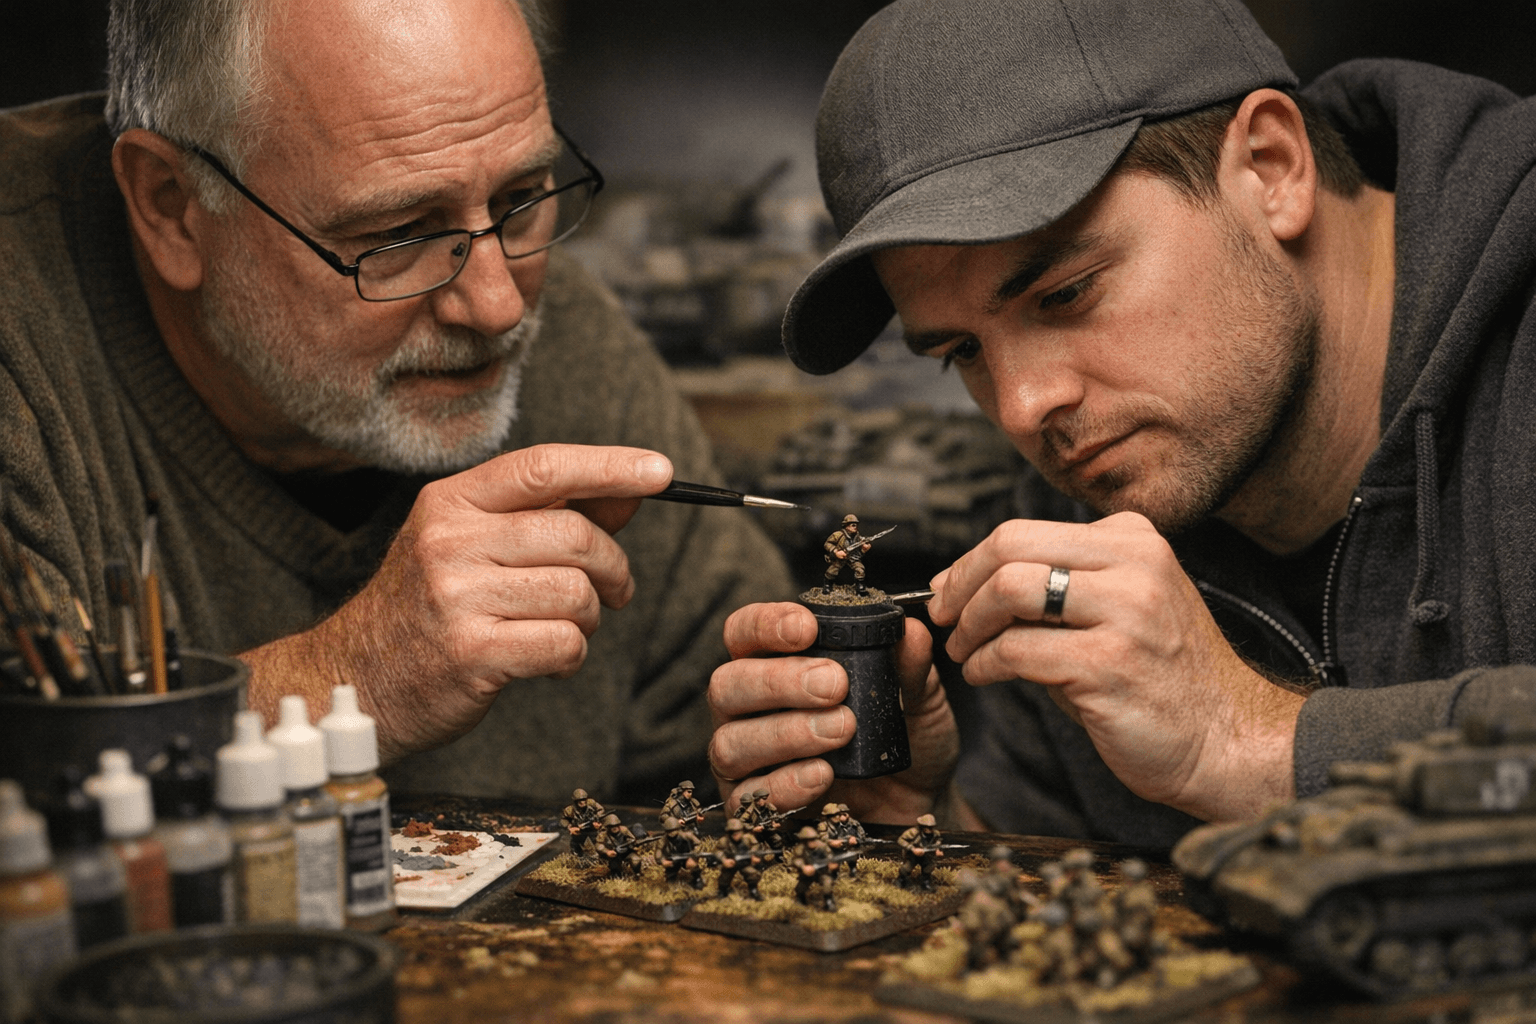
Richard Steer came to the Early-War period of Flames of War with a clear project in hand: the British half of the Dunkirk two-player starter set. That box comes with an Early-War British infantry sprue containing half a platoon of figures, and rather than just post finished photos, Steer documented his entire process on No Dice No Glory. "The purpose of this article is to step through my process for painting FOW infantry, in the hope that this may be of use to players who are just getting into FOW and looking to paint their first figures," he writes. That honest, practical framing sets the tone for everything that follows.
If you've been staring at a sprue of primed BEF infantry wondering where to start, this walkthrough gives you a repeatable method you can run batch after batch.
The Color Palette
Steer keeps his paint selection tight and purposeful. Three colors do the heavy lifting on these figures:
- 921 English Uniform for the uniform itself
- 871 Leather Brown for leather jerkins and any visible hair
- 887 US Olive Drab for the helmet
These are specific paint codes worth noting down before you sit at your desk. The numbers suggest a Vallejo range, though the source material doesn't confirm the brand outright, so check your local retailer or hobby shelf against those codes. The point is that Steer isn't chasing a complex palette here. For BEF infantry, three base colors plus a shade and a highlight is all it takes to produce table-ready figures with genuine depth.
Base Coating and the Case for Messiness
Steer's approach to base coating is refreshingly pragmatic. Rather than agonizing over clean edges on the first pass, he lays down his colors and accepts that things will bleed into each other. The clean-up comes later, deliberately. As he puts it: "I find it is overall much quicker to do a targeted clean-up at this point than to try to take that extra care during the first coat."
That second coat of 921 English Uniform is where the tidying happens. You go back over the uniform carefully, re-establishing crisp borders with neighboring colors. Any other spots that need attention get spot fixes with the relevant color at the same time. It's a two-pass system: paint fast first, then fix once rather than slow down throughout. For anyone who has spent 20 minutes trying to rescue a single figure from an overly cautious first coat, that logic will click immediately.
Leather Brown (871) handles the jerkin on figures wearing one, and picks out any hair visible beneath or around the helmet. Steer notes this detail is easy to miss on some figures depending on the pose, so it's worth scanning each one before moving on.
The Helmet: Don't Skip the Rim
Helmets go on last in the base coat sequence, painted with 887 US Olive Drab. Steer is specific about technique here: "The final item still needing paint is the helmet, which is 887 US Olive Drab. I make sure to paint under the rim of the helmet as well."
That detail matters more than it might seem. The underside of a helmet rim is highly visible at tabletop viewing angles, and leaving it unprimed or bare gives the figure an unfinished look that catches the eye in the wrong way. Taking the brush under that lip takes seconds per figure but makes a genuine difference to the finished result.
Timing: An Hour to a Batch
After base coats, tidying, and helmets, Steer marks a useful checkpoint: "It will usually have taken me about an hour to get a batch of figures from primed to this point." He doesn't specify exactly how many figures constitute a batch, but that one-hour benchmark is a practical planning tool. If you're sitting down for an evening hobby session, you can realistically get a full batch through base coats and into shading in a single sitting.
Shading with Strong Shade
Once the base coats are tidied, Steer applies Strong Shade across the figures. The source material shows the result in a photo captioned "The figure after the Strong Shade has dried," and that image does the explaining. Strong Shade flows into recesses, deepens shadows across the folds of the uniform, and ties all the base colors together under a unified tonal layer. Waiting for it to fully dry before moving on is non-negotiable; rushing to highlight over tacky shade produces muddy results.
Highlighting for Contrast
The final painting stage is where the figures genuinely come alive. Steer describes it as "a careful drybrush of each of the colours to highlight the outer surfaces and any edges, being careful not to cover the shadows created by the shade." The key word there is careful. Drybrushing BEF infantry isn't about hitting everything hard; it's about catching raised surfaces while preserving the shadow depth the Strong Shade built. Overdo the drybrush and you lose the contrast you just created.
This is also the stage where any small details get added. "If I were adding any other tiny details like unit flashes or rank badges, this is when I would paint those," Steer notes. For most players running standard BEF infantry, this won't be necessary, but it's worth knowing the sequence if you do want to add those touches.
Finishing Up
After highlighting, the figures are essentially done. The last step is a coat of matt varnish to protect the paintwork and, critically, to knock out any shininess left behind by the shade. Strong Shade can leave a slight sheen on surfaces, and matt varnish neutralizes that, giving the figures the flat, realistic finish that reads well on a tabletop. Steer describes the finished figure as complete "apart from a coat of matt varnish to protect the paint and to remove any shininess left by the shade."
With a few more batches through the same process, the next stage is basing the full platoon and getting them ready for their first game. That's the finish line this whole workflow is building toward.
Why This Approach Works for New Players
The strength of Steer's method is its repeatability. A limited palette, a deliberate two-pass base coating system, a single shade product, and a controlled drybrush highlight: these are techniques that scale cleanly from one batch to the next. You're not reinventing your approach for every figure. By the time you've worked through the Dunkirk starter set, the process becomes muscle memory, which is exactly where you want to be when your next FOW box arrives.
Know something we missed? Have a correction or additional information?
Submit a Tip
