RetroArch CRT Shader Setup Guide for Accurate, Preservation-Focused Visuals
Three shader settings separate an authentic CRT look from a muddy mess; here's the calibration workflow that gets you there, repeatably, on any device.
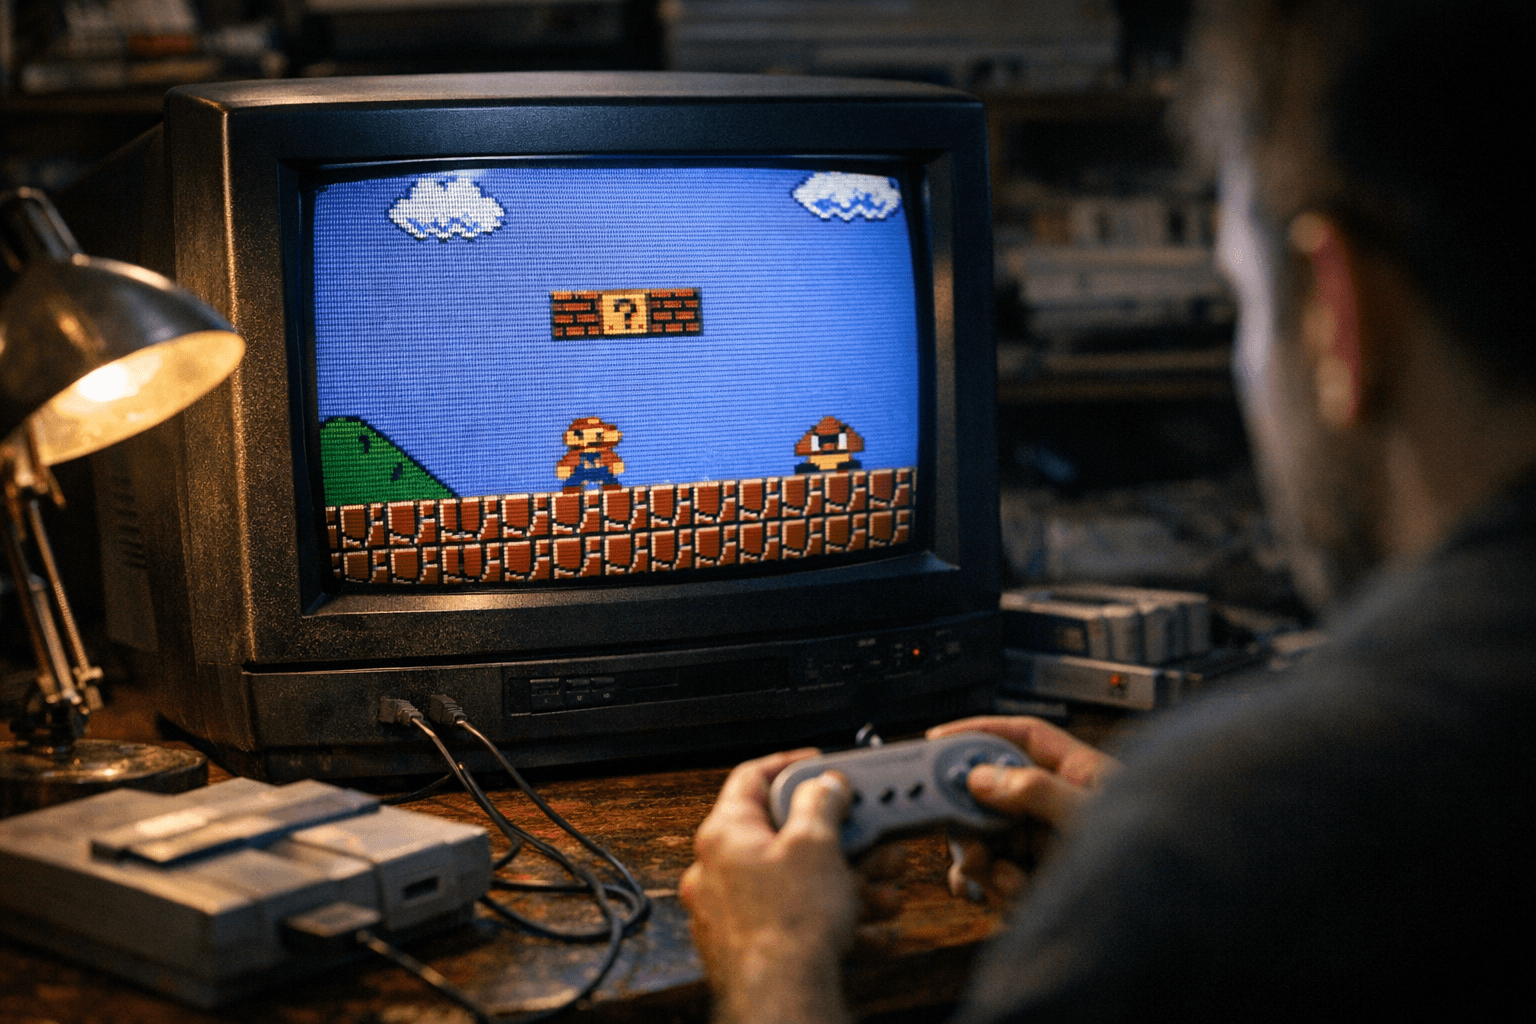
Getting retro games to look right on a modern display is harder than it sounds. The pixels are correct, the audio is synced, the frame timing is solid, and yet something is off. What you are missing is the display itself: the slow phosphor decay, the physical gap between scanlines, the slight bloom of a white sprite bleeding into a dark background. CRT emulation through RetroArch shaders is how you get that back, and when it is done with a calibration mindset rather than a "stack every filter and see what sticks" approach, the results are genuinely stunning and, critically, reproducible.
This guide works on Windows, Linux, macOS, and RetroArch-capable handhelds. The goal is one baseline workflow you can tune per-core and share with the community so others can reproduce your exact look.
Why authenticity demands more than pixel accuracy
8-bit and 16-bit titles were designed with CRT displays in mind. Artists working on SNES or Genesis hardware made color and dithering choices that depend on the physical behavior of a phosphor screen: scanlines blending adjacent pixel rows, aperture grilles softening hard edges, and shadow masks adding a subtle texture that made sprites feel solid rather than flat. A raw pixel-perfect image on a modern LCD strips all of that away. Shaders that emulate scanlines, phosphor bloom, curvature, aperture grille, and shadow mask simulations restore the artistic intent those developers were working toward. Overdo it and you obscure detail or introduce artifacts that never existed on real hardware. The goal is fidelity, not spectacle.
Quick-start preset table
Before diving into the theory, here are three baseline starting points by device class. Treat these as your calibration anchor, not a final destination.
| Device | Shader preset | Internal scale | Scanline opacity | Persistence |
|---|---|---|---|---|
| Handheld / low-power ARM | CRT-Easymode (slang) | 2x | 0.20 | 0.10 |
| Desktop monitor (1080p/1440p) | CRT-Geom (slang) | 3x | 0.25 | 0.12 |
| Living room TV (4K) | CRT-Geom-Deluxe (slang) | 3x | 0.30 | 0.15 |
These numbers are conservative by design. You can push them up once you have a reference comparison, but starting low keeps detail intact and gives you room to calibrate against original hardware screenshots.
Step one: pick your renderer and core
Shaders are only as reliable as the renderer underneath them. Vulkan and OpenGL are the most shader-friendly backends on modern platforms, and Slang is now the recommended shader format, compatible with Vulkan, Direct3D 10/11/12, OpenGL Core, WiiU, and Metal renderers. If you are running SNES titles, pairing your core with Vulkan provides noticeably more consistent shader timing than older GL paths. Check your driver support before committing to a backend; some RetroArch ports on lower-powered devices have renderer limitations that will constrain your shader options.
Step two: install and load a curated shader
Navigate to Menu → Online Updater → Update Slang Shaders (or GLSL Shaders if your platform requires it). RetroArch's curated packs include CRT-Classic, CRT-Easymode, CRT-Geom, and the heavier CRT-Geom-Deluxe, alongside upscalers like xBR and HQ2x/HQ4x and LCD/scanline packs. Avoid downloading unknown community shaders and stacking them without testing; unknown filters compound artifacts in ways that are hard to diagnose.
Once installed, go to Quick Menu → Shaders → Load Shader Preset and start with CRT-Geom (slang) on a capable machine, or CRT-Easymode for anything running on ARM silicon. Both are well-maintained, well-documented, and serve as honest calibration references.
The three settings that actually determine authenticity
Most shader parameters are cosmetic tweaks. Three settings determine whether the result is authentic or theatrical.
- Mask type / aperture simulation: This controls whether the shader mimics an aperture grille (the vertical stripe pattern of Trinitron-style tubes), a shadow mask (the dot-trio pattern of most consumer CRTs), or a slot mask. For SNES and Genesis titles, a shadow mask is most accurate. Aperture grille settings look dramatic but were associated with high-end monitors that most players never owned.
- Scanline strength / opacity: The table above gives starting values (0.20 to 0.30). At 0.25 opacity, scanlines are visible without swallowing fine sprite detail. Push past 0.45 and you are into nostalgia territory rather than accuracy territory. For preservation captures, keep it at 0.20 or lower.
- Gamma and bloom: CRT shaders include contrast, gamma, and gain controls. Small adjustments here change perceived brightness and the "glow" of lit pixels significantly. Use screenshots of original hardware output as your reference anchor. The goal is to match, not to enhance.
Shader chain order matters
RetroArch applies shader chains top-to-bottom. If you want to combine an upscaler with a CRT effect (which is usually the right call), the upscaler must come first. Place HQ2x or HQ4x before your CRT-Geom pass. The upscaler sharpens pixel edges at a higher internal resolution; the CRT pass then simulates how a phosphor screen would render those edges. Reverse the order and you are blurring already-blurred output, which collapses fine sprite detail.
Step-by-step calibration workflow
1. Update RetroArch and your shader packs via Online Updater.
2. Set internal resolution to 2x in Core → Internal Resolution (3x if your GPU handles it).
3. Load your shader chain: HQ2x as pass one, CRT-Geom (slang) as pass two.
4. Set scanline opacity to 0.25, persistence to 0.12, and leave phosphor bloom at a small positive value.
5. Launch a known test scene: a title screen or sprite-heavy stage you can compare against original hardware references.
6. Adjust gamma in small increments until shadow areas match your reference.
7. Save via Quick Menu → Save Core Preset to lock these settings to the current core.
Per-core profiles and sharing presets
RetroArch's core-specific config system means you can have one set of shader parameters for your SNES core, a different set for Game Boy (where an LCD grid shader often makes more sense than a CRT simulation), and another for arcade titles. Once you settle on a setup for a given core, Quick Menu → Save Core/Content Preset writes it cleanly so it loads automatically next time.
When sharing presets with the community, export the shader preset file and document the RetroArch version and shader pack revision you were running. That combination is what makes a shared preset actually reproducible. A preset file alone, without version context, is guesswork for the person receiving it.
Preservation captures: when to strip shaders back
For archival or academic captures, heavy CRT simulation is the wrong tool. Prefer raw pixel output or a very low-intensity preset when generating preservation screenshots or video captures. Keep a small README alongside any captured material that records the emulator version, core version, shader pack revision, and exact preset filename. That documentation makes your captures useful to future researchers rather than just visually interesting.
Performance on handhelds and low-power devices
Shaders are GPU-bound. A preset that runs smoothly on a desktop with a dedicated GPU may drop frames on a handheld running a mid-range ARM chip. CRT-Easymode is specifically designed to be lightweight without sacrificing the core CRT look. If even that causes frame drops, strip the shader chain to a single scanline pass with no bloom. Fidelity at full speed beats a beautiful preset at 45fps.
The preservation case for conservative, well-documented shader setups is straightforward: a config that runs identically on five different machines, shared cleanly with version notes, contributes something real to the emulation community. A heavily stacked, visually impressive preset that only one GPU can run contributes a screenshot.
This article was produced by Prism’s automated news system from verified source data, official records, and press releases, then run through automated quality and moderation checks before publishing. The system is built and supervised by the people who set the standards it runs under. Read our full AI policy.
Did this article answer your question?