RetroRGB Guide Sets Up OSSC for Lumacode NES and Famicom
A ready-made OSSC profile turns Lumacode NES and Famicom setup into a shortcut, cutting out the usual display-tuning guesswork for modded consoles.
A cleaner path for Lumacode NES on the OSSC
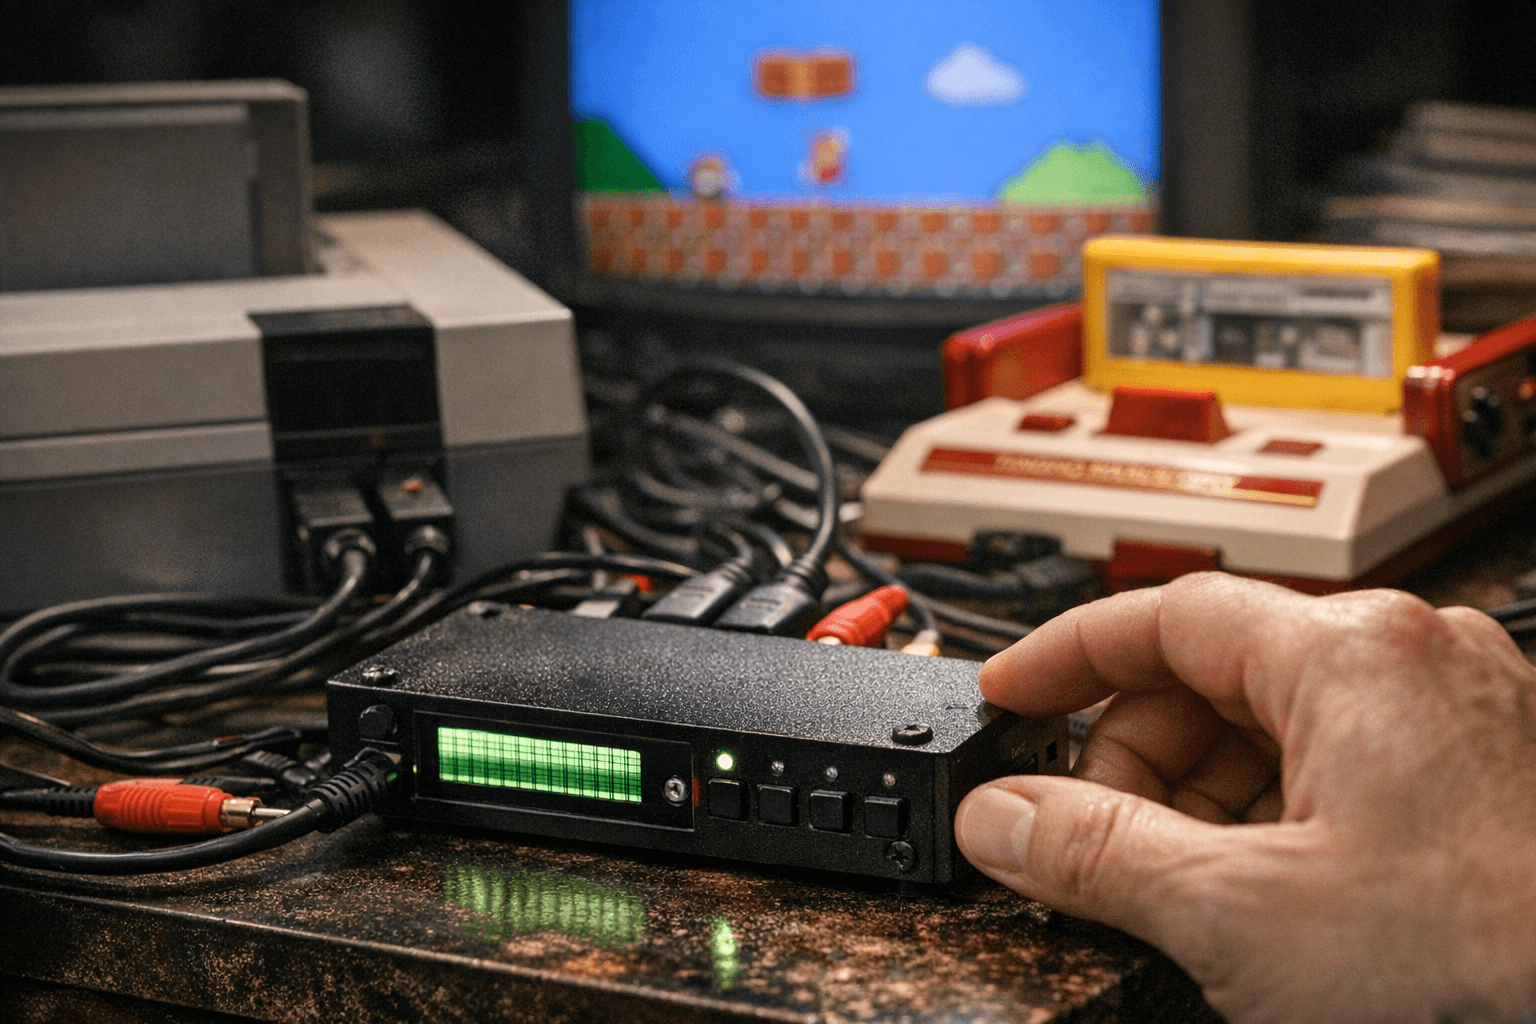
Bob’s new RetroRGB setup guide does something the scene has needed for a while: it turns Lumacode on the original OSSC from a fiddly experiment into a repeatable setup. If your NES or Famicom is already Lumacode-modded, the big win is simple, you can skip the usual trial-and-error and load a known-good profile instead of fighting with menus and guesswork.
That matters because the OSSC still occupies a rare spot in retro display gear. It is built as a low-latency video digitizer and scan converter for getting classic consoles and home computers onto modern displays without turning the image into mush. Add Lumacode to the chain, and you get a cleaner signal path for one of the most stubborn old systems to tame.
What Lumacode changes
Lumacode is C0pperdragon’s signal standard, and he describes it as especially useful for machines from the 1980s. In practical terms, it gives the NES and Famicom a path that the OSSC can handle more gracefully, which is exactly why this setup guide lands as a real utility piece instead of a theory lesson. The point is not just that the hardware can work together, but that it can work together in a way that preserves the original look while making modern display compatibility much less painful.
RetroRGB’s setup page makes the key limitation clear: on the original OSSC, NES Lumacode support is limited to 2x and 5x output modes. That is the kind of detail that saves people from chasing settings that will never behave the way they expect. If you are coming into this with a Lumacode-modded console, you are already in the narrow lane where the OSSC can do the job, but only if the rest of the setup is right.
The hardware and firmware check you cannot skip
The guide does not pretend every OSSC is equally ready out of the box. RetroRGB says the unit needs to be running firmware v1.21 or newer, and that version finalized Lumacode support while also fixing SD profile save and load behavior. That is important because it turns the guide from a vague recommendation into a concrete checklist: firmware first, then profile, then output mode.
There is also a hardware split that matters for owners of older boards. Firmware v1.21 either needs the newer v1.8 OSSC hardware or an older board that has been modified. For those older revisions, the required change is very specific: remove SMD resistor R35 and add a wire between TVP7002 pin 25 and the FPGA-side pad of the removed resistor. VideoGamePerfection notes that on those modified older boards, the red LED no longer works and the equivalent status indication is moved to the green LED, while v1.8 and newer boards have the change built in and keep red LED functionality.
That is the real adoption barrier the guide helps clear. A lot of retro setup advice fails because it stops at “install the mod and adjust the settings.” This one goes further and tells you where the easy path ends, what hardware revision you need, and what exact change is required if you are working with an older OSSC.
Why the prebuilt profile matters
The real value here is the pre-configured profile. Paulb-NL updated the OSSC Profile creator to support v1.20-and-up firmware profiles and to convert older profiles, which makes the current workflow much friendlier than the old one. Instead of building a setup from scratch, you can use a profile that already matches the firmware and the Lumacode-ready behavior RetroRGB is documenting.
That is especially useful for players who care about image quality but do not want to spend an evening testing every menu combination. A prebuilt profile removes a lot of the friction that usually keeps people on the sidelines. For a community that spends a lot of time preserving original hardware output, that kind of shortcut is not a compromise, it is a better on-ramp.
The practical checklist for a clean setup
Before you start
- Make sure the console is Lumacode-modded.
- Confirm the OSSC is on firmware v1.21 or newer.
- Check whether your OSSC is a v1.8 board or an older revision that has already had the R35 and wiring modification.
- Format the OSSC MicroSD as FAT32 or exFAT after loading v1.21 firmware.
Those are the basics that decide whether the rest of the guide will be painless or frustrating. The MicroSD note is a small one, but it matters because SD profile loading is part of what makes the ready-made setup useful in the first place. Once the firmware and card are sorted, the actual profile-driven part of the process becomes much more straightforward.
What the setup gives you
The immediate payoff is a cleaner, more predictable signal chain from an NES or Famicom into the OSSC and then into a modern display. Because the original OSSC is doing the scan conversion work, you keep the low-latency appeal that made it popular in the first place. Because Lumacode is already built around making that signal easier to handle, you are not forcing the system to behave like something it is not.
That combination is why this guide has practical value beyond a single modding crowd. It helps people who already own an OSSC, people who have a Lumacode NES or Famicom, and anyone who wants a documented path instead of a forum scavenger hunt. In a hobby where one wrong menu choice can waste an hour, a known-good profile is worth more than another abstract setup rundown.
The wider context around the guide
RetroRGB also points readers to background material on C0pperdragon and to a build video for a modern NES project, which adds useful context for anyone who wants to understand where Lumacode fits in the broader modding ecosystem. That matters because this is not just a one-off trick for one console. It is part of a mature hardware scene where inventions, firmware work, and profile tools have started to line up into repeatable workflows.
That is the bigger story behind Bob’s guide. The community has moved from “can this be made to work?” to “here is the exact configuration that already does.” For OSSC owners with a Lumacode NES or Famicom, that shift turns a complicated display problem into something much closer to a ready-made solution.
Know something we missed? Have a correction or additional information?
Submit a Tip