8 Sourdough Tips Help Beginners Save Money and Bake Better Bread
Skip the discard step and by day 10 you'd need more than 800 grams of flour per single feeding; here's the real cost math behind home sourdough.
The economics of home sourdough are worth interrogating before you buy a single bag of flour. A standard artisan sourdough loaf at a grocery store runs $5 to $10; raw ingredient costs for the same loaf baked at home sit at $1 to $2 in flour, water, and salt. Bake once a week and the ingredient savings approach $200 a year. But those numbers only hold if you actually produce a loaf, and that's entirely contingent on beginner habits that protect against discard waste, starter failures, and loaves that never rise. The home baker behind a recent first-person guide framed the whole enterprise this way: baking your own bread is the most reliable way to cut a recurring grocery line item, and sourdough specifically rewards repetition because the starter is perpetual and free to maintain once it's running. Getting the habits right early is what makes the math work.
Be patient with your starter
The most important reframe for anyone new to sourdough is that the starter is a living culture, not a packet of instant yeast. It doesn't work on demand; it works on schedule. The process begins by mixing whole-wheat flour and warm water in a jar, covering it loosely, and leaving it alone for the first two days. On day three, you discard half and feed it with a fresh addition of flour and water, then repeat. The timeline to a reliably active starter is typically seven to fourteen days, and rushing that window is the single most common reason beginners conclude their starter "didn't work" and give up before baking a single loaf.
Find the right temperature window
Starter health is inseparable from ambient temperature. The productive range sits between 70 and 75°F; below that threshold, fermentation slows dramatically and a starter can appear dormant or dead when it's simply cold. Beginners who keep their homes cool or air-conditioned often misread sluggish activity as a failed culture and either overfeed or restart unnecessarily, both of which add to flour cost and delay. A warm, draft-free corner of the kitchen counter, away from air vents, is often the simplest fix available and costs nothing.
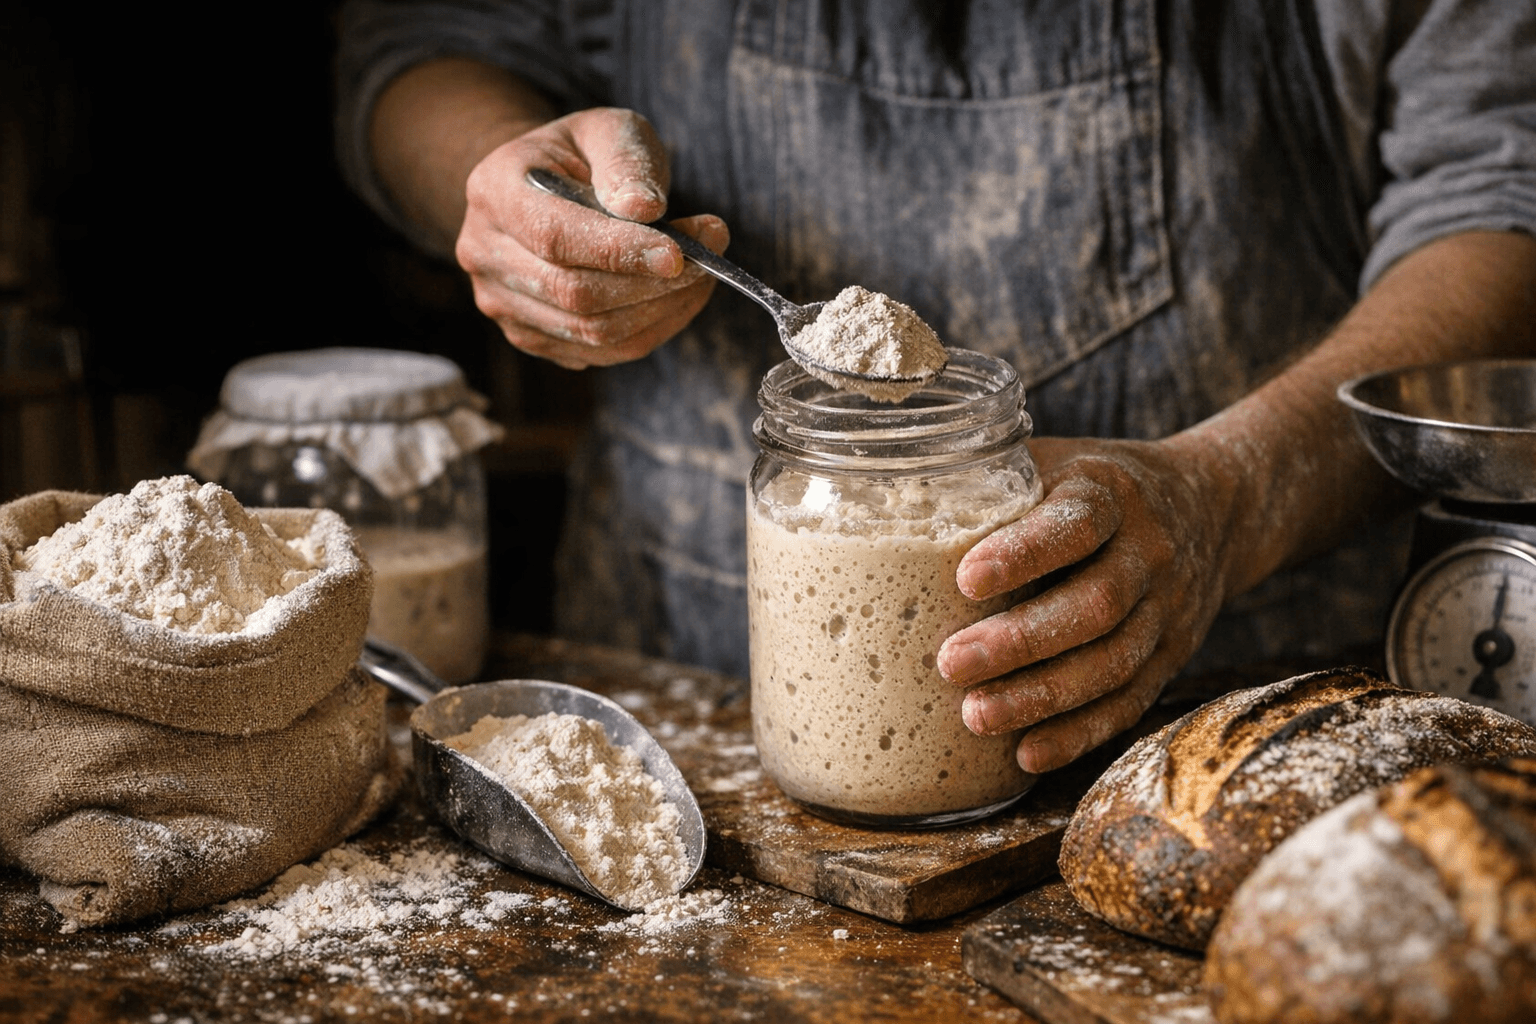
Learn to read your starter before you bake
Knowing when a starter is actually ready to leaven a loaf removes a significant source of beginner waste, because using an underdeveloped culture means a failed bake regardless of how well everything else is executed. The sensory benchmarks are concrete: "You'll know it's strong if it's fluffy and full of bubbles with a nice scent." The culture should have doubled in volume since its last feed, bubbles should be visible throughout the jar (not just at the surface), and the smell should be pleasantly tangy rather than sharp or chemical. Any loaf baked before those three conditions are met is statistically more likely to be dense, under-risen, and effectively a $1 to $2 write-off.
Understand the discard math before it burns your budget
Here is the surprising number that changes how beginners think about discard: skip that step entirely and by day 10, you'd need more than 800 grams of flour per single feeding, because an unfed starter compounds exponentially with every cycle. According to The Pantry Mama, a sourdough-focused baking resource, a starter left to grow without discard would demand over 300 grams of flour per feed as early as day five, rising past 800 grams per feed by day 10. A standard 5-pound bag of all-purpose flour weighs roughly 2,268 grams; at that trajectory, you'd burn through nearly half a bag in a single day of feedings, before anything edible comes out of the oven. The discard step isn't waste. It's the mechanism that keeps the starter at a manageable size and the flour budget intact.
For a beginner on a weekly baking schedule, the practical maintenance routine is straightforward: keep the jar to around 50 grams of starter, discard down to 25 grams before each feed, then add 25 grams of flour and 25 grams of water. That pace uses roughly 175 grams of flour per week on maintenance alone, or about 700 grams per month, well under a third of a standard 5-pound bag.
Put discard to work instead of throwing it away
Even properly managed discard accumulates, and discarding it into the bin erodes the ingredient savings that made sourdough attractive in the first place. The most budget-protective habit is to collect discard in a separate jar stored in the refrigerator and deploy it in recipes that don't need an active, leavening-ready culture: sourdough crackers, pancakes, dinner rolls, and flatbreads all absorb discard effectively. For households that don't want an ever-growing discard jar, composting is the zero-waste alternative. What it should never be is a routine trash disposal.
The minimalist shopping list for a beginner on a weekly schedule needs only:
- Bread flour or all-purpose flour (a 5-pound bag covers several weeks of both maintenance and baking)
- A small amount of whole-wheat flour for the initial starter build (a single bag lasts months)
- Non-iodized salt (iodized salt inhibits fermentation)
- A kitchen scale for consistent measurements
That's the entire material commitment to start.
Refrigerate when baking isn't on the schedule
A starter doesn't require daily feeding once it's established, and treating it like it does is both unnecessary and expensive in flour. A healthy, mature starter can be stored in the refrigerator and fed once a week. Pull it out the evening before a planned bake, give it a feeding, leave it at room temperature overnight, and it will be active and ready by morning. This approach fits sourdough into a realistic household schedule and stops the flour drain that comes from maintaining an active culture through weeks when no baking is actually happening.
Choose simple equipment over specialty gear
The equipment argument for sourdough beginners is almost entirely about restraint. Ceramic bowls and silicone spatulas handle mixing and folding well, and stainless steel is generally fine for most tasks. What genuinely matters is what to avoid: reactive metals like uncoated aluminum can interact with an acidic starter and alter the flavor in ways that beginners often mistake for technique problems. Beyond that basic caveat, the first months of sourdough baking require no Dutch oven, no banneton, and no lame. Those tools improve the experience eventually; they don't determine whether a first loaf is worth eating.
Protect the loaf from the failures that actually cost money
Ingredient cost per loaf may be $1 to $2, but a failed loaf still consumes that amount plus the several hours committed to the bake. The beginner failure points that actually drive waste are predictable: baking with a starter that hasn't hit the bubble-and-double threshold, skipping or shortening the bulk fermentation that builds dough structure, and slicing the loaf too soon after it leaves the oven. A loaf needs at least an hour, preferably two, to finish its internal set after baking; cutting it early produces a gummy crumb that reads as a bake failure when it's actually a cooling failure. These aren't advanced techniques. They're the habits that separate a $2 learning experience from a $2 loss.
The home-baking savings that first drew you to sourdough are real, but they're conditional. The bread gets cheaper every time you don't fail, and you fail less often when the starter is properly maintained, the temperature is right, and the discard isn't compounding against you. Get those variables locked in early and the economics take care of themselves.
This article was produced by Prism’s automated news system from verified source data, official records, and press releases, then run through automated quality and moderation checks before publishing. The system is built and supervised by the people who set the standards it runs under. Read our full AI policy.
Did this article answer your question?