RecipeCreek's Complete Sourdough Starter Guide Covers Ratios, Timelines, and Troubleshooting
Most sourdough starters fail from guesswork, not bad flour. RecipeCreek's new guide fixes that with exact ratios, day-by-day timelines, and a full troubleshooting playbook.
The starter sitting on your counter is either thriving or silently struggling, and the difference almost always comes down to consistency in three variables: flour weight, water weight, and timing. RecipeCreek's newly published guide, "The Last SOURDOUGH STARTER RECIPE You Ever Need," strips away the ambiguity that derails so many first attempts and replaces it with explicit numbers, observable checkpoints, and a troubleshooting section that covers everything from hooch to mold. For bakers who've been winging it with volume measures and vague instructions, the shift to a weight-based, timeline-driven approach is genuinely transformative.
Building From Day One: The Initial Multi-Day Build
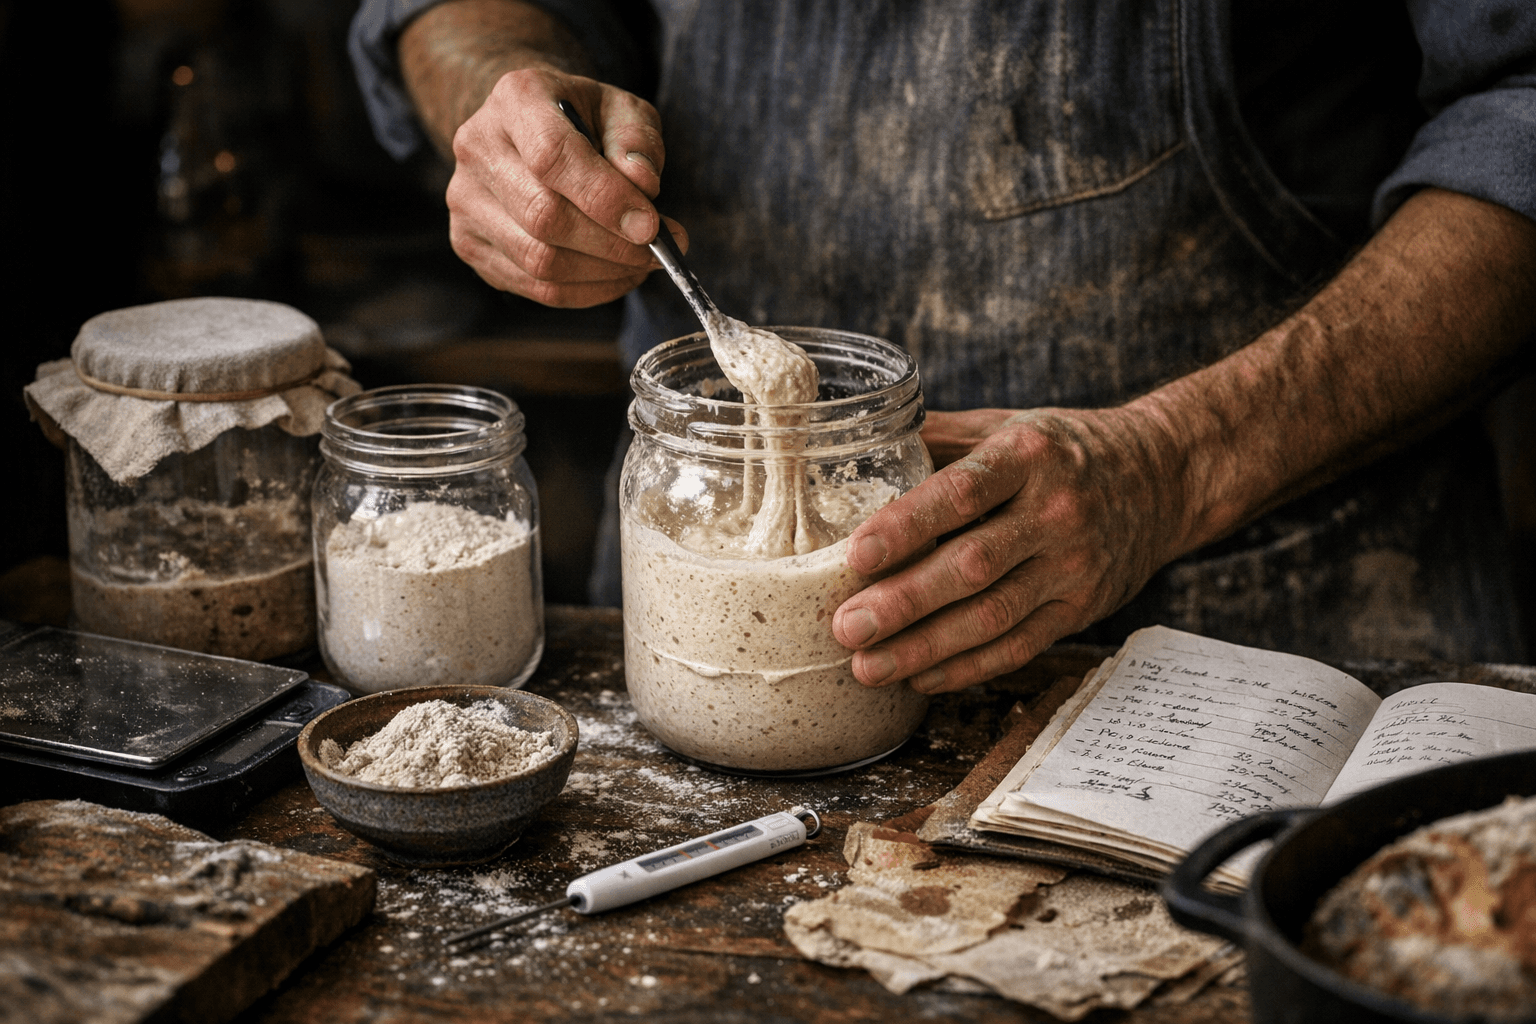
The foundation of the RecipeCreek method is an equal-weight flour-and-water build, meaning the same gram count of each goes into the jar every single time. That 100% hydration baseline keeps variables minimal while the wild yeast colony establishes itself. One practical accelerant the guide recommends is starting with whole-wheat flour rather than white: the bran carries more naturally occurring yeast and bacteria, so activity tends to appear faster in the first few days. As the culture matures, bakers can transition to whatever flour suits their bread goals.
Daily discards and feedings are non-negotiable during this phase. Removing a portion of the old culture before each feed prevents acidity from building to the point where it suppresses the very organisms you're trying to cultivate. The guide stresses using a kitchen scale throughout, not measuring cups, because flour density varies enough between scoops to throw off the ratio and produce inconsistent results across batches.
Reading the Timeline: What to Expect and When
One of the guide's most useful contributions is its set of time-based checkpoints, giving bakers a day-by-day picture of what bubbling and rise patterns should look like as the culture develops. New bakers often panic when activity seems slow on day two or three, or misread a false rise on day one as evidence of a healthy starter. Having concrete expectations for each stage takes the second-guessing out of the process.
Visual cues and smell profiles are documented alongside these checkpoints. A healthy, developing starter produces a pleasant acidic or faintly fruity aroma as lactic and acetic acids accumulate. The texture of the surface matters too: fine, evenly distributed bubbles signal vigorous fermentation, while large, irregular pockets that collapse quickly suggest the culture is past peak and needs to be fed sooner.
Starter Readiness: Knowing When to Bake
The guide outlines a clear set of readiness markers, and its most important advice is to use them in combination rather than relying on any single indicator. No one test tells the whole story.
The key signals to look for together:
- Consistent doubling in volume within a predictable window of hours after each feeding
- A pleasant acidic or fruity aroma with no sharp solvent notes
- Stable, fine-bubbled surface texture without large collapsing pockets
- A favorable response to the float or poke test when used alongside the other cues
The float test, dropping a small spoonful of starter into water to see if it floats, gets a measured endorsement here. It can confirm readiness when the other signs are already positive, but it's not reliable enough to use in isolation. The poke test, pressing the surface gently and watching for a slow spring-back, similarly works best as one data point among several.
Maintenance: Daily Baking vs. the Refrigerator
Once a starter is established, the maintenance strategy depends entirely on how often you bake. The guide addresses both scenarios directly. For bakers producing loaves multiple times a week, a countertop routine with daily feedings keeps the culture primed and ready. For everyone else, refrigeration is the practical answer: the cold dramatically slows fermentation, allowing once-a-week feedings without sacrificing starter health.
Warmer kitchens require their own adjustment. Fermentation accelerates with temperature, so a starter in a 78°F kitchen may need feeding twice a day to avoid over-acidification. The guide walks through how to recognize when a countertop starter is moving faster than expected and how to adapt the feeding cadence accordingly, rather than just following a fixed clock schedule.
Troubleshooting: Hooch, Solvent Smells, and Mold
Even well-maintained starters run into problems. RecipeCreek dedicates a full section to the most common issues and how to correct them.
A gray or brown liquid pooling on top of the starter is hooch, essentially alcohol produced when the culture runs out of food. It looks alarming but is not a death sentence. Pour it off or stir it back in, feed promptly, and increase feeding frequency going forward.
A sharp, nail-polish-remover or solvent smell indicates the culture is producing too much ethanol and not enough of the organic acids that make bread taste good. This usually means the starter is being fed too infrequently or kept too warm. Corrective action involves more frequent feedings, possibly with a small addition of whole-grain flour to reintroduce diverse microbial activity and give the culture a metabolic boost.
Mold, which appears as fuzzy patches in colors ranging from white to green to black, is the one situation that requires discarding entirely and starting over. Unlike hooch or off smells, mold contamination cannot be fed or stirred away.
For sluggish starters that are alive but barely active, the guide recommends a combination of warmer feeds, using water in the 80-85°F range rather than room temperature, and occasional whole-grain boosts to reintroduce nutrients and microbial diversity.
Putting Discard to Work
Every feeding produces discard, and the guide makes a strong case for treating it as an ingredient rather than waste. Quick-turnaround recipes for crackers and pancakes are included, both of which work well with unfed discard and require no additional leavening. Crackers in particular are an ideal entry point: the discard's acidity translates directly into flavor, the recipe is forgiving, and the result is something worth making repeatedly. The guide also points readers toward video resources and online communities for ongoing support as their practice develops.
The Case for Weighing Everything
Running through every section of the RecipeCreek guide is one consistent conviction: precision creates repeatability, and repeatability creates skill. A baker who measures by weight and tracks feeding times builds an actual mental model of how their starter behaves. One who eyeballs ratios and feeds whenever it seems about right is essentially starting from scratch with every loaf. The equal-weight flour-and-water ratio isn't just a formula; it's a foundation for understanding how hydration, temperature, and timing interact, which is the knowledge that eventually makes baking intuitive rather than anxious.
That shift from novelty to durable skill is exactly what separates bakers who bake sourdough once from those who still bake it years later.
This article was produced by Prism’s automated news system from verified source data, official records, and press releases, then run through automated quality and moderation checks before publishing. The system is built and supervised by the people who set the standards it runs under. Read our full AI policy.
Did this article answer your question?