How to Insulate Tiny Homes: Thermal Bridging, Sealing, HVAC Sizing
Learn practical steps to stop heat loss in tiny homes by addressing thermal bridging, airtight sealing, and right-sized HVAC so you stay cozy and cut energy use.
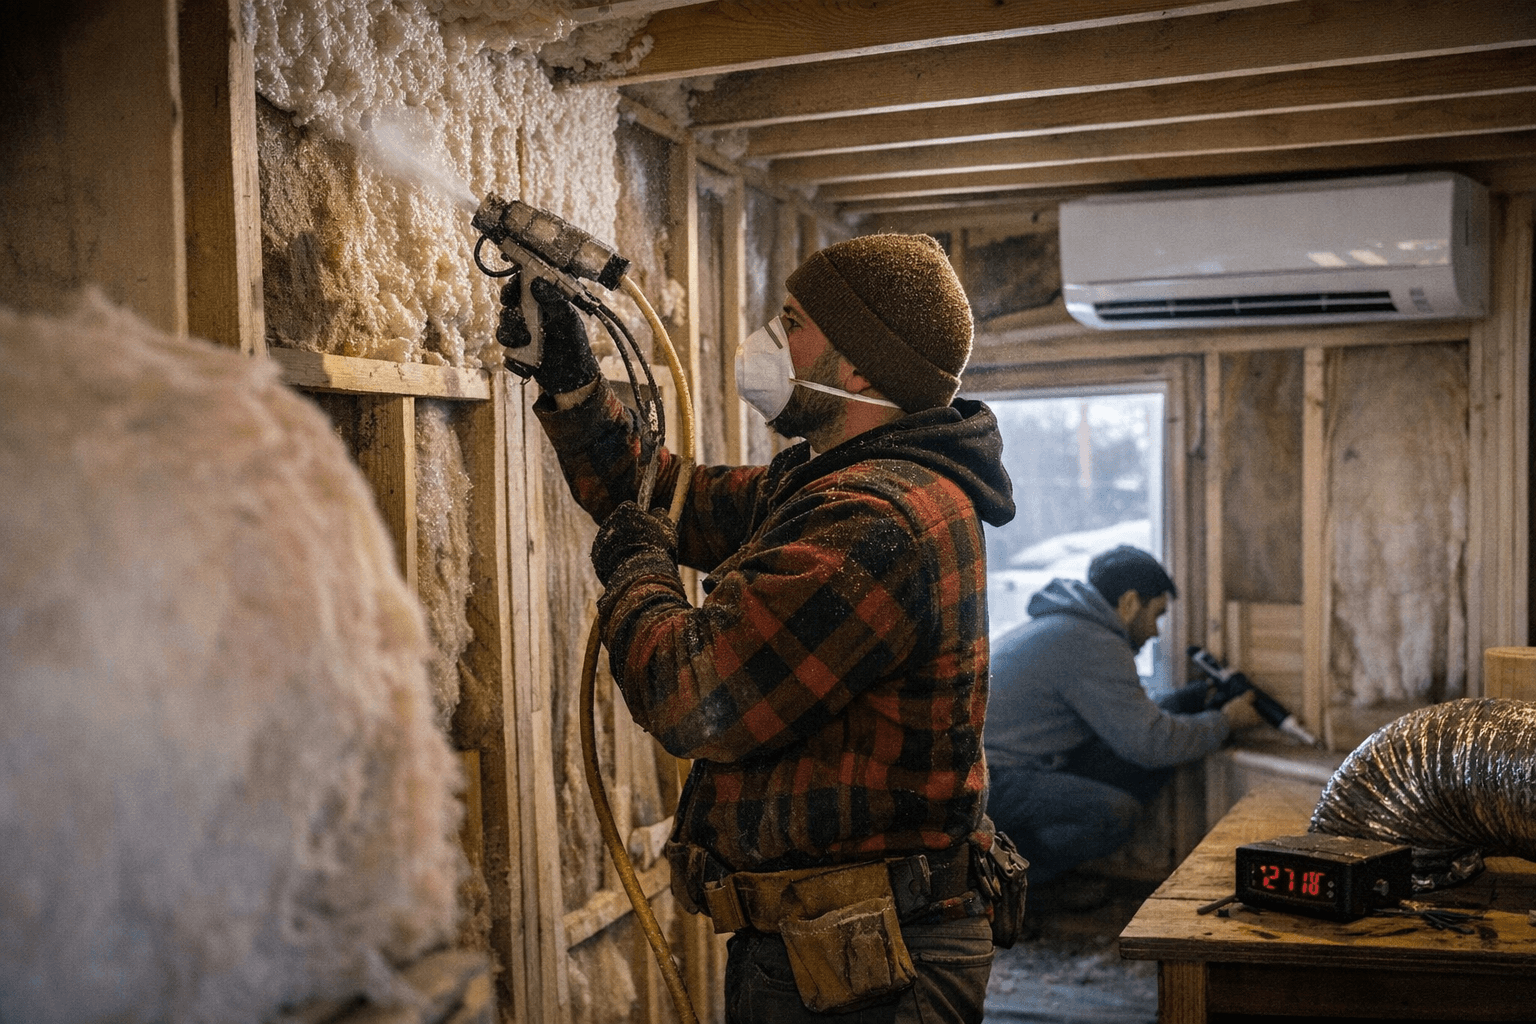
1. Thermal bridging, identify and interrupt heat paths
Thermal bridging happens when conductive elements (metal trailer frames, studs, or fasteners) create a direct route for heat to bypass insulation. In tiny houses on wheels (THOWs), the chassis and trailer frame are frequent culprits; insulating around those components or adding a continuous thermal break under the floor dramatically reduces cold spots and frost on interior finishes. Add or upgrade perimeter insulation (around the floor and foundation plane) and loft insulation (roof and ceiling cavities) sized to the tiny-home envelope, thin walls mean you must be strategic about R-value per inch.
Choose materials and methods that fit the vehicle-style construction: rigid exterior foam or continuous insulated sheathing provides a thermal break over studs, while closed-cell spray foam can seal awkward voids around trailer frames and minimize air movement. Pay attention to mechanical fasteners and window bucks, use insulated spacers or thermal tape where metal penetrates a continuous insulation layer. Community relevance: many tiny-home neighbors report condensation and mildew concentrated near frames and wheel wells; tackling bridging is the most direct fix that improves comfort and reduces winter energy bills.
- Tip: If you can only do one upgrade, install a continuous layer (¼–½ in. rigid foam or equivalent) under the interior finish to interrupt stud-to-stud conduction.
- Tip: When retrofitting an existing THOW, prioritize insulating around the chassis before adding interior finishes to avoid trapped moisture.
2. Sealing, stop air leaks and upgrade windows
Air-sealing is the most cost-effective way to reduce heat loss in small volumes because drafts make a tiny home feel much colder than the thermostat indicates. Focus on weatherstripping doors and windows, sealing service penetrations (plumbing, electrical, ventilation ducts), and caulking seams where different materials meet (walls to roof, window frames to bucks). High-performance window seals and thermal curtains are especially important in tiny homes because a single leaky sash or poorly seated window accounts for a large proportion of heat loss in a compact space.
Use a layered approach: durable gaskets and compression weatherstripping on doors and windows, low-expansion spray foam for irregular gaps, and acrylic or silicone caulk for narrower seams. Install thermal curtains or insulated cellular shades to trap a layer of still air at night, and consider magnetic or removable storm panels for occasional cold snaps, these are inexpensive community-friendly upgrades that often get swapped and discussed at local meetups. When sealing, leave designed ventilation (bath/kitchen fans, trickle vents) intact and balance air tightness with indoor air quality, add a small heat-recovery ventilator (HRV) if you tighten the shell significantly.
- Tip: Label and map every sealed penetration during retrofit so future repairs and upgrades don’t accidentally breach the air barrier.
- Tip: Use removable access panels at service points so tradespeople can work without ripping the air barrier each time.
3. Insulation materials and moisture management, pick the right product for your climate
Picking insulation for a tiny house is more nuanced than “more R-value equals better” because wall thickness is limited and moisture risks vary by climate. Closed-cell spray foam performs well in tight cavities and acts as a vapor retarder, making it a solid choice for thin assemblies and around metal trailer frames where condensation risk is higher. However, it’s pricier and harder to modify later. In milder, humid climates, vapor-open strategies (fiberglass with exterior rigid foam or mineral wool with good drainage) can reduce moisture trapping and rot risk.
Match material to climate and assembly: use moisture-resistant insulation where condensation is likely (near wheel wells, floor seams), select vapor-impermeable layers carefully in cold climates to avoid interior condensation, and provide a capillary break between wood framing and wet surfaces. Closed-cell spray foam is great “strategic” insulation for tight or irregular cavities, not necessarily to fill every cavity if cost or future modification matters. Community builders often combine products: rigid foam exterior for a continuous thermal break, mineral wool for sound and fire resistance in walls, and targeted closed-cell foam at problem spots.
- Tip: In retrofit cases, monitor for cold-side condensation points for a season before sealing everything, run a dehumidifier if moisture shows up during the first winter.
- Tip: Keep documentation of insulation types and locations in the electrical/utility cupboards for future owners and inspectors.
4. Windows, curtains, and thermal layering
Windows are disproportionately important in tiny homes. Upgrading to high-performance sealing (compression gaskets, insulated bucks, and properly flashed assemblies) reduces air leakage and thermal loss around frames. Combine sealed windows with thermal curtains or cellular shades: these add an insulating dead-air layer and are a low-cost way to improve overnight comfort.
Consider interior storm panels for rental or located-together tiny-home communities as a removable solution for extreme nights. Ensure window installations include proper flashing and drainage to prevent trapped moisture behind trim, cheap repairs today avoid mold in a week of cold, wet weather.
- Tip: Use dark, insulated curtains on south-facing windows in winter to capture passive solar gain during the day, then close them at night to retain heat.
- Tip: Keep window sill-mounted radiators or heaters off by a small margin to avoid reheating chilled glass and encourage convective warmth across the room.
5. HVAC and heat-source sizing, match capacity to tiny volume
A tiny home's heating load is much smaller than a conventional house's, but proportionally more sensitive to over- or under-sizing. Oversized systems cycle and waste energy; undersized systems run continuously and fail to maintain comfort. Rather than guessing, perform a heat-loss calculation specific to the tiny envelope (a Manual J or community-minded online calculator will help) that accounts for the lower internal volume, insulation levels, infiltration, and thermal bridges.
Choose heating equipment designed for small loads: ductless mini-splits, compact electric heat pumps, or properly vented propane/natural gas units sized for the calculated load. Remember that distribution matters, short duct runs, ceiling-mounted low-volume heat registers, or direct-wall-mounted units reduce losses. If you rely on space heaters, follow small-space heater safety rules carefully: maintain clearances, never use unvented combustion heaters in very tight shells without adequate ventilation, install carbon monoxide and smoke alarms, and follow manufacturer specs for placement and amperage.
- Tip: Pair heating upgrades with control upgrades, a smart thermostat or simple programmable controller prevents waste and keeps occupants comfortable.
- Tip: Consider a multi-point approach: a small primary heat pump for steady loads plus a supplemental low-energy heater for very cold snaps.
6. Practical checklist and community playbook
Turn knowledge into action with a short checklist to use before cold weather or when planning a retrofit. Start with a blower-door or house-pressurization test if possible, map cold spots, then sequence work: thermal breaks and chassis insulation first, air sealing second, window and curtain upgrades third, and finally HVAC right-sizing. Share results and product experiences with your local tiny-house community; many neighborhoods run swap-and-help sessions for weatherstripping and curtain sewing.
- Checklist highlights: inspect chassis and wheel wells, add continuous perimeter insulation, seal service penetrations, upgrade window seals, install thermal curtains, use closed-cell spray foam strategically, and calculate heating load before equipment purchase.
Closing practical wisdom Insulation in tiny homes is about targeted fixes and balance: stop the obvious heat leaks first (thermal bridges and drafts), choose materials that suit your climate and moisture risk, and then size the heating system to the reduced volume. Small investments in continuous insulation, careful sealing, and the right-sized heat source will make your tiny home feel larger, use far less energy, and keep your community’s shared winter stories pleasant instead of shivery.
This article was produced by Prism’s automated news system from verified source data, official records, and press releases, then run through automated quality and moderation checks before publishing. The system is built and supervised by the people who set the standards it runs under. Read our full AI policy.
Did this article answer your question?