Tiny House Hookup Guide Covers Water, Sewer, and Electrical Connections
Connecting water, sewer, and electricity to your tiny house doesn't have to be overwhelming - here's what you need to know before day one on site.

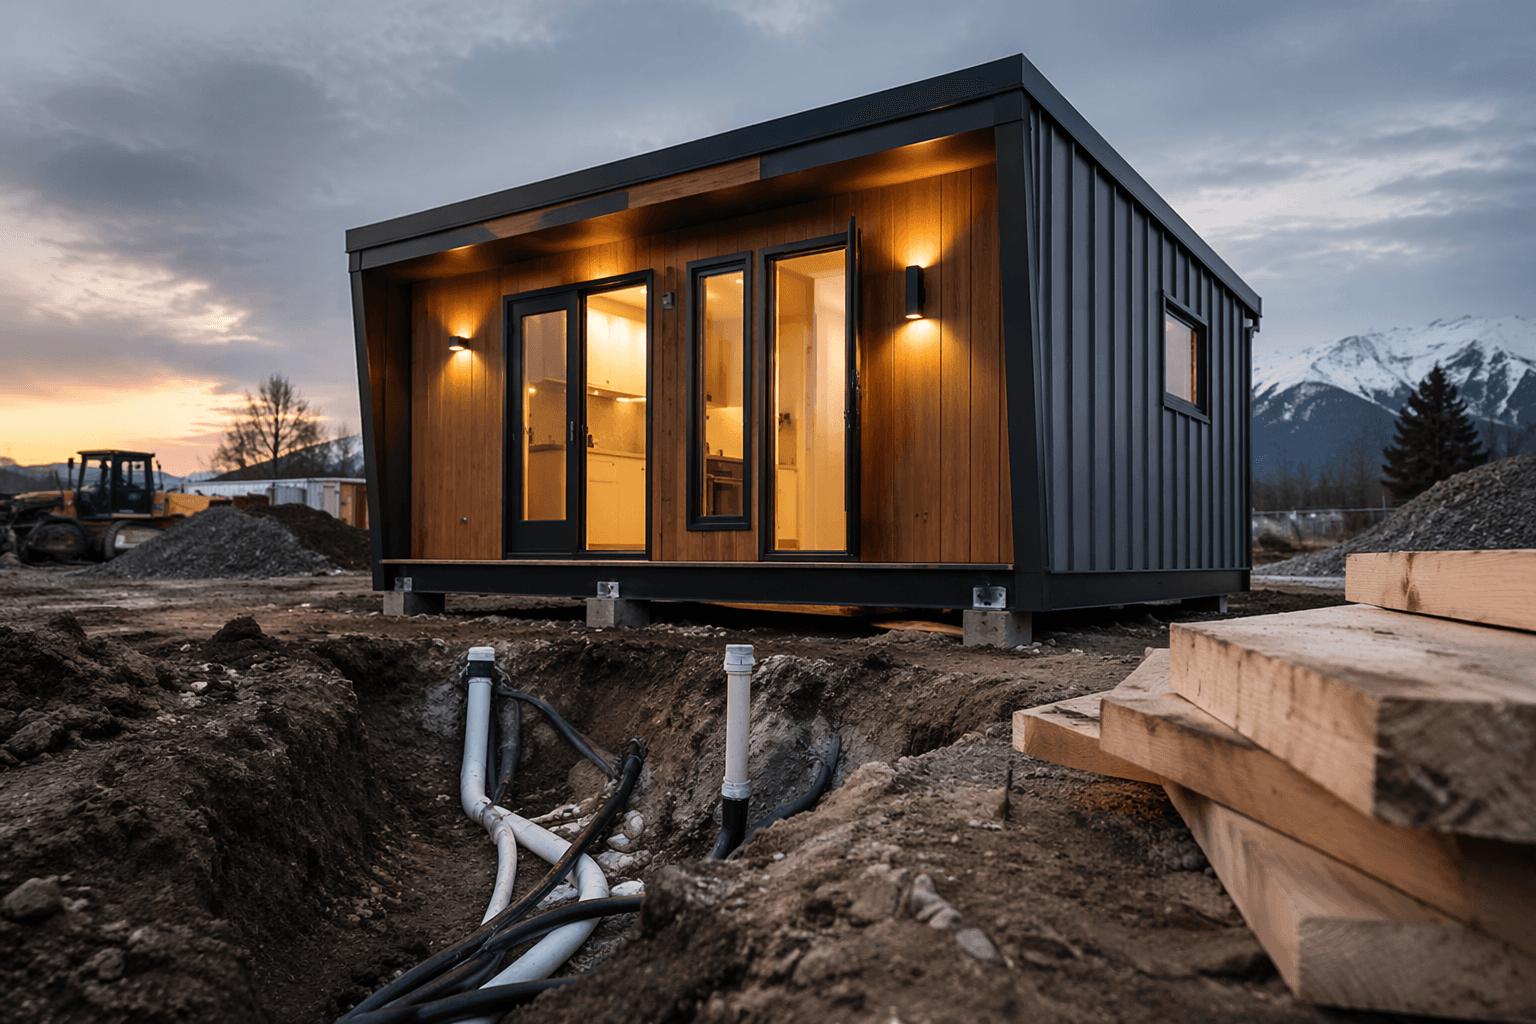
Getting your tiny house onto a piece of land is one thing. Getting it actually livable is another. That first day of utility hookups can feel like the most technically demanding moment in the entire tiny house journey, and doing it wrong means cold showers, backed-up drains, or worse. Whether your home is on wheels or set on a foundation, the process of connecting water, sewer, and electricity follows a clear logic once you understand what each system needs and how each type of tiny house handles it differently.
Tumbleweed Houses has put together a step-by-step resource aimed squarely at new tiny home owners and builders tackling these connections for the first time. The guide walks through the full scope of first-day utility hookups, covering both tiny houses on wheels (THOWs) and foundation-based builds, recognizing that these two formats have meaningfully different requirements even when the end goal, a functional, connected home, is exactly the same.
Water Connections
Water hookup is typically the most approachable of the three utility connections, but it still demands attention to the right fittings, pressure levels, and hose quality. THOWs generally connect to a municipal or campground water supply using a standard drinking-water-safe hose, the same type used in RVs and campers. Pressure regulation matters here: city water pressure can run higher than your tiny home's plumbing is rated to handle, so a pressure regulator installed at the spigot end of your hose is a smart first investment. For foundation homes, the connection typically runs through a buried supply line tied into the property's main water service, which may require a licensed plumber depending on local code.
Winterizing your water supply lines is a conversation worth having early. Exposed hoses and uninsulated supply connections can freeze overnight in cold climates, and a burst line on your first week on site is a frustrating and avoidable setback. Foam pipe insulation, heat tape, and even the simple habit of disconnecting hoses during hard freezes can protect your system through winter.
Sewer and Waste Connections
Sewage handling varies more dramatically between tiny house types than almost any other system. A THOW parked at an RV park or private property typically connects to a sewer hookup using a standard RV sewer hose and a 3-inch bayonet fitting, dumping into a cleanout, septic inlet, or dedicated dump station. The setup is straightforward but benefits from a good-quality hose with solid fittings and a slight downhill slope from your drain outlet to the connection point to encourage gravity flow.
Foundation tiny homes connect to sewer or septic in much the same way a traditional house does, with a drain line running from the home's main stack out to either a municipal sewer lateral or a septic tank on the property. If you're building on rural land without access to municipal sewer, a septic system or composting toilet setup becomes part of the planning conversation well before move-in day. Many tiny house owners in off-grid or semi-rural situations opt for composting toilets specifically to sidestep the cost and permitting complexity of a full septic installation.
Gray water, the drainage from sinks and showers as distinct from toilet waste, is another consideration. Some jurisdictions allow gray water to be handled separately through a simple French drain or leach field, while others require it to route through the full sewer or septic system. Knowing your local rules before you connect anything saves potential headaches with inspectors later.
Electrical Connections
Electrical hookup carries the highest stakes of the three systems, both from a safety standpoint and a code-compliance perspective. For THOWs, the most common setup mirrors an RV connection: a 30-amp or 50-amp shore power cord that plugs into a pedestal or exterior outlet on the property. A 30-amp connection runs most tiny house essentials comfortably, while a 50-amp hookup gives you more capacity for electric appliances, heat, or air conditioning without tripping breakers.
The shore power cord connects to your tiny home's main electrical panel, and from there your interior circuits distribute power just as they would in any home. Before connecting, confirm that the outlet or pedestal on the property side is properly grounded and rated for the amperage your cord is pulling. An improperly grounded connection is one of the most common and most dangerous mistakes in tiny house electrical setup.
Foundation tiny homes go through a more permanent electrical service connection, with a meter base, main disconnect, and panel installed to local utility and code specifications. This work almost always requires a licensed electrician and a permit, followed by an inspection before the utility will energize the connection. If you're doing an owner-builder project, this is the stage where partnering with a licensed professional pays for itself.
For those pursuing off-grid living, solar panels paired with a battery bank and inverter replace the shore power or utility connection entirely. Sizing your solar system correctly, matching panel wattage, battery capacity, and inverter output to your actual consumption, is a project of its own, but it gives you full energy independence and the ability to park on land without existing utility infrastructure.
A Few First-Day Priorities
Before flipping a single breaker or turning a single valve on move-in day, a quick checklist approach saves time and prevents problems:
- Inspect all hoses, cords, and fittings for damage before connecting anything
- Confirm water pressure at the source before connecting your supply hose
- Check that your sewer connection has the right slope and a secure fitting
- Verify your electrical pedestal or outlet is grounded and rated correctly
- Have a flashlight, basic hand tools, and a pipe wrench within reach
The goal on day one isn't perfection; it's a safe, functional connection that gets you through the first night. Refinements, better hose management, a permanent electrical conduit run, upgraded fittings, come with time and familiarity.
Tiny house hookups reward preparation. Understanding what your specific home requires, whether it's on wheels at a friend's property or sitting on a permanent foundation, and knowing which connections you can handle yourself versus which ones need a licensed professional, is the foundation of a first-day setup that actually works. Tumbleweed Houses built this guide specifically for that first-day scenario, and the systems it walks through are the same ones every tiny house owner encounters sooner or later. Getting them right from the start means you spend less time troubleshooting and more time living.
This article was produced by Prism’s automated news system from verified source data, official records, and press releases, then run through automated quality and moderation checks before publishing. The system is built and supervised by the people who set the standards it runs under. Read our full AI policy.
Did this article answer your question?