Simple Wire-Bending Techniques Create Elegant Minimalist Wave Rings at Home
Wire-bending a wave ring at home requires little more than 20-gauge copper wire and the right technique — proof that fine-looking minimalist jewelry begins with understanding your materials.
There is something quietly radical about making your own ring. Not because the process is difficult, but because it forces you to understand, at a fundamental level, what jewelry actually is: shaped metal, held in tension, worn against skin. A wave ring made from bent wire is perhaps the most honest expression of that idea. No stones to distract, no elaborate casting process to obscure the maker's hand. Just wire, tools, and the deliberate curve of a wave.
The wave form has appeared in fine jewelry for centuries, from Art Nouveau brooches that mimicked water in motion to the sinuous lines of contemporary designers working in recycled gold. What makes it so enduring is structural as much as aesthetic: a wave is a series of controlled curves, and controlled curves are what give wire its strength, its spring, and its visual rhythm. When you bend that form yourself, you begin to understand why jewelers obsess over gauge, temper, and the precise placement of each bend.
Why 20-Gauge Copper Wire Is the Right Starting Point
Gauge matters enormously in wire work, and 20 gauge is a particularly instructive choice for learning the wave form. At approximately 0.81 millimeters in diameter, 20-gauge wire is substantial enough to hold a defined shape without springing back aggressively, yet fine enough to bend by hand with basic tools. It sits in a sweet spot between structural integrity and workability that thicker gauges like 18 or 16 cannot offer a beginner without a great deal of frustration.
Copper, specifically, is the material of choice here for practical and pedagogical reasons. It is soft enough in its annealed state to bend fluidly, which means your curves will be smooth rather than angular and forced. It is also inexpensive enough that you can practice the wave pattern multiple times without the anxiety that accompanies working in sterling silver or gold-fill. Copper's warm, reddish tone also shows the wave form with clarity, making it easy to evaluate the visual balance of each bend before you commit to a more precious metal. Think of copper at this stage the way a sculptor thinks of clay: a material that teaches the hands before the hands are trusted with bronze.
Tools You Will Actually Need
Wire-bending at this scale requires a small, specific set of tools. The temptation to improvise with household objects is understandable, but the results will show it. Round-nose pliers are non-negotiable for forming smooth, consistent curves; the tapered jaw allows you to vary the radius of each bend by repositioning where along the jaw you grip the wire. Chain-nose pliers, sometimes called flat-nose, are essential for straightening, gripping, and making sharper directional changes without leaving marks. A ring mandrel, or at minimum a cylindrical object of the correct diameter, ensures the finished piece is sized accurately rather than approximated.
A flush cutter, rather than a standard wire cutter, gives you clean ends that won't catch on fabric or skin. The difference between a flush-cut end and a pinched one is immediately apparent when you wear the ring. Wire work lives and dies in its finishing details, and a rough wire end is the fastest way to undermine an otherwise elegant piece.
Forming the Wave: A Sequential Process
The wave ring is built around a repeating S-curve that, when wrapped around a mandrel, creates the illusion of motion across the band. Here is the process as demonstrated in the technique video:
1. Cut a length of 20-gauge copper wire appropriate to your ring size, adding approximately 1.5 to 2 centimeters of extra length to account for the material consumed in the bends themselves.
2. Using round-nose pliers, form the first curve at the center of the wire, bending gently and repositioning the pliers to maintain a smooth arc rather than a sharp kink.
3. Reverse direction to create the opposing curve of the wave, keeping the amplitude of each bend consistent. Inconsistency here is the most common beginner error; the eye is remarkably sensitive to irregular rhythm in a repeated pattern.
4. Continue the S-curve pattern along the length of the wire, working outward from the center toward both ends. This approach keeps the design visually centered on the finger.
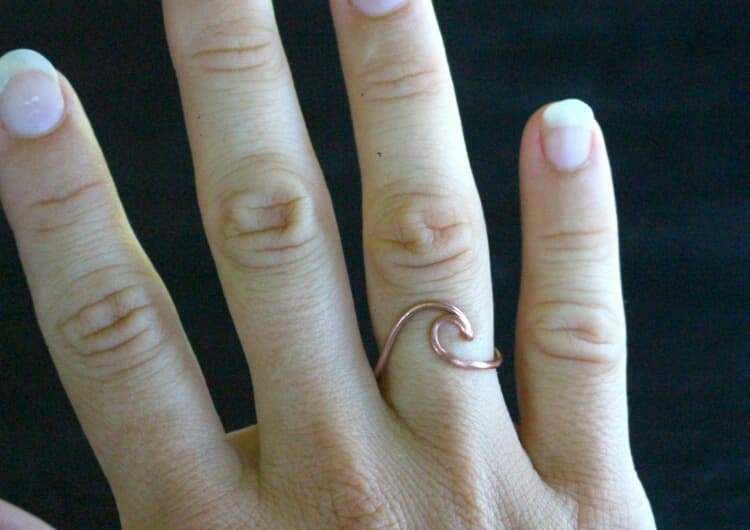
5. Wrap the shaped wire around a ring mandrel at the target size, coaxing it into a circular band while preserving the wave pattern across the top.
6. Use chain-nose pliers to bring the wire ends together at the inner base of the ring, securing them neatly. The join should sit on the palm side of the finger, where it is both less visible and more comfortable.
7. Flush-cut any excess wire and smooth the ends carefully. At this stage, a fine-grit nail file or a jeweler's needle file removes any remaining sharpness.
Reading the Form Before You Bend
One of the habits that separates competent wire work from genuinely elegant wire work is visualization before bending. Once copper wire has been bent and work-hardened through repeated manipulation, it becomes increasingly difficult to correct without cracking. Take time before beginning to sketch the wave pattern or trace it on paper, counting the number of peaks and valleys you intend to create across the ring's face. An odd number of waves tends to read as more dynamic; an even number creates symmetry that can feel almost architectural.
The amplitude of the wave, how high each curve rises from the central axis, also determines the ring's visual weight. A shallow wave reads as restrained and modern, the kind of piece that layers imperceptibly with other bands. A deeper wave becomes a statement, something closer to a sculptural cuff in miniature. Both are valid choices, but they require different amounts of wire and different levels of precision in the bending.
From Copper to Silver: Making the Transition
Once you have made the wave ring in copper to your satisfaction, the transition to sterling silver or gold-fill wire is a meaningful step. Sterling silver in 20 gauge behaves similarly to copper but is slightly springier, which means your bends will need slightly more deliberate pressure. Gold-fill wire, which carries a layer of gold mechanically bonded to a brass core, is warmer in tone and holds a polish beautifully. Neither requires different tools, but both reward the muscle memory developed through copper practice.
A wave ring made in sterling silver or 14-karat gold-fill is no longer a craft project in the hobbyist sense. It is a piece of jewelry that belongs in the same conversation as minimalist fine jewelry from independent studio designers, many of whom work in precisely this idiom. The wave form in silver, finished with a polishing cloth and worn on the index finger, reads as studied and intentional. The technique is simple. The result, if executed with care, is not.
This article was produced by Prism’s automated news system from verified source data, official records, and press releases, then run through automated quality and moderation checks before publishing. The system is built and supervised by the people who set the standards it runs under. Read our full AI policy.
Did this article answer your question?


