DIY bulkhead replacement: step-by-step tactics for safe interior repairs
A detailed case study lays out how to diagnose rotten bulkheads, remove joinery, template and cut marine plywood, and bond and fasten replacements safely. These techniques help small-boat owners tackle localized structural rot without compromising load paths.

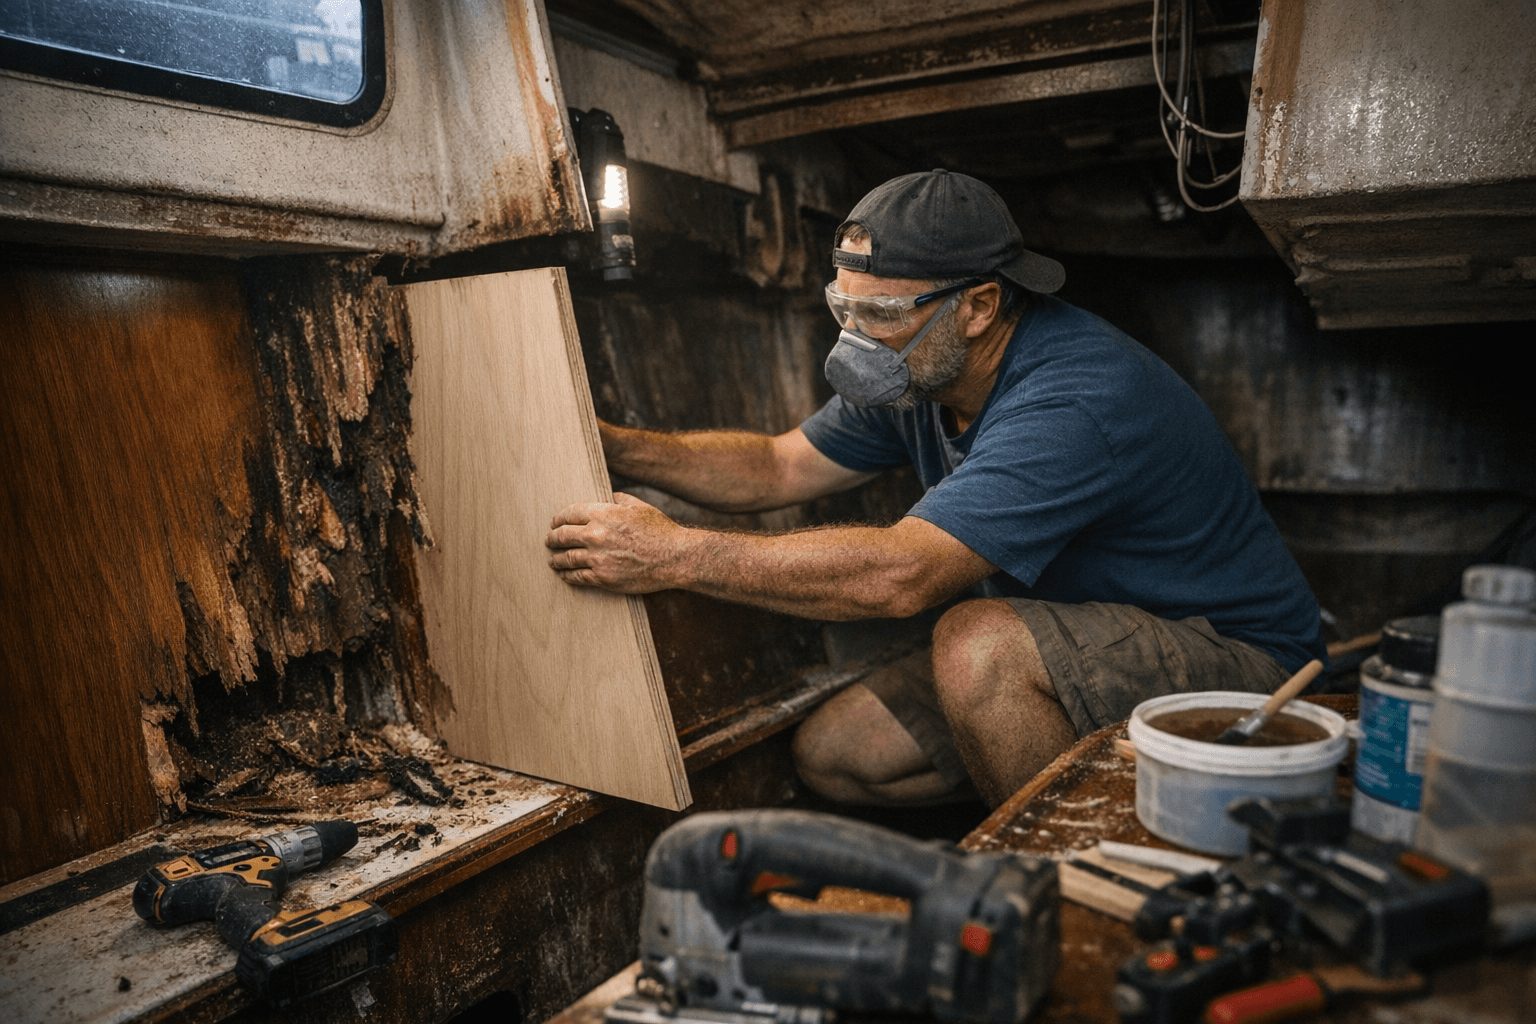
When a localized bulkhead becomes soft or rotten, it is more than an aesthetic problem, it can interrupt load paths that carry rig and hull loads. A recent case study of a DIY bulkhead replacement walks through practical steps you can use to repair interior structure while keeping safety and longevity front of mind.
The project begins with diagnosis. Probe suspect areas with a sharp awl or screwdriver, look for discoloration, and remove trim and joinery to expose the web of laminates, stringers, and backing. If the decay reaches into areas that carry rigging, keel or chainplate loads, stop and consult a surveyor; those are structural problems that go beyond simple panel swaps.
Once rot is removed and the damaged core excised, the next priority is a reliable template. Make a full-size template from cardboard or thin plywood that follows any camber or compound curve. Transfer the template to marine plywood that matches the original thickness or is planned to be glassed in place. Cut with tools suited to the cut line, jigsaw or circular saw for straight runs, oscillating tool or router for tight corners, and leave the piece slightly oversize for trimming at the final fit.
Dry-fitting matters. Test the replacement repeatedly, aligning edges and checking mating surfaces for gaps. The case study stresses that final bonding should be the last step after all mechanical fastenings are planned and pilot holes located. Use a combination of structural adhesive and mechanical fasteners; epoxy or modern structural adhesives lock out moisture and spread loads while stainless or coated fasteners hold pieces during cure and provide redundant strength. Pre-drill, countersink where needed, and use backing plates or stringers if the bulkhead ties into primary load paths.
Clamping and temporary shoring are essential during bonding. Use multiple clamps, ratchet straps or temporary screws to maintain pressure across the bond line and preserve alignment. Allow full cure time before loading the structure or reinstalling joinery. Finish edges with fillets, glass tape if specified, and fairing compound before painting or varnishing to seal and protect the repair.
Know the limits of DIY. If the rot is extensive, you cannot establish a continuous load path, or removing the bulkhead exposes other critical structure, hire a marine surveyor and a professional rigger. The wrong repair can shift loads and create a bigger problem.
Our two cents? Work methodically, test fits obsessively, and combine adhesives with mechanical fastenings. If you can trace load paths and restore continuous bearing, you can save a boat and a budget; if you can’t, call in expertise before you seal anything up.
Know something we missed? Have a correction or additional information?
Submit a Tip

