Vintage Synthesizer Restoration Checklist: Safety, Documentation, Parts, Community
Practical restoration checklist covers safety, documentation, parts, and community resources to keep vintage synths playable and safe.
Unplug the instrument and treat safety as the first and nonnegotiable step. Discharge power supply capacitors safely, use proper ESD handling and isolation, and bring-up on a current-limited bench supply or variac to prevent feedback effects that can destroy transformers or modules. High-voltage areas demand respect - CRT circuits, sealed electro-mechanical guts, and unknown faults are reasons to pause and consult a professional.
Documentation is the next priority. Source service manuals and schematics from manufacturer archives, community scans, or museum resources before soldering. Study power-rail values, connector pinouts, and parts lists so replacements match original ratings. Bring restoration logs and a copy of the schematic to every bench session so you can trace changes and avoid repeating mistakes.
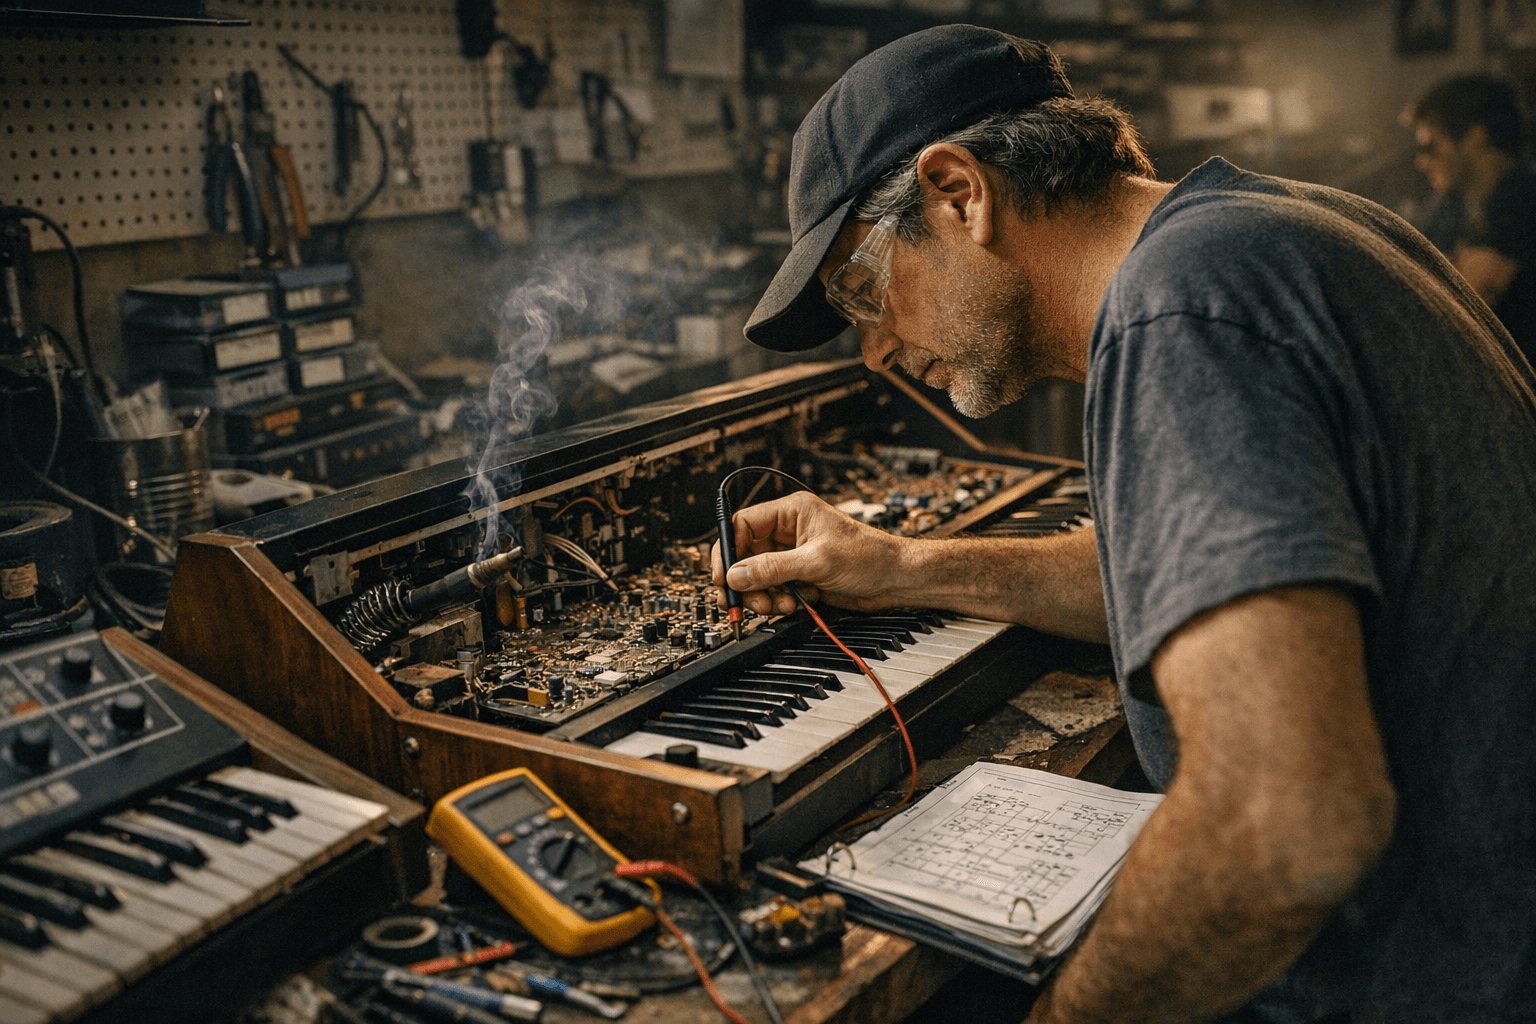
Start non-invasive checks before any component swaps. Clean pots, switches, and contacts with a good contact cleaner and cycle controls to free oxidized tracks. Inspect boards with a microscope for cracked solder joints and lifted traces. Measure power rails with a current-limited PSU; confirm standby voltages and fuse behavior before applying full power. Use a multimeter and visual inspection to isolate obvious faults like blown fuses, cracked solder, or loose ribbon cables.
Replace common consumables early in most projects. Electrolytic capacitors age and leak, belts degrade in tape-based mechanisms, and faders, potentiometers, and key contacts accumulate corrosion and wear. Fit reputable replacement capacitors with correct voltage ratings and match polarity carefully. Change belts by length and type, and refurbish key contacts where tactile failure affects playability.
Stock the right parts and tools. Use a variac or current-limited PSU for safe bring-ups, a microscope for board inspection, quality soldering iron tips, and reliable replacement capacitors. A stable workbench, proper lighting, and a parts-tracking method make multi-session projects manageable. Keep a small spreadsheet or restoration log to record part numbers, sources, and measured voltages so future troubleshooting is faster.
Tap community resources for parts, knowledge, and morale. Restoration logs, forum threads, and museum workshop pages contain model-specific tips that save hours. Search Reverb and MatrixSynth threads for donor boards, parts donors, and troubleshooting threads; MatrixSynth maintains ongoing community archives at matrixsynth.com/2026/. Local museum workshops and small repair services are valuable when mechanical skills or high-voltage experience are required.
When a project crosses into sealed mechanisms, CRT high-voltage, or ambiguous intermittent faults, bring in a qualified technician to avoid injury and further damage. Follow documented steps, keep safety front and center, and log every change. With careful safety practices, good documentation, correct parts, and community support, you can tame GAS, revive old circuitry, and keep beloved vintage voices on the keyboard and in the studio.
Know something we missed? Have a correction or additional information?
Submit a Tip