How to care for chicks and pullets before laying begins
The most expensive mistakes happen before the first egg. Use the chick-to-pullet timeline to know when to lower heat, widen space, and switch feed.
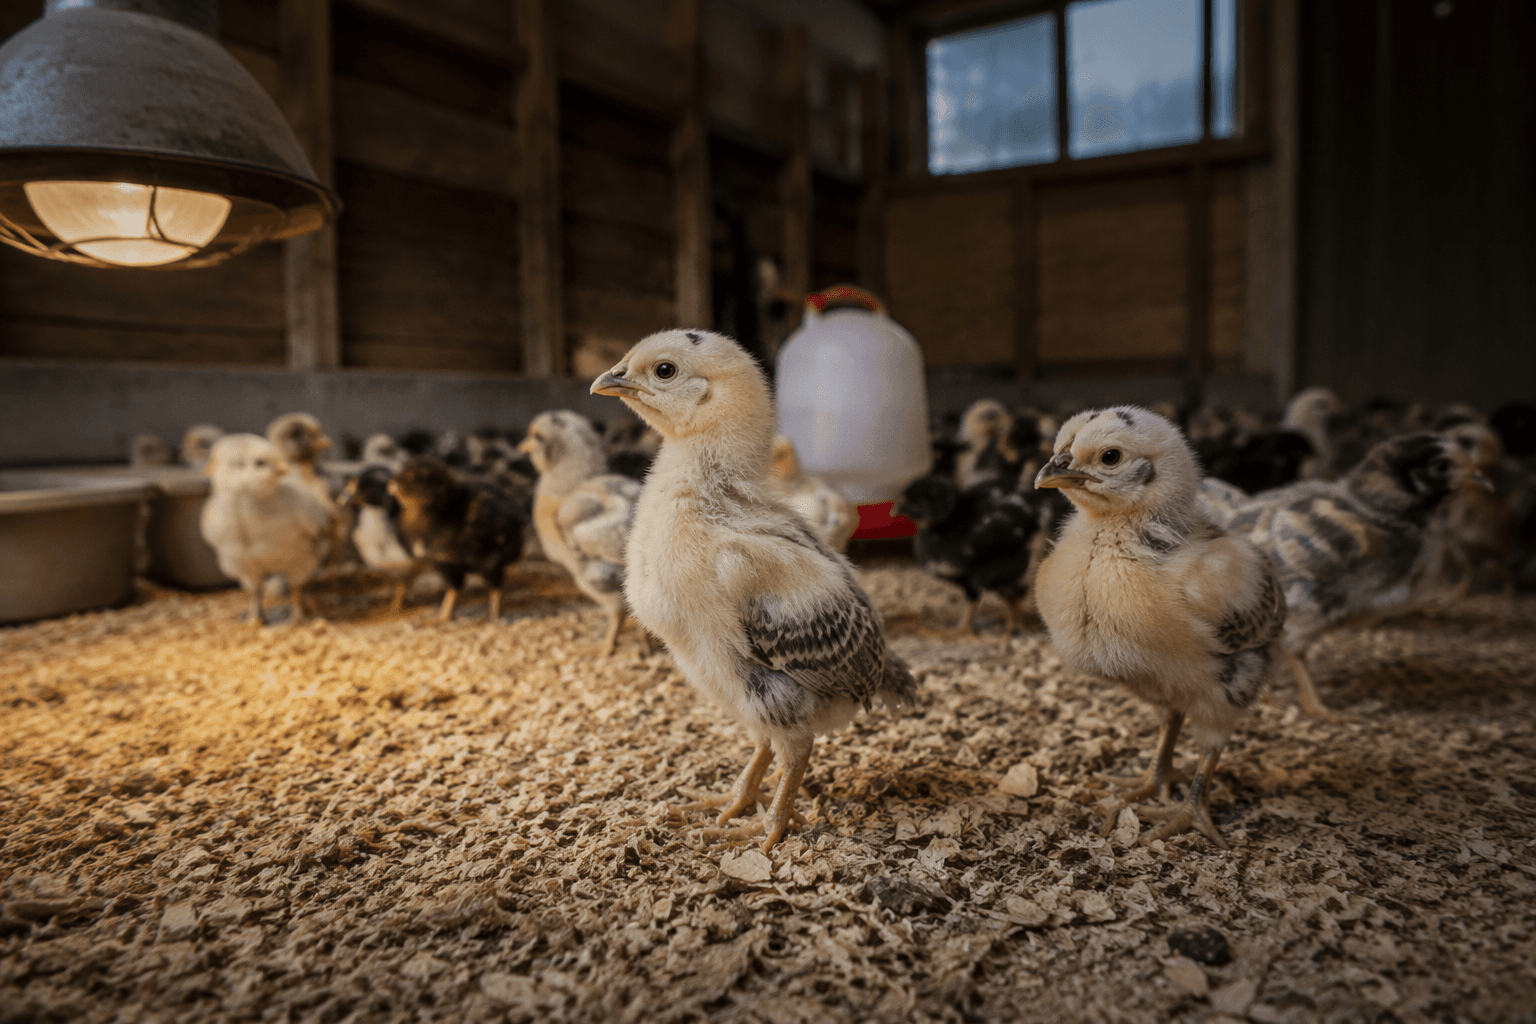
A brooder at about 95 degrees Fahrenheit, the starting point in University of Nebraska-Lincoln Extension guidance, is where the most expensive chicken mistakes begin. In the stretch between brooder life and laying, you are steering birds through a series of small, timed decisions that shape health, growth, and cost.
Reading the clock: chick, pullet, layer
A chick is the newly hatched bird that needs heat, protection, and close supervision. A pullet is a young female chicken that has not started laying yet, and that in-between stage is where beginners most often get tripped up. Birds get moved too early, fed the wrong ration, or crowded into housing that no longer fits.
You do not run a brooder the same way you run a coop for near-layers, and you do not feed a pullet the same way you feed a bird that is old enough to lay.
Weeks 0 to 2: build the brooder around warmth
New chicks need a secure brooder, clean water, appropriate starter feed, and enough warmth to stay active and settled. After the first two weeks, University of Nebraska-Lincoln Extension recommends lowering the heat by 5 degrees each week until feathering is complete.
That temperature rule only works if the chicks can choose their comfort zone. Oak Ridge Feed’s temperature chart puts the thermometer at chick level, not up on a wall where it can miss what the birds are feeling, and chicks should be able to move away from the heat source if they get too hot. If they are piling, panting, or camped far from the lamp, the brooder needs adjusting.
This is also the stage where feed discipline matters. The birds need a starter ration built for growth, not treats and extras that fill them up without meeting their nutritional needs. The Chicken Chick warns that adding treats or other foods can dilute the nutrient balance of commercial feed, so the brooder is the time to keep the menu simple and the water clean.
Weeks 3 to 5: reduce heat and make room
Once the first two weeks are over, the main job shifts from keeping chicks warm to helping them grow comfortably. Dropping the temperature by 5 degrees each week is not just about the heat lamp, it is about watching for the point where the birds are fully feathered enough to handle less warmth.
As they grow, they also need more room, sturdier feeders and waterers, and better protection from drafts and contamination. A crowded brooder slows growth and invites pecking, which turns a cute setup into a stressful one fast. Moving chicks from the brooder to the coop is stressful for chickens, so the handoff should happen when the new space is actually ready, not when the birds simply look too big for the box.
This is the moment many beginners spend money twice. They buy small equipment that no longer fits by the time the birds are several weeks old, then replace it again when the flock outgrows it.
Weeks 6 to 8 and beyond: prepare the coop before the first egg
Purina Animal Nutrition puts chicks at the coop-moving stage around 6 to 8 weeks old. That does not mean they are ready for a finished laying house in every respect, but it does mean the brooder is no longer the right long-term setup. By this point, you should be thinking about roosts, airflow, nest boxes, and enough square footage to keep the flock from turning on itself.
Per University of Minnesota Extension, backyard layers need at least 3 to 5 square feet per bird, including outdoor space, at least 12 inches of perch space, and one nest box for every 4 to 5 birds.
Nest boxes do not need to be an afterthought. If you wait until the birds are nearly laying to think about them, you risk crowding, egg-laying in the wrong places, and a rushed coop layout that does not fit the flock you actually have. The same goes for roosts and space to move around.
The costly mistakes beginners make in the pullet stage
Feed is a big one: University of Maryland Extension puts feed at about 70 percent of the cost of raising a chicken, so choosing the wrong ration is not a minor slip. Oregon State University Extension limits layer feed to chickens old enough to lay eggs, and Tractor Supply’s feed guide puts layer feed at 15 to 18 percent protein, which is why switching too early can create nutrient imbalance instead of helping the flock.
Treats are another trap. Commercial feed is already formulated to be nutritionally balanced, so every extra handful of scratch or kitchen scraps pushes the ration farther from what the birds need. Over time, that can slow growth, undercut egg readiness, and make feed costs harder to control.
Crowding and rushing are the other expensive habits. A too-small brooder, a too-fast move outdoors, or a coop with too little perch and nest space can trigger pecking, stress, and poor adjustment right when the birds should be maturing smoothly.
A timeline you can actually use
Think of the path like this: the first two weeks are about heat, water, and starter feed. The next few weeks are about lowering heat, widening space, and watching feathers replace fluff. By 6 to 8 weeks, the birds should be ready to leave the brooder for a coop setup that already has room, perches, and a plan for nest boxes.
This article was produced by Prism’s automated news system from verified source data, official records, and press releases, then run through automated quality and moderation checks before publishing. The system is built and supervised by the people who set the standards it runs under. Read our full AI policy.
Did this article answer your question?