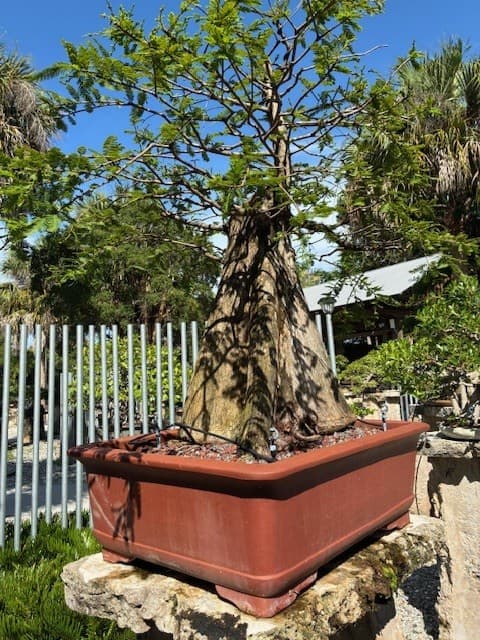
Step-by-Step Bonsai Wiring Guide: Gauge, Anchoring, Wrapping, Pressure, Removal
Learn practical bonsai wiring: how to pick wire gauge and material, set anchors, wrap at the right angle, manage pressure, and remove wire safely.

Wiring is one of the fastest ways to sculpt a tree, but it’s also where beginners most often trip up. Read on for clear, practical steps, from choosing wire to safe removal, so you can bend branches without cutting into your tree’s future.
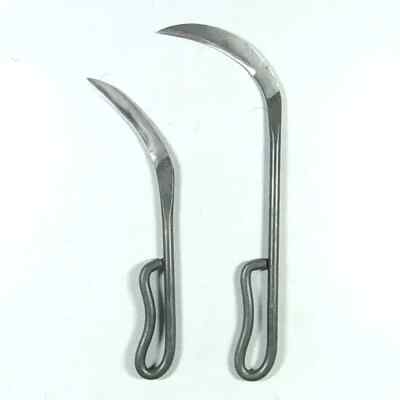
1. Gauge (selecting wire gauge and material)
Choose a wire thickness and material that supports the branch without overpowering it. Aluminum is forgiving, easy to bend, and great for deciduous trees and beginners; copper holds shape better and is favored for conifers and long-term styling because it keeps bends with less rebound. Match wire diameter to branch strength: use wire that’s strong enough to hold the bend but not so thick that it prevents gradual shaping, you want control, not a clamp. Keep a small range of gauges in your kit (thin for ramification, thicker for later structural work) so you can move from primary shaping to finer refinements without re-wiring unnecessarily.
2. Anchoring (anchoring and starting points)
Secure anchoring is the foundation of a stable bend, anchor either to the trunk, a heavier branch, or the pot/rootball as needed. For branches near the tip, begin by wrapping wire back toward a solid anchor point on the trunk; for heavy branches, use a trunk-wrap anchor or guy lines to distribute force and avoid relying on a single fragile attachment. Start the wire off at the base of the branch and run it into the trunk or anchor, leaving enough tail to tuck or twist so the wire won’t slip. Proper anchors reduce movement where you don’t want it and make bending safer for the cambium and bark.
3. Wrapping (correct wrapping angle and technique)
Wrap wire at a gentle diagonal, roughly a 45-degree angle, so coils support the branch along its length and resist slippage, with each coil touching but not overlapping excessively. Keep tension consistent: hold the wire with steady pressure and guide coils so they sit snugly against the branch, but avoid compressing the bark; the goal is firm contact, not strangulation. For complex junctions or multiple branches, consider cross-wrapping (a crisscross pattern) to lock form while maintaining circulation. When wiring fine ramification, use thinner wire and shorter runs; for long bends, wrap in longer, continuous lengths to avoid weak points.
4. Pressure (managing pressure to avoid wire cutting into bark)
Monitor wire pressure regularly, growth and seasonal changes can cause wires to bite into bark faster than you expect. Check wired branches every 4–8 weeks depending on species and growth rate: faster-growing species need inspections more often, especially in spring flushes. If you see the wire digging in, remove it immediately and either rewire with a thicker or differently placed wire or allow recovery time with protective measures (like raffia) if the cambium is damaged. Use gradual bending and, for large moves, combine wiring with raffia or guying so the strain is distributed and the bark isn’t shear-cut by a single coil.
5. Removal (safe removal timing and technique)
Remove wire as soon as the branch holds its new shape and before the wire cuts into the bark, this timing depends on species, growth stage, and how dramatic the bend was. Deciduous trees are often wired in late winter while dormant and may require removal once the structure sets in spring; conifers and evergreens can sometimes be wired outside dormancy but still need frequent checks and quicker removal if growth is vigorous. When removing wire, cut coils with basic wire cutters rather than unwinding, this avoids catching and tearing bark during release, and gently ease the branch to its final position. If you must rewire after removal, wait until the bark and cambium have healed sufficiently to avoid compounding injuries.
Step-by-step wiring procedure 1. Anchor Secure the wire to a trunk wrap, heavier branch, or pot anchor; tuck the tail or twist it so it won’t slip during wrapping. A solid anchor keeps the applied forces where you want them and prevents the wire from sliding as you form bends.
2. Wrap
Run the wire out along the branch at a 45-degree angle, keeping coils snug and evenly spaced so the branch is supported along its length. Maintain consistent tension and avoid overtightening; the wire should hold form without compressing the bark.
3. Bend gently
Bend the branch gradually, working from the base toward the tip and supporting the limb as you go to avoid snapping or splintering. For thicker limbs, use successive small bends over weeks instead of a single dramatic twist; combine shifts with raffia or guying for heavy work.
4. Monitor wire bite
Inspect wired areas every 4–8 weeks in active growth and more often during spring flushes; look for discoloration, indentations, or wire pressing into bark. If you spot bite marks, remove or replace the wire immediately and assess for cambial damage.
5. Remove when branch holds shape
Once the branch holds position without support, often a few months for fine work or longer for major structural bends, cut the wire off carefully rather than unwinding. After removal, check for healing and, if necessary, provide a recovery period before any re-wiring.
- If the wire is biting but the branch still needs shaping, remove and re-anchor with a thicker wire or use raffia and a spreader bar to protect the bark.
- Use raffia on thicker limbs before heavy bending to support the bark and prevent cracking.
- When a branch cracks, stop bending immediately, stabilize with raffia or tape, and allow time to callus before further work.
- Keep a small wire cutter, several gauges of aluminum and copper wire, and a roll of raffia in your styling kit, versatility saves trees.
- Check potted specimens more frequently; fast root growth often correlates with faster branch growth and quicker wiring issues.
Troubleshooting and tips
Closing practical wisdom Wiring is as much patience as technique, think in moves, not miracles: plan anchor points, take small bends, and inspect often. With careful gauge selection, tidy anchors, consistent wrapping, tight pressure control, and timely removal, you’ll shape healthier trees and join the community of makers who trade stories about successful bends and the occasional lesson learned the hard way.
This article was produced by Prism’s automated news system from verified source data, official records, and press releases, then run through automated quality and moderation checks before publishing. The system is built and supervised by the people who set the standards it runs under. Read our full AI policy.
Did this article answer your question?