Platinum Ink Guide Reveals Step-by-Step Secrets to Planning Geometric Sleeves
Platinum Ink's studio guide pinpoints two planning mistakes that destroy geometric sleeves, and reveals the mapping workflow that keeps symmetry intact across every joint.
Most geometric sleeves that fail do so in the planning phase, not in execution. Platinum Ink's studio-level guide calls out two errors responsible for the majority of ruined sleeve projects: adding pieces without a unifying theme, and failing to account for how arm anatomy distorts shapes. For geometric work specifically, both mistakes are catastrophic. A mandala that looks perfect on a flat reference sheet can fracture into asymmetric segments once it wraps a bicep and shoulder curve. A repeating grid pattern that doesn't account for the elbow joint becomes unreadable from three feet away after a year of wear. The guide's core directive is direct: treat the sleeve as one connected piece from the very start.
Geometry as Composition, Not Collection
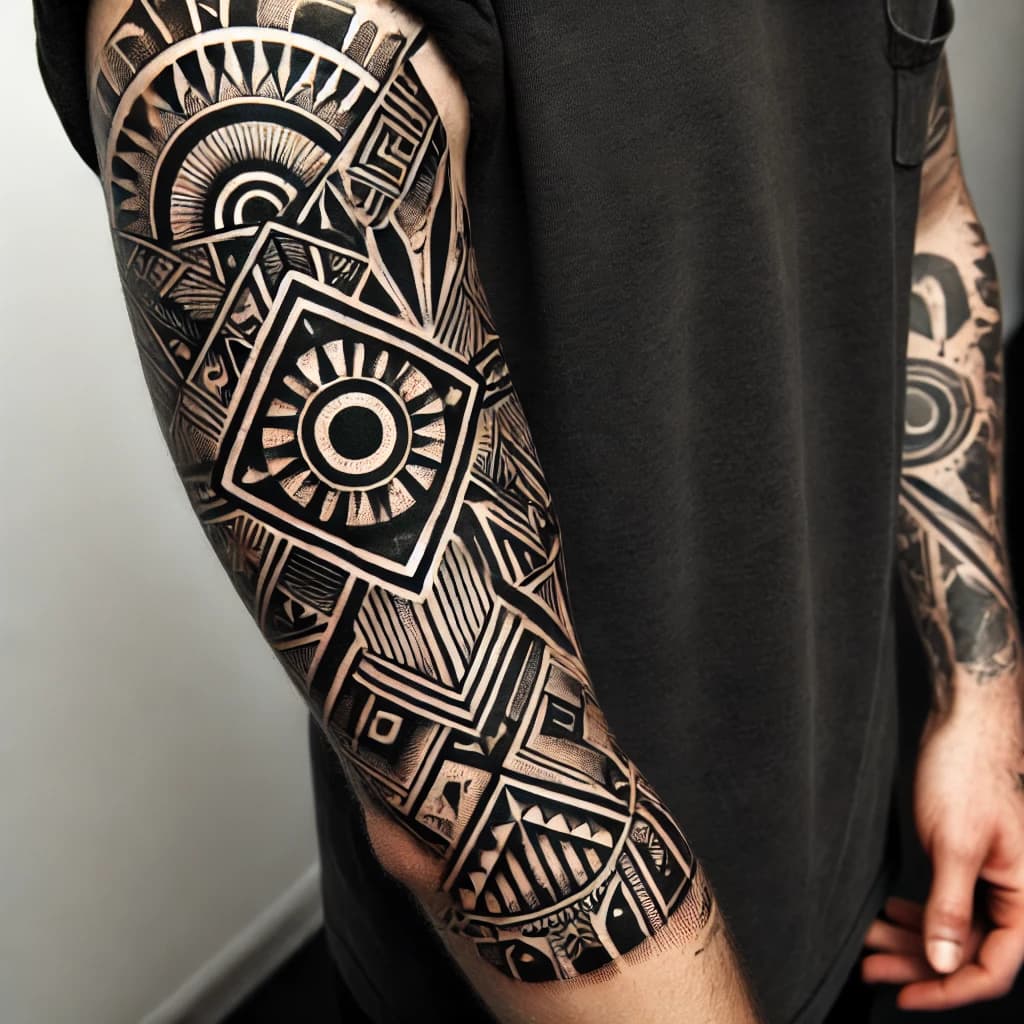
The instinct to collect favorite geometric motifs and arrange them across an arm is exactly the wrong approach to a sleeve. Platinum Ink frames the entire project as a single composition, the way a designer treats a poster rather than a collage. This shift in mindset changes every decision that follows. Theme comes before motif selection: are you building around structural geometry (tessellations, sacred geometry frameworks, architectural lattice patterns) or abstract geometric texture (organic line clusters, distressed grid work, the black-and-grey abstract texture trending prominently in 2026)? That answer determines scale, line weight, density, and the ratio of positive to negative space across the full arm.
Negative space in geometric sleeves is not empty area waiting to be filled. It is an active design element that controls how the eye travels from wrist to shoulder. Properly managed, it creates rhythm: the visual breath between dense polygon clusters that makes a sleeve legible rather than overwhelming. Without deliberate negative space planning, geometric work collapses into a grey mass at normal viewing distance and ages into visual noise within a decade as ink migrates.
Why Joints Are the Design Problem
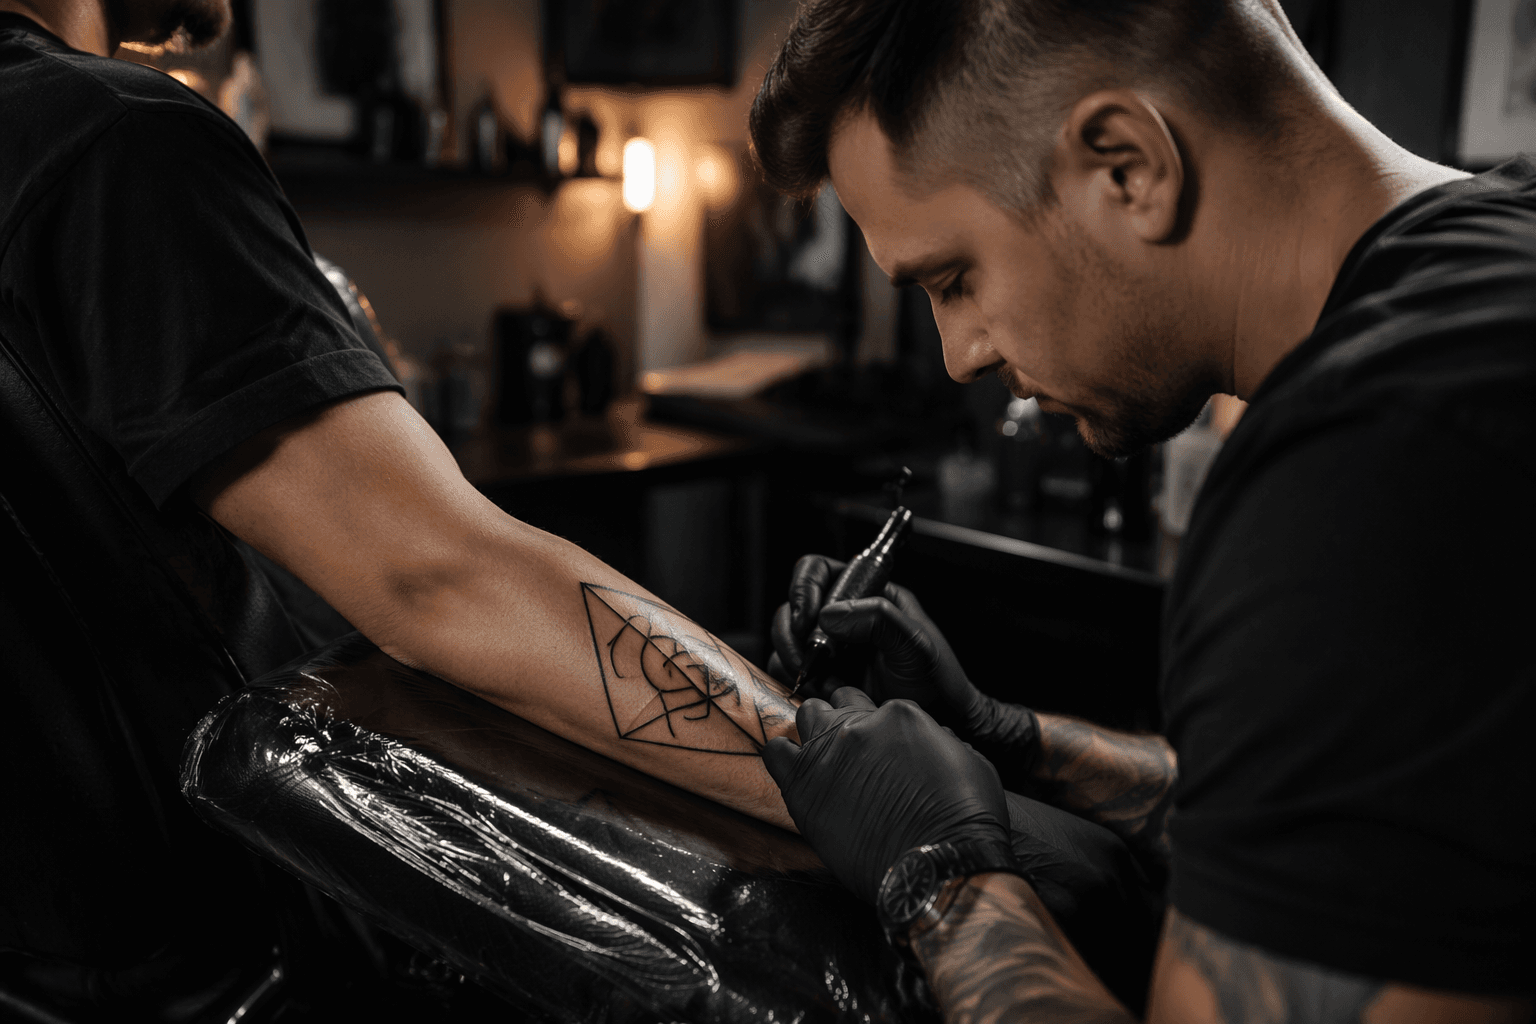
The elbow and shoulder are where geometric sleeves succeed or fail. When the arm bends, skin at the inner elbow compresses and the outer elbow stretches. Any line meant to travel continuously across that zone will appear to break or shift when the arm moves, unless the artist has designed the transition specifically to accommodate that movement. The Platinum Ink guide is explicit: geometric designs must be mapped in advance to avoid distortion when an arm bends or a shoulder curves, with the solution being close collaboration to map seams, background fills, and transitions that preserve symmetry and rhythm.
The practical approach is to treat the elbow as a seam zone rather than a design zone. Geometric patterns should flow toward the elbow from both the upper and lower arm, with the joint handled by background fill, soft texture, or a deliberate negative space break that reads as intentional rather than interrupted. The same principle applies at the shoulder's deltoid curve: pattern elements that wrap over the curve need to be scaled or spaced to account for the three-dimensional surface, or they will appear compressed from the front and stretched from the side.
The Measurements and Mockups Workflow
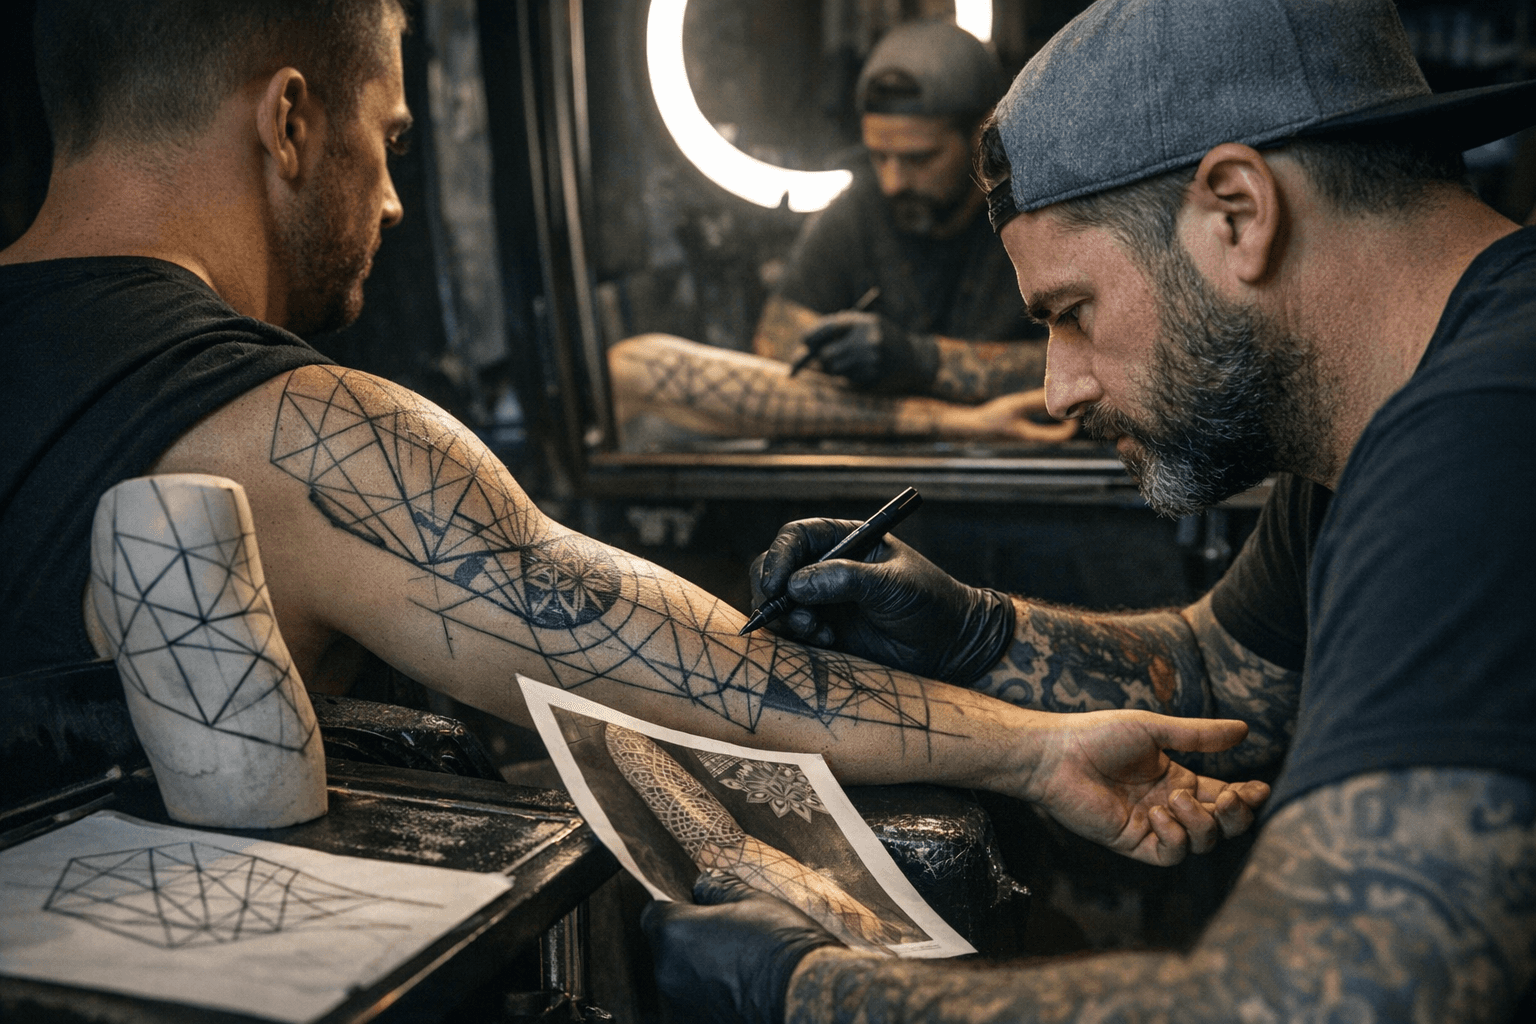
Planning a geometric sleeve with precision requires a physical mapping process before any stencil touches skin. Here is the step-by-step workflow the Platinum Ink guide supports and that experienced geometric artists use in practice:
1. Zone the arm. Divide the arm into distinct panels: upper arm, elbow transition zone, forearm, and wrist.
Note which zones have high movement (elbow, wrist) and which are more stable (mid-upper arm, mid-forearm). Design decisions in each zone should reflect that movement reality.
2. Build a placement grid. Using measurements of the client's actual arm circumference at multiple points, create a flat grid that represents the arm's surface when unrolled.
Map where key geometric anchors (the largest, most complex focal points) will sit. These anchors should land in stable, low-movement zones unless the design specifically and deliberately addresses movement.
3. Establish line-weight hierarchy. Geometric sleeves need at least three line weights: bold structural outlines for primary shapes, medium weight for secondary elements, and fine linework for fill and texture.
Heavy line weights hold up as skin ages and ink spreads; fine linework in high-movement zones should be used sparingly, as it will blur faster than work on flat, stable skin areas.
4. Decide the blackout versus fine-line balance. This is a tradeoff with long-term consequences.
Heavy blackout fills create bold contrast that ages cleanly and makes geometric shapes readable at distance, but they are difficult to modify and eliminate future design options in covered areas. Fine-line geometric work is visually striking when fresh but requires more frequent touch-ups and can lose definition within five to seven years in high-friction zones like the inner forearm. For a sleeve built to age well, use blackout or heavy shading as background anchor in low-movement zones, and reserve fine linework for focal pieces in stable areas.
5. Run stencil iterations. A single stencil test is not enough for a geometric sleeve.
Artists should apply the stencil, have the client hold natural poses (arm bent, arm raised, arm at rest), photograph the result from all angles, and adjust before committing to ink. Repeating this for each major section prevents the compounding errors that come from tattooing one section in isolation, only to find it misaligns with the next planned section.
Session Pacing: The Timeline Reality
High-precision geometric sleeves require multiple sessions, and the sequence matters as much as the total hours. The Platinum Ink guide specifically flags the need for artists experienced in transferring perfect stencils to curved, flexible canvases, because geometric precision demands consistency across sessions that may be spaced weeks or months apart.
A realistic session plan for a full geometric sleeve looks like this:
- Sessions 1-2: Anchor pieces and primary structural outlines placed in stable zones. This establishes the visual grammar of the entire sleeve.
- Sessions 3-4: Connecting elements, joint transitions, and background framework. This is where the composition either coheres or fractures.
- Sessions 5+: Fill work, texture layers, negative space refinement, and touch-ups on healed early sections.
Rushing the sequence by stacking sessions too close together prevents proper healing assessment. A section that looks clean at two weeks may show ink migration or uneven settling at eight weeks, and that information should inform the next session's approach. The guide was assembled to reduce client confusion about exactly this reality, compiling studio best practices and planning checklists into a format designed to set accurate expectations from the first consultation.
Cost and Time Reality Check: Your Pre-Session Checklist
A full geometric sleeve from a specialist artist is a multi-year investment. Session costs vary by artist and region, but the planning infrastructure (consultations, stencil iterations, mapping sessions) adds time that should be budgeted before the first needle touches skin. Before committing to the project, run through this checklist:
- Theme locked before motif selection? (structural geometry vs. abstract texture)
- Color vs. black-and-grey decision made with aging in mind?
- Arm zones mapped with circumference measurements at multiple points?
- Placement grid built and focal anchors positioned in stable zones?
- Line-weight hierarchy established across the full composition?
- Blackout vs. fine-line balance assessed for long-term readability?
- Joint transition zones designed as deliberate seams, not afterthoughts?
- At least two stencil iterations planned before session one begins?
- Session sequence mapped with healing intervals built in?
- Artist's experience with curved stencil transfer confirmed?
The geometric sleeve that reads as a unified, symmetrical composition five years after the last session is not a lucky outcome. Every item on that checklist is a decision that makes it possible.
This article was produced by Prism’s automated news system from verified source data, official records, and press releases, then run through automated quality and moderation checks before publishing. The system is built and supervised by the people who set the standards it runs under. Read our full AI policy.
Did this article answer your question?