How to glue leather to plastic for durable repairs
The fastest way to ruin a leather-to-plastic repair is the wrong glue. Match the adhesive to flex, moisture, and finish, and the fix can hold instead of peeling.

The weak spot in most leather-to-plastic repairs is not the seam, it is the setup. Dirty surfaces, poor fit, and the wrong adhesive turn a simple fix into a short-lived patch that lifts, stains, or cracks under use. The good news is that the right combination of prep, glue, and clamping can make the repair disappear into the piece instead of advertising itself.
Start with the surface, not the bottle
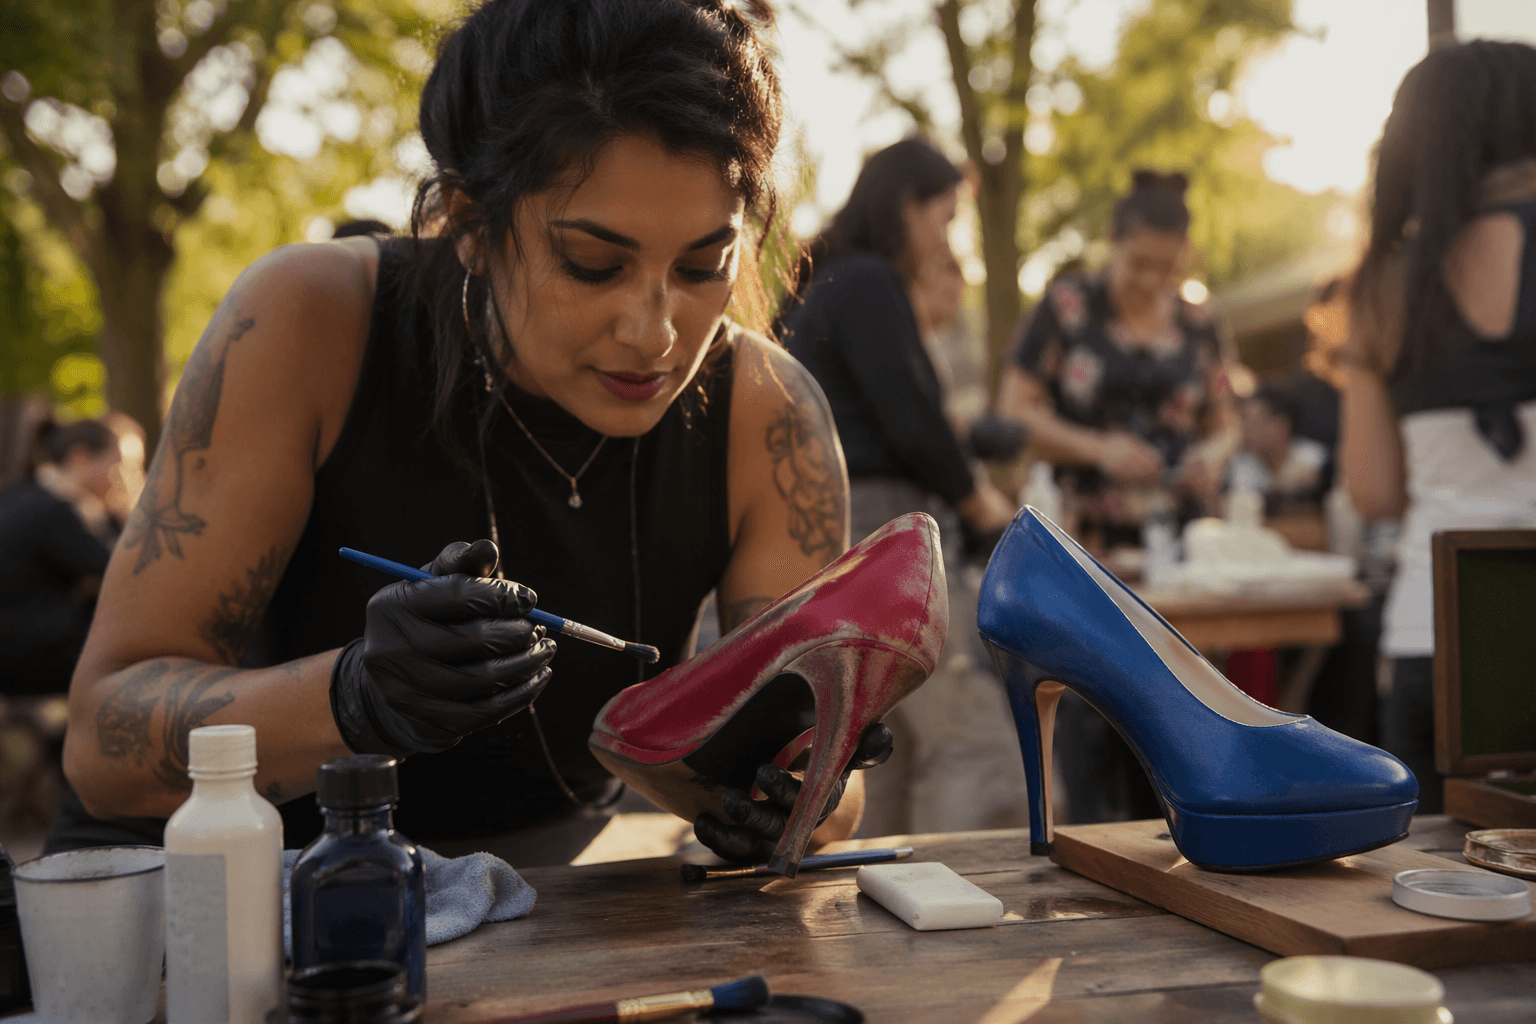
Clean, dry material is the first line of defense against failure. Dirt, oils, and other contaminants sabotage adhesion before the glue ever has a chance, so both the leather and the plastic need to be wiped down and fully dried before bonding. If the surfaces are glossy or slick, roughing them up with sandpaper gives the adhesive more grip, especially when the finished piece will flex, bend, or move in daily use.
That prep matters even more when you want the repair to look intentional. Precise cutting keeps the leather and plastic meeting cleanly before the bond goes down, which helps you avoid gaps, uneven edges, and awkward trimming later. Leather is best cut with a sharp knife or rotary cutter, while plastic may call for scissors or a saw depending on the material.
Choose the adhesive by how the repair lives
Not all glues behave the same way, and that is the decision that separates a durable repair from a mess. Contact cement is the classic strong, water-resistant choice, but it has to be applied to both surfaces before the pieces are joined. It is a good fit when you want broad coverage and a bond that can hold through wear, but the product also brings real safety concerns, including flammability and the need for protective gloves plus eye or face protection.
Epoxy resin and super glue can also work in certain plastic-to-leather applications, but they are not universal fixes. The wrong adhesive can discolor leather or fail once the item starts taking stress, so appearance and movement both matter when you choose your glue. If the repair has to remain flexible, a leather-safe adhesive designed for that kind of motion is usually the smarter call.
Loctite’s Vinyl, Fabric & Leather Flexible Adhesive is built for that problem. It is described as highly flexible, clear-drying, and waterproof, which makes it well suited to items that bend and twist instead of staying rigid. Loctite also points to shoe-glue-style products for materials that require constant flexing, which is exactly the kind of wear leather goods see every day.
For rigid plastic jobs, Loctite’s Plastic Bonder plays a different role. It is formulated to produce a tough, rigid, high-strength bond in about 20 to 25 minutes, and it resists water and common solvents. That makes it a better match when the plastic side of the repair needs structure more than give.
Match the glue to the use case
A leather-to-plastic repair on an auto seat is not the same job as a patch on a bag flap or a furniture panel. 3M’s leather-and-vinyl repair products are aimed at automotive upholstery, including car seats, dashboards, motorcycle seats, center consoles, marine and RV upholstery, and furniture, which tells you how common these mixed-material repairs are across the shop and the garage. In those settings, flexibility and appearance often matter as much as raw strength.
For auto trim, seats, and dashboards, 3M says its Plastic Adhesive 2262 bonds leather, most vinyl sheeting, and plastics for a strong, enduring bond. 3M’s Nitrile High Performance Plastic Adhesive 1099 also bonds leather and plastics, and it resists water, oil, and plasticizer, but 3M warns that it may stain thin or light-colored vinyls. If the repair sits in a visible interior panel, that warning deserves attention before you commit to a full spread.
For bags and small leather goods, the biggest issue is movement. Straps, corners, and fold lines keep flexing, so a clear-drying, waterproof flexible adhesive is usually a better match than a rigid plastic repair compound. That is where adhesives designed to stay flexible matter most, because the bond has to move with the item instead of turning into the next failure point.
Furniture and marine or RV upholstery bring a different set of demands. The joint may be larger, but the stress can be constant, and moisture resistance becomes more important when the piece lives in a humid or hard-use setting. In those repairs, a strong bond is only useful if it survives daily handling without staining the visible face or hardening into a brittle edge.
A repair sequence that holds up
1. Clean both surfaces until they are free of dirt and oils, then let them dry completely.
2. Roughen the leather, and if needed the plastic, to improve grip for the adhesive.
3. Cut the leather and plastic precisely so the pieces meet without forcing the bond line.
4. Apply the chosen adhesive in the way it is designed to be used, such as coating both sides for contact cement.
5. Join the parts carefully and clamp or hold them in place until the bond sets.
That sequence sounds basic, but it is where durable repairs are won. Tandy Leather’s Craftool Pro Detail Rougher exists for exactly this kind of prep work, reinforcing the shop rule that the best bond starts with the surface, not the squeeze-out. If you rush straight to glue, you are asking the adhesive to solve problems that should have been handled with prep and fit.
Do not wait for the tear to spread
3M says tears and cuts in leather and vinyl should be addressed promptly because the damage can spread if left unchecked. That is the practical truth behind a lot of upholstery and gear repairs: once a crack opens, stress keeps working on it every time the item flexes. The sooner you clean, roughen, trim, and bond the repair properly, the better the odds that the fix stays invisible and does its job.
That is the real lesson in leather-to-plastic work. If the job is flexible, choose a flexible adhesive. If it is rigid, choose a rigid bond. In every case, clean the surfaces, rough them where needed, cut precisely, and treat safety as part of the repair, because the ugliest fixes usually fail before the glue even sets.
This article was produced by Prism’s automated news system from verified source data, official records, and press releases, then run through automated quality and moderation checks before publishing. The system is built and supervised by the people who set the standards it runs under. Read our full AI policy.
Did this article answer your question?