How to service sailboat winches before they seize up
A dirty winch can hide expensive trouble. A basic strip, clean, and re-lube keeps self-tailing and multi-speed winches working before a small job becomes a rebuild.
Winch servicing is one of the cheapest ways to protect some of the most expensive gear on deck. A winch can look fine on the outside while friction, corrosion, dirt, and dried grease quietly turn it sluggish, noisy, and unreliable, which is why a simple maintenance session is worth far more than waiting for a seize-up.
Why winches deserve regular attention
A sailboat winch works hard every time you trim, grind, or load a sheet, especially on boats that rely on self-tailing or multi-speed setups. West Marine’s guide makes the case plainly: the cost of routine service is tiny compared with the cost of replacing or rebuilding a neglected winch. Once grime starts building inside, the handle may still turn, but the winch stops delivering the smooth, predictable feel you want under load.
Harken’s guidance lands in the same place. It says winches should be serviced at least once during the preseason, twice a season for boats living in salt water, and before every regatta if the boat is raced hard. Lewmar is just as direct, saying winches should be completely stripped, cleaned, checked for damage, lubricated, and reassembled at the end of each sailing season or before the new season begins. Its maintenance advice also calls for monthly fresh-water hose-downs, plus light oiling and greasing, with two or three full services during an active season.
The warning signs are easy to miss
Neglected winches rarely fail all at once. The clues tend to show up as small annoyances first, and those are the moments to act before a straightforward service turns into a full rebuild.
- Sluggish or sticky ratcheting
- A drum that does not turn freely
- A winch that turns in both directions because of a pawl problem
- A winch that feels rough, uneven, or harder to load than it used to
Watch for these signs:
Harken adds an especially useful clue: sluggish or sticky ratcheting can mean the pawls were greased instead of oiled. That matters because the wrong lubricant can gum up the tiny parts that let the winch ratchet correctly. If the action feels off, that is not the time to power through another season.
Start with the right manual and the right kit
Before a single screw comes out, get the exact service documentation for the winch on your boat. West Marine notes that winches vary by manufacturer and by the number of speeds, so the right manual is essential. Harken reinforces that point by offering manuals and drawings for specific winch products, which is exactly what you want when internals differ from one model to the next.
The other non-negotiable is the service kit. Practical Sailor’s advice is simple: make sure you have the right winch servicing kit, including pawls and springs, before you start pulling the winch apart. That saves a lot of frustration when the winch is open and a tiny part needs replacing right away. Disposable nitrile gloves are another smart move, keeping grease and solvent off your hands while you work.
A small but brilliant trick can save the whole afternoon: cut a hole in the center of a shallow box and place it over the winch before opening it up. Springs and pawls can launch themselves into the bilge or overboard in a blink, and that simple box keeps the parts contained where you can see them.
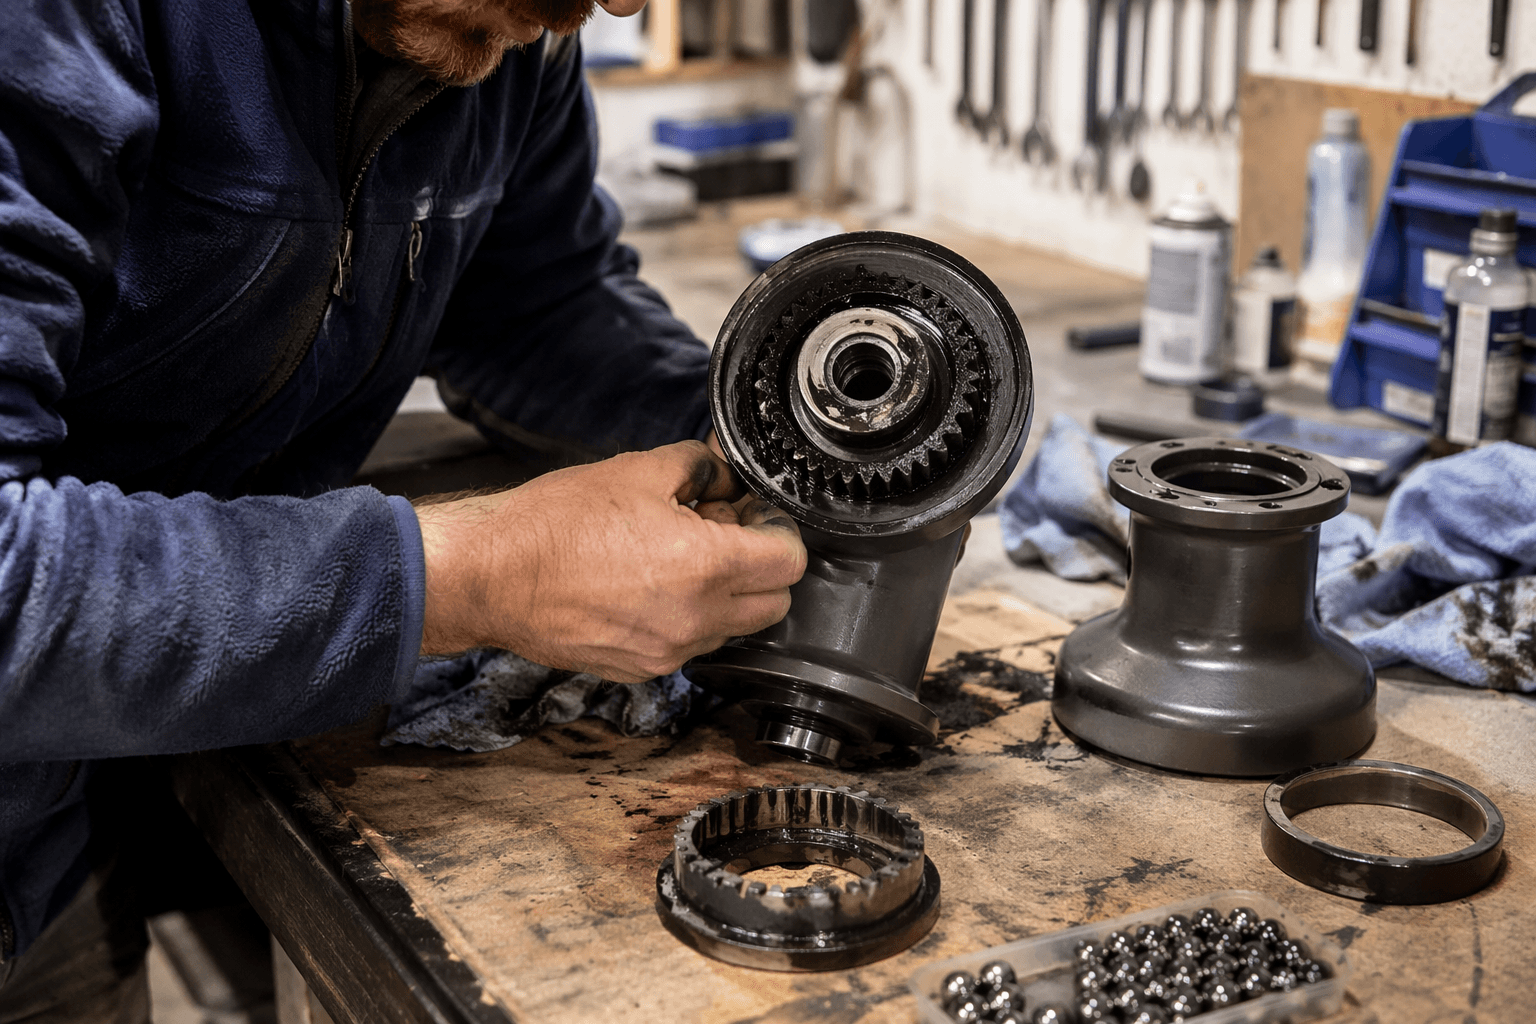
The basic service workflow
Winch service is not complicated, but it does reward patience and order. The job is easiest when you treat each stage as part of the same system: preparation, disassembly, cleaning, inspection, lubrication, reassembly, and then ongoing care.
1. Prepare the area. Clear the cockpit or deck space around the winch, put the box over it, and keep your parts tray or cloth ready.
Take photos before and during disassembly so you have a visual record of how everything goes back together.
2. Disassemble in order. Pull the winch apart methodically and lay the parts out exactly as they come off.
That helps avoid one of the most common DIY mistakes, mixing up small pieces or forgetting the order of washers, springs, and gears.
3. Clean everything thoroughly. Old grease, salt, and grit need to come off before anything goes back in.
This is where a winch often goes from feeling merely sticky to spinning properly again, because dirty lubricant can be as bad as no lubricant at all.
4. Inspect for damage. Look for worn teeth, pitted surfaces, and any parts that do not sit correctly.
Lewmar’s guidance specifically says to check for damage before reassembly, and that step matters because no amount of fresh grease fixes a damaged component.
5. Lubricate correctly. This is where many first-time owners trip up.
Use oil where the manual calls for oil, and grease only where grease belongs. Over-greasing can slow the mechanism and attract more dirt, which is how a simple service turns into a sticky mess.
6. Reassemble carefully. Work back through the parts in the exact reverse order, using your photos and the manual as a guide.
A wrong spring orientation or misplaced pawl can leave the winch behaving badly even if every part is technically back in place.
7. Test the action. Once assembled, the winch should turn smoothly and ratchet cleanly.
If it still feels wrong, stop and check the pawls, lubrication, and part order before you put load on it.
What to replace, and when
Some parts are meant to wear and should be treated that way. West Marine reports that Lewmar recommends replacing pawls every five years and installing new springs every time the winch is serviced. That is a strong reminder that service is not only about cleaning what you already have, but also about refreshing the small parts that keep the mechanism trustworthy.
If you are working on a specific model, the manufacturer’s documentation matters even more. Harken’s model-specific manuals and drawings exist for a reason: winches are not all built the same, and speed counts change the internal arrangement. A careful owner follows the right diagram instead of assuming one winch looks enough like another.
Keeping the winch happy between full services
Monthly fresh-water rinsing and light lubrication go a long way, especially in salt water. Lewmar’s advice to hose the winch down monthly and do two or three full services in an active season is the kind of routine that prevents the bigger problems from ever arriving. If you keep that rhythm, the winch stays closer to its best feel and far away from the day it refuses to ratchet cleanly.
That broader discipline fits the safety culture around the boat too. The American Boat & Yacht Council has been developing standards for boat design, construction, repair, and maintenance since 1954, and says its standards, credentialing, and education are meant to make boating safer and reduce accidents over time. Winch care is a small part of that larger picture, but it is exactly the kind of small part that pays off every time you grind a sheet in anger.
A winch that is serviced before it seizes is more than a tidy bit of maintenance. It is a cheap safeguard for expensive deck gear, and one of the most achievable jobs a first-time DIY owner can take on with the right manual, the right kit, and a little patience at the dock.
This article was produced by Prism’s automated news system from verified source data, official records, and press releases, then run through automated quality and moderation checks before publishing. The system is built and supervised by the people who set the standards it runs under. Read our full AI policy.
Did this article answer your question?


