Multimeters help DIY sailors diagnose battery, charging, and wiring faults
A multimeter can spot a dying battery, a lazy charger, a bad ground, or a hidden voltage drop before they turn into a tow.
Start with the question that costs the most if you answer it wrong
On a boat, the expensive failures usually do not start as dramatic failures. They start as a battery that seems fine until the first hard pull, a charger that looks alive but never really fills the bank, or a corroded connection that turns into a mystery shutdown at anchor. That is where the multimeter earns its berth: it replaces guessing with a simple set of tests that tell you whether power is there, whether it is moving, and where it disappears.
BoatUS gets right to the point that many boaters already have a multimeter or DVOM aboard, but never quite learn how to turn it into a real troubleshooting tool. The trick is not memorizing every function on the dial. It is knowing which question you are asking right now, then choosing the right setting and the right probe placement to answer it.
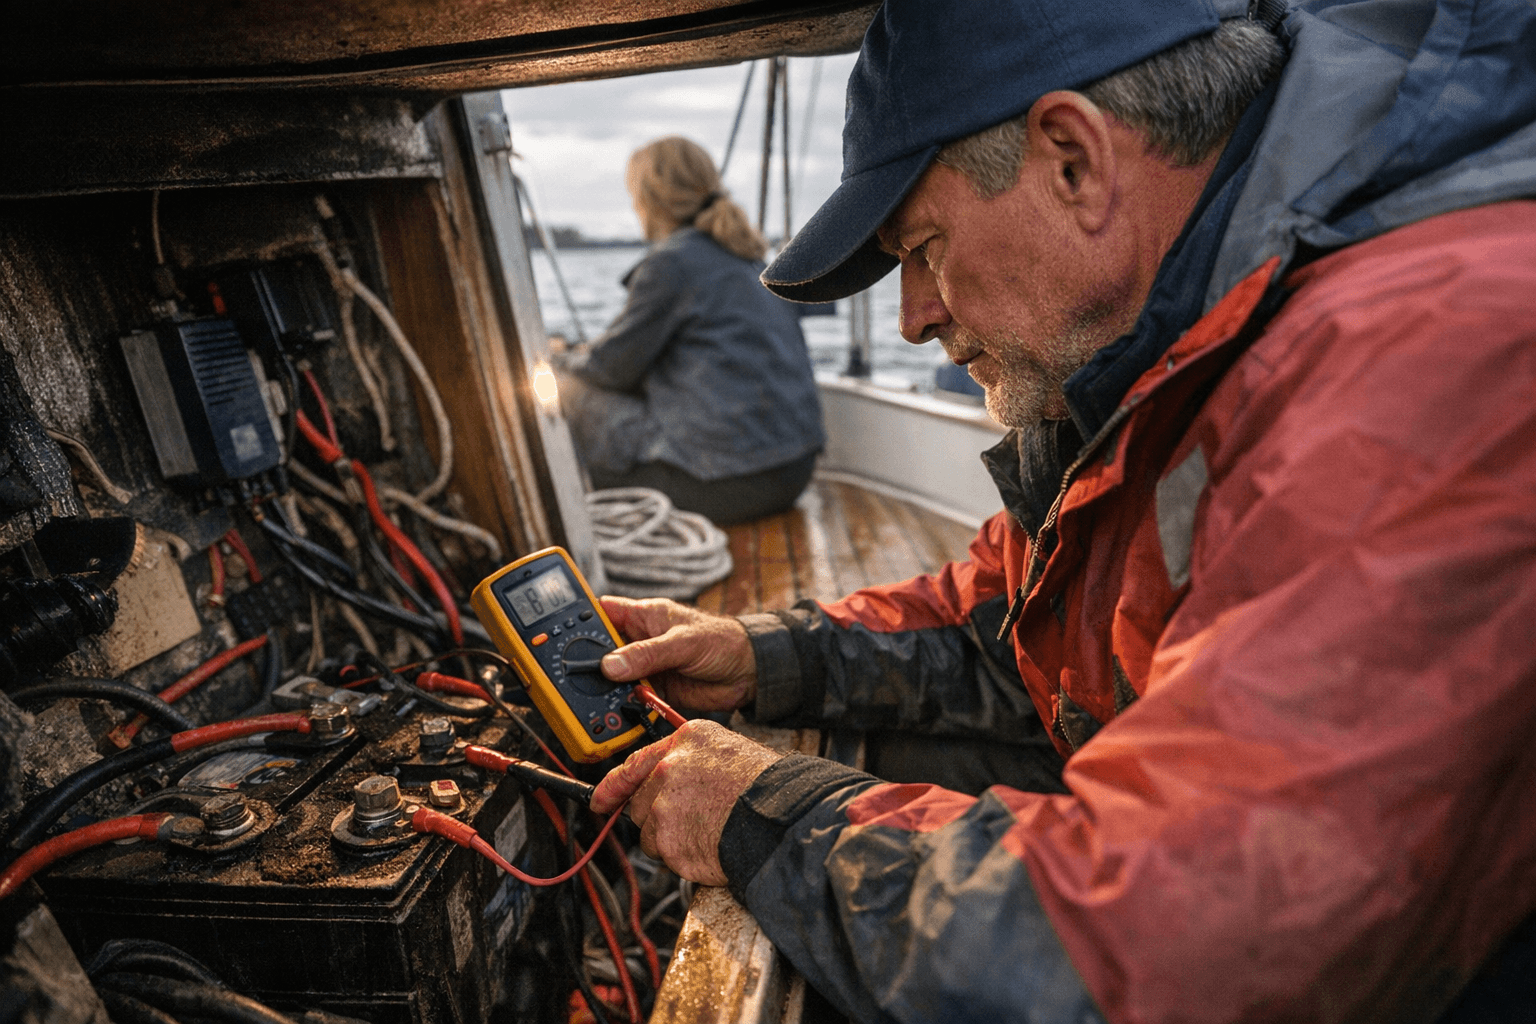
Battery first: is it actually delivering power?
When a circuit goes dark, start at the battery with the meter on DC volts. Put the black probe on the negative post and the red probe on the positive post, not on random terminal hardware downstream, so you are checking the source itself before you blame the rest of the boat. If the battery cannot hold voltage under load, or the voltage collapses the moment you ask it to do real work, that is a fix now problem, not a keep sailing and see problem.
That first test matters because a lot of dead systems are not really dead systems at all. They are batteries that are discharged, sulfated, loose at the terminals, or simply no longer able to support the demand of a starter, a windlass, or a bank of electronics. BoatUS points out that a multimeter helps you confirm whether the battery is actually delivering power, which is the first and most expensive question in the whole diagnosis chain.
Charging faults: is the charger or alternator doing anything useful?
If the battery looks weak, the next question is whether the charging side is doing its job. Leave the meter on DC volts and measure across the battery posts while the engine or charger is running. A working charging circuit should show that the battery is being pushed upward, not sitting stubbornly at its resting state.
If the reading never rises, or it rises erratically and then falls away, the problem is upstream from the battery and deserves immediate attention. On larger setups, that concern grows fast, especially where a battery installation is tied to a charger with output over 2 kilowatts, a category the Coast Guard treats as a large battery installation. A dead charging path on a cruising boat is not just inconvenient, it is the kind of fault that can strand the electrical system and force the skipper to start conserving every amp.
Bad grounds and bad connections: the boat’s favorite hidden failure
Ed Sherman has said that excessive electrical resistance is the biggest single enemy of boat electrical performance, and that is exactly why so many “mystery” problems turn out to be ordinary connections gone bad. In the marine environment, the usual suspects are wire size or gauge, saltwater exposure, and poor connections. The meter is what turns those vague villains into a specific fix.
To chase a connection fault, move the probes along the circuit instead of staring at the symptom. Test the voltage before and after a switch, connector, fuse holder, or terminal; if the voltage is present on one side and missing on the other, you have narrowed the failure to that spot. That is the difference between replacing parts at random and repairing the actual weak point.
For grounds, do not assume the negative side is innocent just because it is black wire and bolted to the system. Measure from the battery negative post to the device ground under load, because a bad return path can waste as much power as a bad positive feed. If a device works only intermittently, or only when the boat is calm and dry, the ground path is one of the first places to look.
Voltage drop: the number that tells you whether to clean, tighten, or stop trusting the circuit
Voltage drop is where the multimeter becomes more than a yes-or-no tester. boats.com points to the ABYC convention of 3 percent and 10 percent voltage-drop limits for battery-powered circuits, which gives you a practical line between acceptable loss and a circuit that is bleeding power. Critical circuits belong near the 3 percent target, while less critical battery-powered circuits can tolerate more, up to the 10 percent benchmark.
To measure drop, place the probes across the component or section you are testing, one probe at each end of the cable, connector, or switch, then read the loss while the circuit is loaded. If the reading is beyond the relevant target, the fix is usually not complicated: clean the terminals, tighten the connection, repair the corroded lug, or replace undersized wire. If the number is high enough to starve a critical load, that is a fix now issue, because the circuit is telling you it cannot be trusted under demand.
Use continuity for open circuits, and use resistance only when you know what normal looks like
BoatUS also makes an important point that gets overlooked aboard: the meter’s ohms function is only useful in limited situations unless you already know the value you expect to see. That is why continuity testing is so handy on boats. With power off, use continuity to check fuses, switches, wiring runs, and suspect conductors when you want a simple pass or fail result.
If continuity is absent where it should be present, the problem is open, and the circuit will not recover on its own. If continuity exists but the device still fails under load, the fault is probably not a broken wire at all; it is more likely resistance, corrosion, or a termination issue that only shows up when current starts flowing. That is the kind of distinction that saves a full afternoon of replacing parts that were never the problem.
Why this tool matters under the rules, not just in the bilge
The multimeter also sits inside a bigger electrical reality. The U.S. Coast Guard says marine electrical regulations in 46 CFR Subchapter J cover cabling, lighting, grounding, and hazardous locations, and 46 CFR Part 183 requires electrical equipment to be installed and maintained to protect people and the vessel from hazards including fire and shock. ABYC’s training materials treat multimeter selection, use, and reading interpretation as core skills alongside wire sizing, terminations, starter circuits, battery installations, and corrosion mitigation.
That is the real reason this small tool matters so much. It is not just a gadget for the toolbox drawer, it is the fastest way to decide whether a boat has a minor annoyance, a maintenance item, or a failure that needs attention before the next departure. For the DIY sailor, the multimeter turns electrical uncertainty into a sequence of clear answers, and that is often the difference between a quick repair and a costly day of chasing ghosts.
This article was produced by Prism’s automated news system from verified source data, official records, and press releases, then run through automated quality and moderation checks before publishing. The system is built and supervised by the people who set the standards it runs under. Read our full AI policy.
Did this article answer your question?


