Proper seacock installation can prevent a sinking disaster
A proper seacock is engineered, not improvised. The difference between a supported, flanged assembly and a loose valve can be the difference between a dry boat and a sinking.
When a fitting becomes a flooding risk
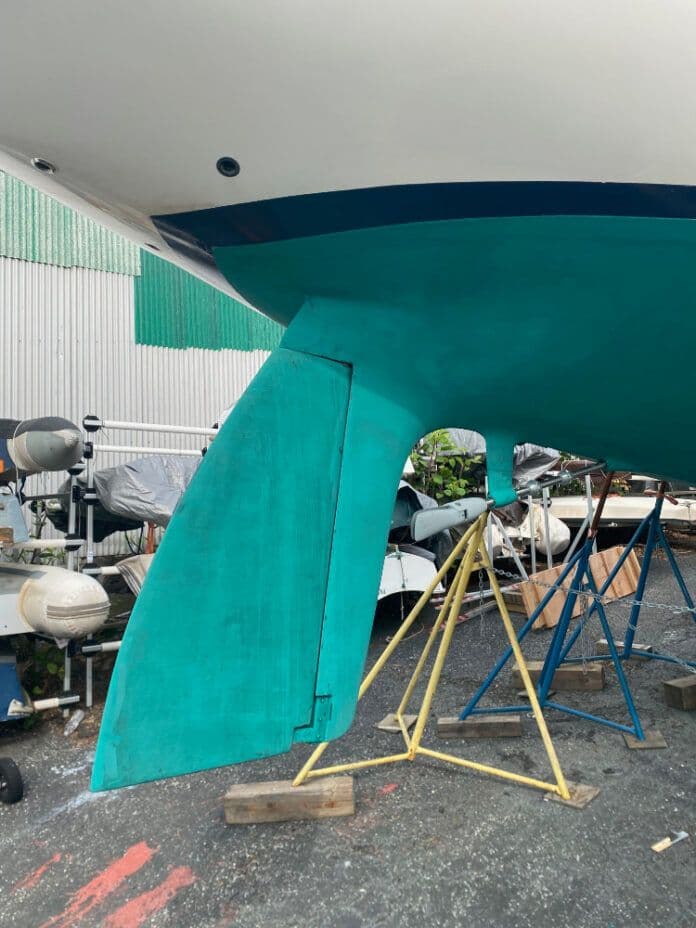
Below-the-waterline hardware is not where you improvise. A thru-hull, a valve, and some sealant may look complete from inside the bilge, but that does not make it a proper seacock, and it certainly does not make it safe if the hull fitting is asked to carry real load. The core issue is simple: if this part fails, water comes in fast, and the boat loses the argument.
ABYC H-27, titled *Seacocks, Thru-Hull Fittings, and Drain Plugs*, treats that reality as a minimum-performance problem, not a style choice. The public preview is dated July 2008, ABYC says it reviews each standard at least every five years, and the standard identifies a 500-pound static-load requirement for installed seacocks. That is the standard that separates a real seacock assembly from the kind of valve-and-through-hull combination that can look acceptable until it is loaded, stressed, or corroded.
What a serviceable installation actually looks like
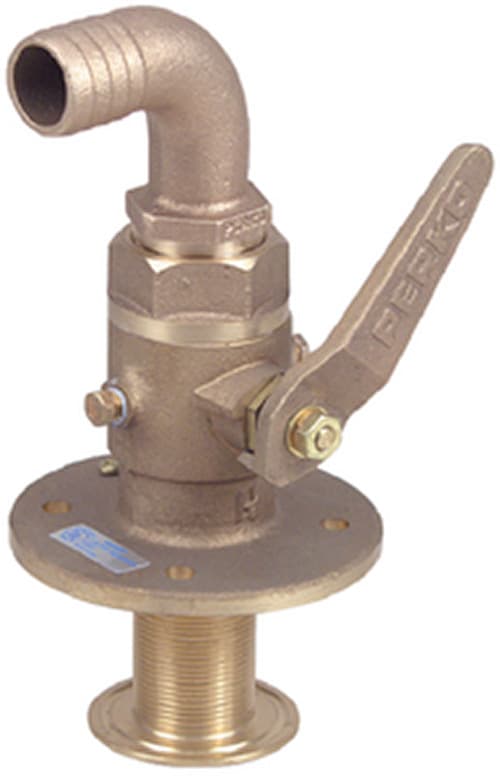
A serviceable seacock is more than a valve that happens to open and close. ABYC defines a seacock as a valve used to control water through the hull, typically with a lever handle that gives a clear open-or-shut indication. In practice, that means the owner should see a supported assembly, a sound bedding job, and a load path that does not ask the hull skin to do all the work alone.
That is where the flanged seacock matters. Steve D’Antonio has been blunt that too many older practices are “bad habits,” and his point lands because a proper seacock uses a load-distributing flange instead of hanging on a skin fitting like a compromise that never got challenged. In the same spirit, he and other marine pros have pushed owners toward UL 1121 approval for marine through-hull fittings and sea-valves, which reinforces the idea that this is engineered hardware, not generic plumbing.
The distinction matters most when a boat comes from the factory with something that looks tidy but is not especially robust. Owners often assume a below-waterline fitting is fine because it has been there for years, yet years of service do not erase a weak load path, poor bedding, or corrosion working at the edges.
Serviceable, marginal, or unsafe
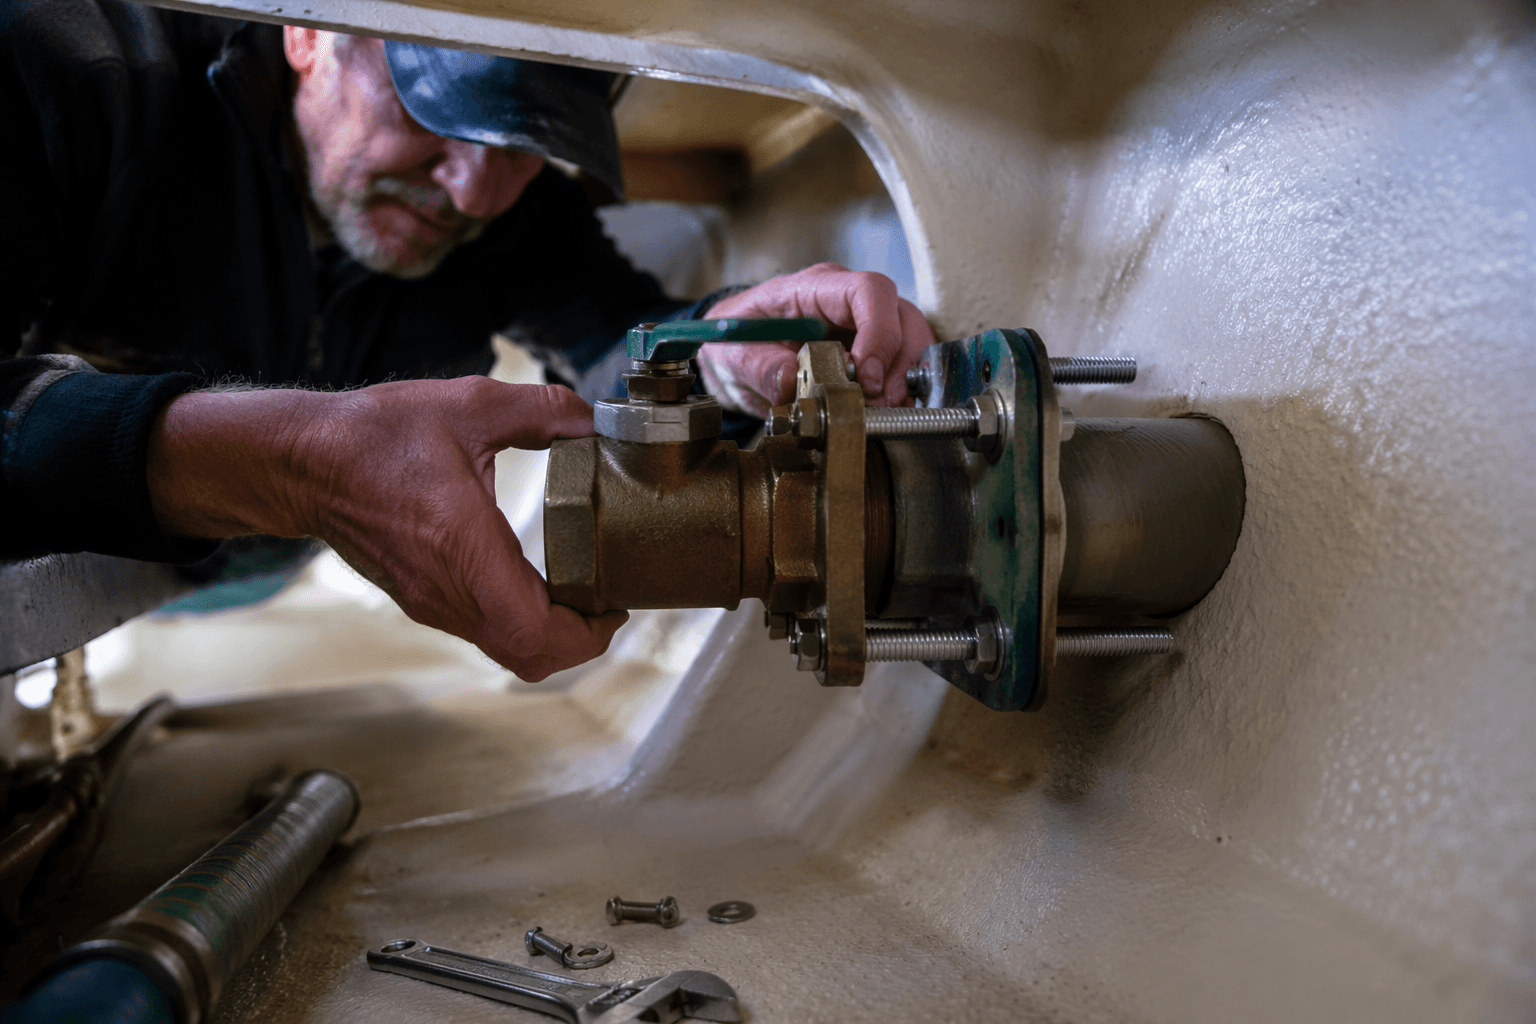
A serviceable setup is one you would trust after a hard season: the seacock is flanged, it is properly supported, and the valve moves cleanly with a lever that makes its open or shut position obvious. The bedding is intact, the backing structure is sound, and there is no visible movement between the fitting, the hull, and the valve when the boat is loaded.
A marginal setup is the one that makes you slow down and inspect twice. Maybe the valve still turns, but the bedding looks tired, the backing is questionable, or the assembly was installed in a way that leaves too much stress on the hull laminate alone. Maybe the hardware works today, but the installation does not inspire confidence for the next grounding, the next haul-out, or the next freeze-up.
An unsafe setup is the one that misses the point of the standard entirely. If you are looking at a basic valve hanging on a skin fitting, or a thru-hull that lacks proper support and load distribution, you are not looking at a properly engineered seacock. That is the kind of arrangement that can turn a routine maintenance job into an emergency.
The haul-out inspection that actually matters
The best time to judge a seacock is when the boat is out of the water and you can see the whole system. Marine How To’s guidance makes one practical tool stand out: a step wrench. It can be inserted into the thru-hull and used to tighten it into a seacock or remove it from a seacock, and with a little heat it can also help break marine sealant free from the hull. That is a small detail, but it is the difference between controlled removal and the kind of damaging improvisation that creates a bigger repair than the one you planned.
From there, inspect the installation as a system, not as a part. Look at the hull opening, the backing structure, the bedding, the valve body, and the surrounding corrosion, because any one weak point can compromise the whole assembly. If a fitting is buried in sealant but not properly supported, it is not really protected, it is just hidden.
A practical checklist looks like this:
- Confirm the seacock is not just a valve on a skin fitting, but a supported assembly with a proper flange.
- Check that the fitting is bedded cleanly and that the joint has not opened up or fractured.
- Verify the backing block or backing structure is solid and appropriate for the load.
- Look for corrosion, seized movement, or any sign that the metal has been working against the hull.
- Make sure the handle gives a clear open-or-shut indication, so there is no guesswork in an emergency.
Groco’s installation guidance is especially useful here because it says to install the seacock on a backing block of suitable material in wet bilge areas, specifically to spread the load rather than rely on the hull section alone. That aligns with the entire logic of ABYC H-27: the fitting has to survive static load, not just look tidy when the hose is off.
Maintenance does not end at installation
A good seacock is not a fit-and-forget part. Groco recommends operating the valve at least monthly to prevent marine growth, and that advice matters because a valve that sits untouched can become stiff, sticky, or deceptive right when you need it to move quickly. The same guidance warns that freezing water can damage the seacock and connected plumbing, which is why winterizing and inspection go together instead of happening in separate mental drawers.
That recurring attention is why serious refits can simplify a boat so dramatically. Practical Sailor reported a Cape Dory 36 refit where Far Reach went from nine seacocks and ten through-hulls to just three through-hulls with seacocks. That kind of reduction is not about minimalism for its own sake, it is about cutting down the number of underwater openings that have to be defended by structure, bedding, and vigilance.
Why the stakes are bigger than one fitting
The U.S. Coast Guard’s 2024 Recreational Boating Statistics is the 66th annual report, and the earlier 2023 report recorded 3,844 incidents, 564 fatalities, and 2,126 non-fatal injuries. Those numbers are not seacock-specific, but they frame why flooding and equipment failures remain central to boating safety. Federal marine casualty rules also treat flooding as a reportable occurrence when it materially affects seaworthiness, which tells you how seriously the system is judged once water is no longer staying where it belongs.
That is the real replacement decision guide: if the thru-hull and seacock are properly supported, properly bedded, and built to withstand load and corrosion, they are serviceable. If they are marginal, they deserve attention now, while the boat is still dry. If they are unsafe, the answer is not more sealant or wishful thinking, it is replacement with the right hardware, the right structure, and the kind of installation that can stand up when the sea leans on it.
This article was produced by Prism’s automated news system from verified source data, official records, and press releases, then run through automated quality and moderation checks before publishing. The system is built and supervised by the people who set the standards it runs under. Read our full AI policy.
Know something we missed? Have a correction or additional information?
Submit a Tip