Small Wooden Boat Restorers Get Spring Commissioning Tips, Workshop Links
Glue joints and varnish work are the first casualties of a rushed spring launch: five targeted checks protect what took you all winter to build.
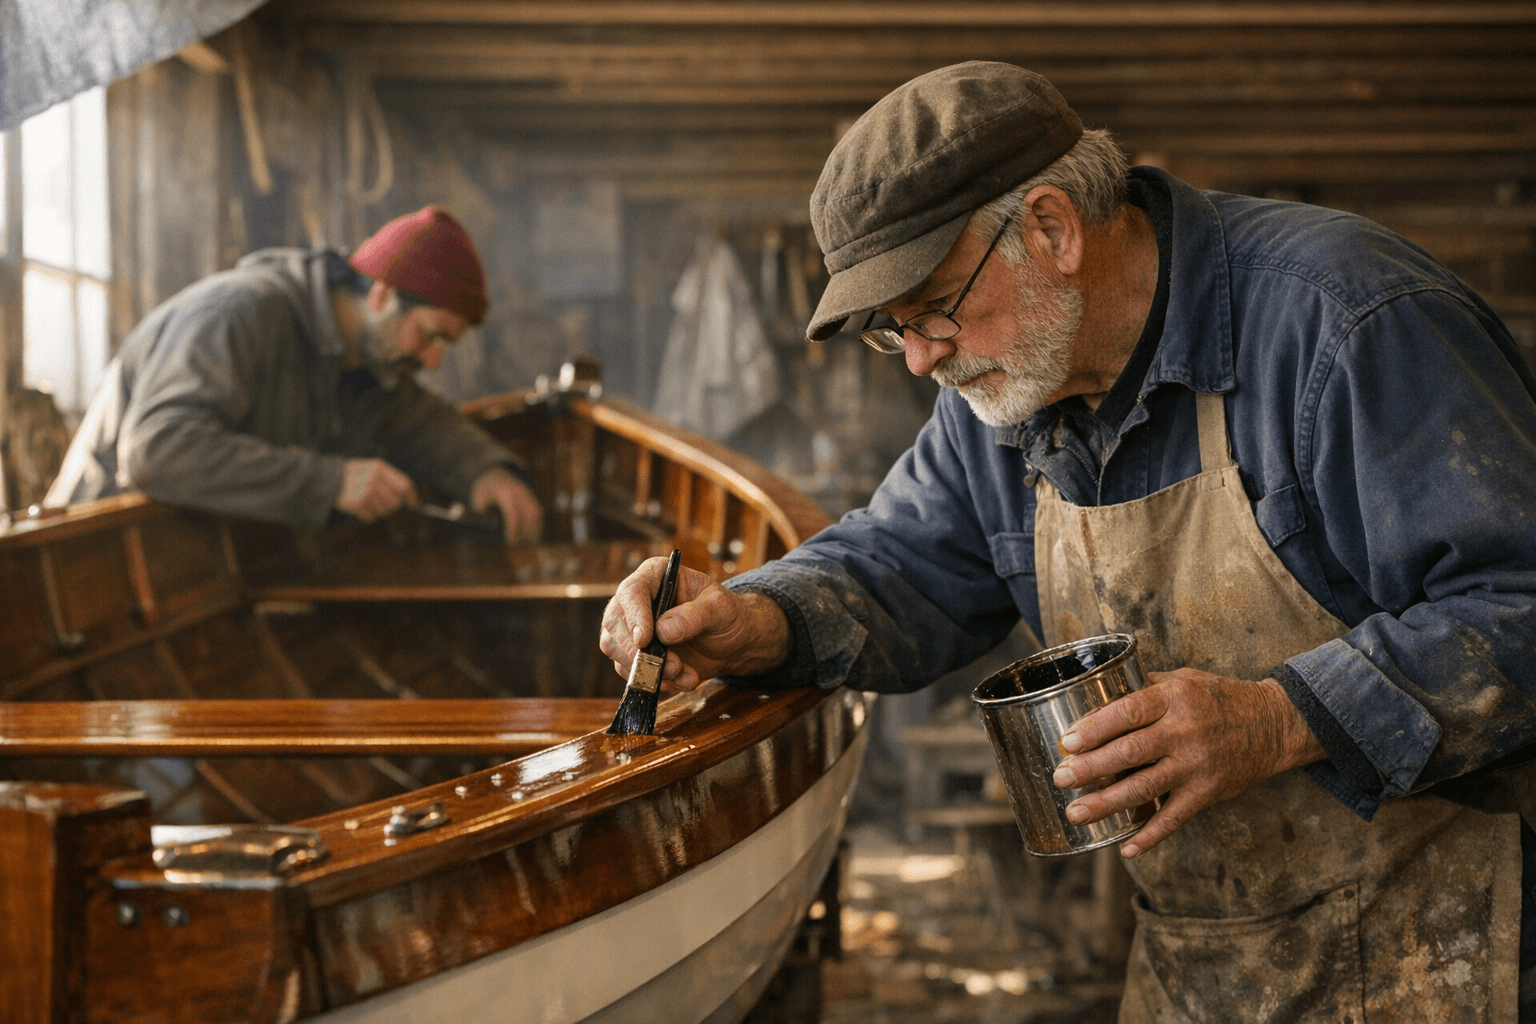
The difference between a wooden tender that lasts another decade and one that quietly fails at a dock cleat often comes down to what happens in the four weeks before you put it back in the water. Hear The Boat Sing, the rowing-culture blog that has become a go-to bulletin for small-craft restorers and hands-on boatbuilders, published an April 8 round-up collecting practical commissioning notes alongside links to upcoming workshops: a compact dispatch timed precisely for owners pulling tarps off skiffs, prams, and sailing dinghies right now. The guidance is short, but each item targets a failure mode that routinely blindsides even experienced builders.
The moisture trap under your cover
Every tarpaulin or canvas cover that seals too tightly creates a micro-climate. Overnight condensation has nowhere to go, and in a wooden hull that means repeated wet-dry cycling across glue lines, seams, and end grain. The fix is low-tech: prop the cover at the transom or gunwale with a short length of PVC pipe or a wooden batten to create a low-profile vent gap. Air should be able to circulate from bow to stern without the cover acting as a tent. The failure you will catch early by adopting this habit: checking blisters forming under varnish on thwarts and brightwork that would otherwise not appear until mid-summer, by which point re-varnishing means stripping back to bare wood.
Materials for this weekend: one length of 3/4-inch PVC conduit, two bungee cords, ten minutes.
Gradual drying and the glue-joint problem
Heat guns, shop propane heaters pointed directly at a hull, or parking a boat in direct sun inside a black poly tent are all faster than good practice allows. Rapid, uneven drying pulls moisture out of the outer wood cells faster than the interior can equalize, and that differential stress opens hairline checks along glue joints, especially epoxy-filleted seams on stitch-and-glue panels. The rule from experienced restorers: never raise surface temperature more than about 10 degrees Fahrenheit above ambient when drying a glued assembly. Shade cloth or a light-colored tarp buys you controlled drying without the thermal spike. The failure you will catch early: a fillet that sounds hollow on a tap test but has not yet let water past the glass cloth tabbing.
The felt-pad check under stored spars
This one surprises newer builders. Spars stored horizontally on padded sawhorses or shop racks wick moisture from the contact point upward into the wood if the pad material holds water, and foam or carpet padding is especially bad for this. The recommendation: use closed-cell foam pads (camp-sleeping-mat offcuts work well) or wrap the contact points in a layer of felt that you replace at the start of each season. Before storing or commissioning, press a dry hand firmly against each contact point on the spar. Any coolness relative to the surrounding wood signals retained moisture. Caught early, this is a light-sanding-and-re-varnish repair; missed, it becomes a delamination that runs six inches up the spar under the finish.
Plank fasteners and bung inspection
The WoodenBoat Forum's widely-referenced maintenance schedule recommends withdrawing a sample of plank fasteners every five to eight years on a well-kept wooden boat to check their condition. For a dinghy or tender, spring commissioning is the right moment to probe every visible bung with a thin pick. A bung that gives slightly under light pressure, that has turned darker than the surrounding wood, or that shows a hairline crack around its edge is advertising a fastener that has either corroded enough to lose its grip or that has let water track down the screw thread into the plank. Replace the bung, extract the fastener, and you will know whether you are dealing with surface staining or structural softening. The materials required are a bung punch, the matching bung stock (match the original species; teak bungs in a cedar plank will telegraph moisture differently than the surrounding wood), a bit of thickened epoxy or marine varnish for bedding, and an afternoon.
Sound and feel diagnostics: the tap test and the flex check
Before reaching for any compound or filler, a systematic tap test with a small brass or hardwood mallet identifies hollow voids under painted or varnished surfaces without touching them with chemistry. Work from bow to stern in overlapping rows, listening for the sharp, clear note of a well-bonded surface versus the lower, papery sound of delamination or a void. A flex check complements this: grip the gunwale with both hands and apply gentle racking pressure side-to-side. Any creak that starts amidships and travels toward a specific frame suggests a fastener in that frame has let go. These diagnostics cost nothing and take about thirty minutes for a typical ten-to-twelve-foot tender; they are the fastest way to build a repair priority list before spending anything on materials.
Oarlock sockets: the overlooked wear point
Bronze oarlock sockets on a wooden rowing tender or yacht dinghy wear on the forward and aft inner faces with every stroke cycle, and that wear is easy to overlook because the pin still fits. Spin the pin inside the socket. A tight, play-free fit means the socket is fine. Any measurable wobble, combined with a worn elliptical shape in the socket bore (visible if you shine a light straight down), means the socket has worn past the point where it controls the oarlock reliably under load. A loose socket also allows water to track down around the fasteners into the rail, exactly the failure that the plank-fastener inspection above is designed to catch downstream. Replacement bronze sockets run under twenty dollars each; installation requires backing out two or four screws, bedding the new socket in polysulfide, and re-fastening.
Skeg wear and grounding damage
On a tender that has been beached repeatedly or towed astern, the skeg takes the first abuse. Inspect the full length of the skeg for compression damage at the forward face (from grounding bow-first), for any lateral flex that indicates a fastener has pulled, and for checking or splitting at the aft tip. A skeg that flexes laterally at its mid-point is no longer protecting the keel line and will worsen quickly once the boat is in regular use. Epoxy consolidant worked into a checking skeg tip buys time; a skeg that has lost its fastening alignment needs re-bedding and re-fastening before launch.
Workshops that build repeatable technique
Knowing what to look for is only half the skill. Stitch-and-glue and cedar-strip sessions, the kind Hear The Boat Sing links to in its April 8 roundup, teach the hand skills that make these repairs repeatable: consistent epoxy fillet radius, clean glass-cloth tabbing, and the scarfing technique that produces a joint stronger than the surrounding wood. WoodenBoat School's 2026 catalog includes an Introduction to Boatbuilding course building skiffs in marine plywood, white oak, and northern white cedar that covers scarfing, framing, planking, and interior joinerwork under direct instruction, as well as a cedar-strip course focused on wood strips and epoxy. These are not beginner-only offerings; restorers who have fixed the same joint three times without a consistent result often find a single instructor-led session solves the underlying technique gap for good.
The spring window for this work is genuinely short. Glue joints that have been slowly cycling through a wet winter stabilize once temperatures rise, making this the lowest-risk moment to probe, tap, and assess before a repair becomes a rebuild.
This article was produced by Prism’s automated news system from verified source data, official records, and press releases, then run through automated quality and moderation checks before publishing. The system is built and supervised by the people who set the standards it runs under. Read our full AI policy.
Did this article answer your question?


