Step-by-Step Guide to Bottom Painting Your Boat for Better Performance
A clean bottom is faster, cheaper, and less frustrating to maintain. Pick the right coating first, and you avoid a season of sanding and recoating.
The real payoff starts before the first brush stroke
A fouled hull does not just look rough. West Marine says marine growth slows the boat, hurts maneuverability, and can increase fuel burn, which is why bottom painting is a performance decision as much as a maintenance chore. Get the system wrong and you can spend the season paying for it twice, once in materials and again in lost speed, poor adhesion, and extra yard work.
The smartest way to treat the job is as a planning exercise. The right paint, the right prep, and the right weather window can turn a messy spring project into a controlled weekend task. Skip those decisions, and you are far more likely to end up with premature failure, another sanding session, and a haul-out that drags on for weeks.
Choose the coating before you buy the supplies
The first call is compatibility. West Marine stresses that the new coating has to work with whatever is already on the hull, because switching systems without checking the existing layer can create adhesion problems and expensive rework. If you do not know what is on the boat now, a tie-coat primer is the safer move.
The next decision is paint type. West Marine’s guidance separates ablative and hard antifouling paints, and the choice should track how you use the boat, where you sail, and what the hull is made of. Copolymer ablative paints stand out for trailerable boats because they have minimum overcoating times and no maximum out-of-water time, which gives you more flexibility if the boat sits on a trailer between launches.
Timing matters too. West Marine says antifouling paints are often reapplied every 1 to 3 years depending on paint type, so you are not just buying a finish, you are choosing the next maintenance cycle. That is where the cost-and-effort tradeoff really shows up: a better match on the front end can save a much bigger sanding and recoating bill later.
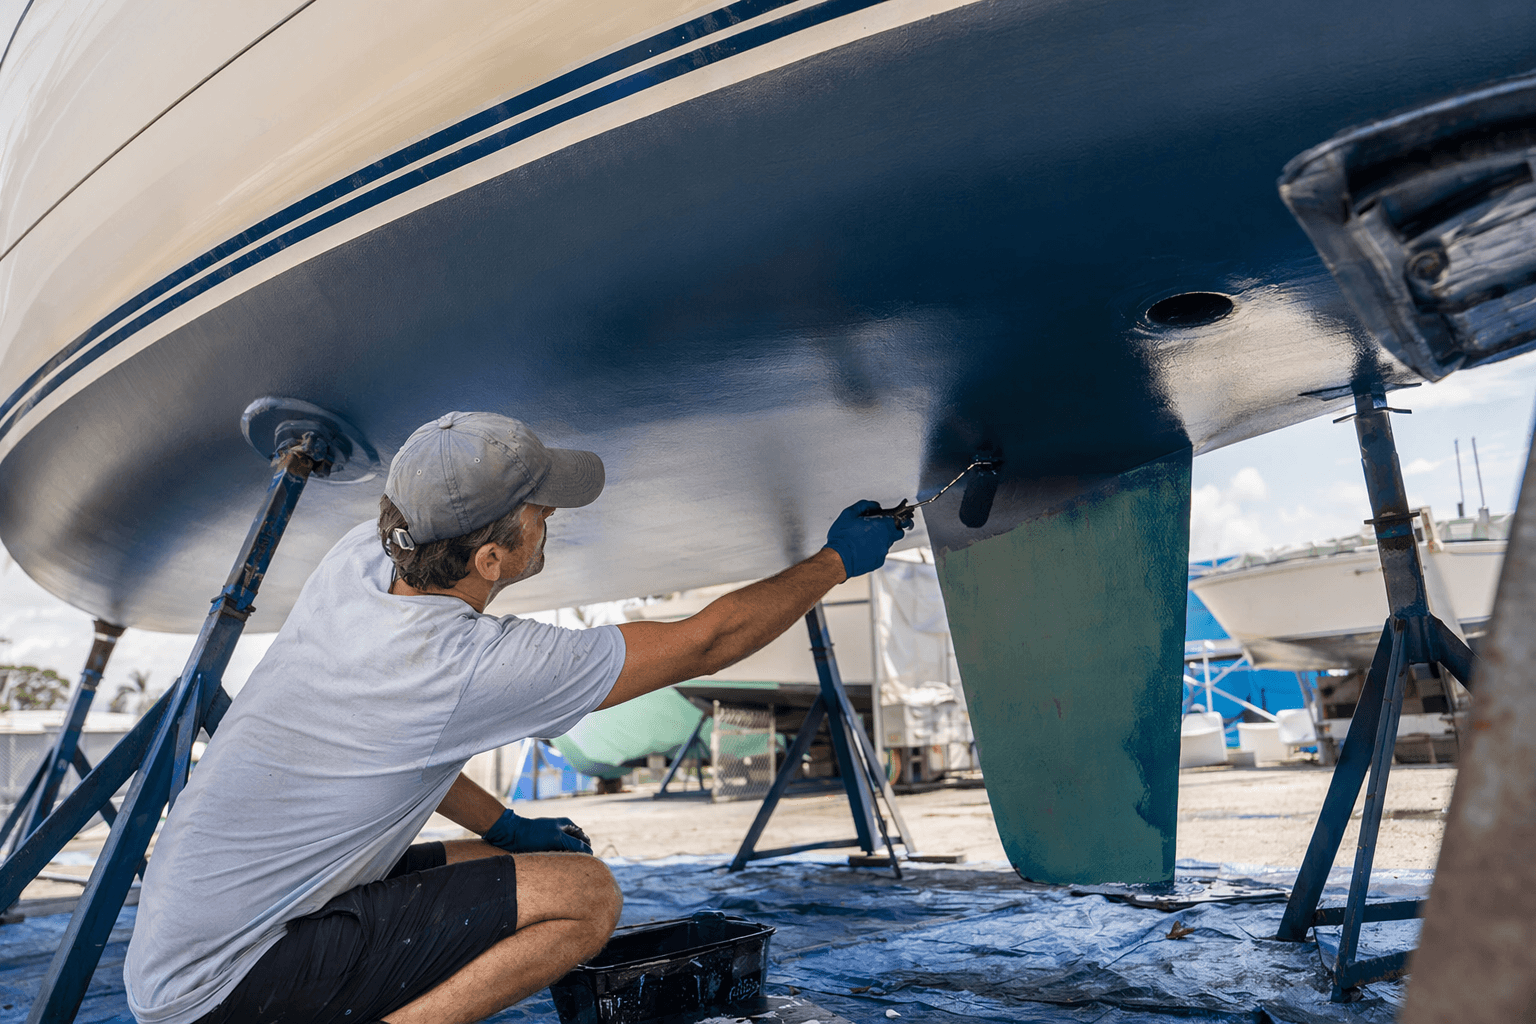
Prep is where most of the savings are won or lost
Surface preparation is the foundation of the whole job. Clean off dirt and growth, let the hull dry, then sand for adhesion. If any of those steps are rushed, the best paint in the world will still struggle to hold.
This is also the step where many DIY jobs become expensive. A hull that is not dry enough or not properly scuffed can force you back into the yard for more sanding, more dust, and more material. In practical terms, prep is the difference between a coating that lasts and a coating that starts lifting before the season is over.
Safety belongs in prep, not as an afterthought. OSHA requires suitable respirators and protective clothing for certain paint-spraying work with toxic vehicles or solvents, and even brush application in poorly ventilated spaces can require respirator protection. Practical Sailor has also highlighted the dust exposure problem around sanding bottom paint and grinding fiberglass, which makes a proper respirator and protective clothing worth the effort every single time.
Apply with the weather, not against it
Antifouling paint needs the right conditions to cure properly, so the calendar is only part of the plan. West Marine’s guide puts timing and temperature alongside paint choice and hull prep because rushing the job in bad weather can ruin an otherwise careful application. If the air is too cold, too damp, or too unstable, the finish can suffer and the work can stretch out.
That is one reason the step-by-step approach works so well for DIY sailors. You are not trying to knock out a huge spring project in one frantic push. You are moving through a sequence: identify the old coating, choose the new system, prep the hull, and then apply the paint in a window that gives it the best chance to cure.
Why the environmental stakes are part of the maintenance bill
Bottom paint is not only about your boat. The U.S. Environmental Protection Agency has said that several California marina basins have suffered copper overloading, much of it from passive leaching off antifouling coatings and from periodic hull cleaning by divers. The agency has also funded a $96,000 project to test safer, non-biocide alternatives in San Diego, San Francisco, and Newport Beach.
NOAA and Sea Grant educational material adds the performance side of that same equation. Fouling organisms such as algae, barnacles, mussels, and worms can slow sailboats and increase fuel consumption for power boats, but many antifouling paints contain copper that can contaminate coastal waters. The Port of San Diego has been blunt about the issue too, saying copper from antifouling hull paints can be a significant source of water pollution in marina basins and can harm marine life.
That is why the paint aisle now carries more than just a performance choice. Washington State Department of Ecology’s 2024 update says a 2020 law could restrict most copper-based antifouling paints for recreational boats beginning January 1, 2026, if safer and effective alternatives are found and judged feasible, reasonable, and readily available. California documents also say long-term monitoring is still necessary after the 2018 leach-rate cap regulation to evaluate dissolved copper in marinas. For boat owners, that means the coating you choose today may affect not only next season’s speed, but also marina access, compliance, and local water quality.
The smartest bottom-paint job is the one you do once
Older EPA and NOAA material notes that pesticide-containing bottom paints remain the principal way to prevent fouling, while also pointing back to the stricter era of tributyltin restrictions. That history explains why modern bottom painting is such a balancing act: you are trying to protect performance, control ownership costs, and stay ahead of changing environmental expectations at the same time.
For DIY sailors, the best result comes from treating the job like an investment, not a chore. Pick a compatible system, use the right respirator and protective clothing, prep the hull until it is truly ready, and give the paint the weather it needs to cure. Do that well, and bottom painting stops being a season-long headache and starts doing what it should: keeping the boat fast, efficient, and ready to launch.
This article was produced by Prism’s automated news system from verified source data, official records, and press releases, then run through automated quality and moderation checks before publishing. The system is built and supervised by the people who set the standards it runs under. Read our full AI policy.
Did this article answer your question?


