Maurizio Leo breaks down sourdough starter into 7 easy steps
Maurizio Leo turns starter care into a seven-day routine, with clear bubble, rise, and smell cues so you can tell when the jar is alive and when it just needs a warmer feed.
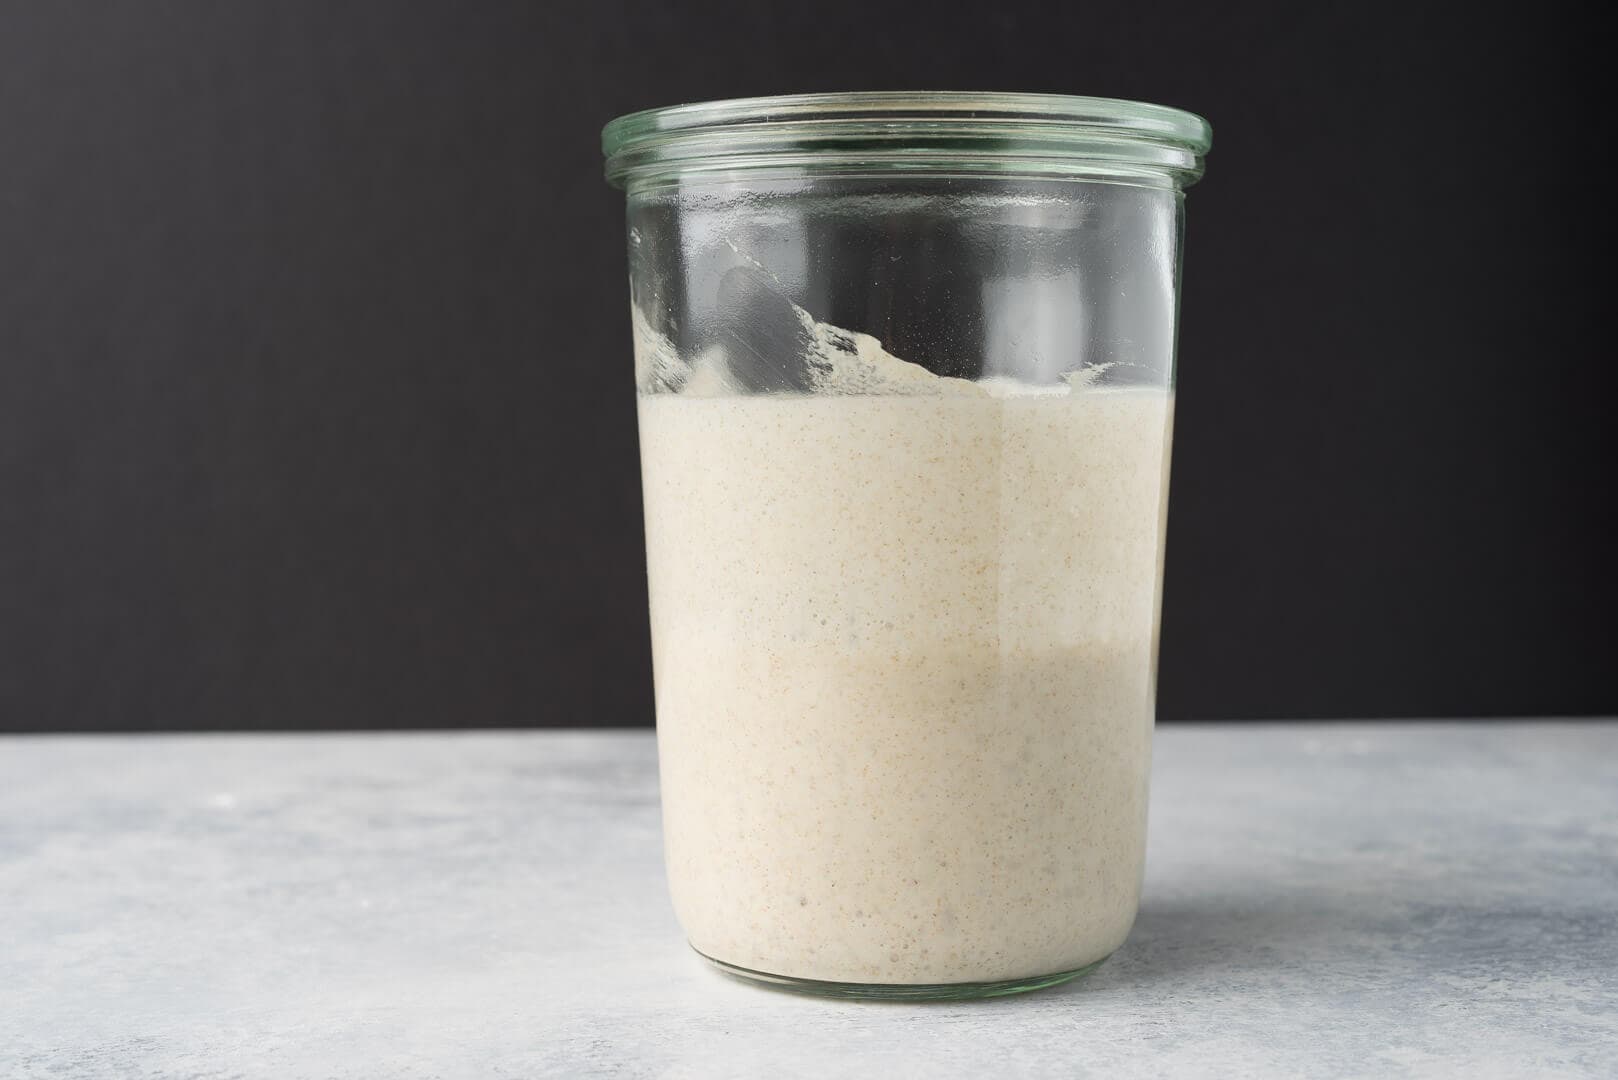
A clean, marked jar is the center of Maurizio Leo’s seven-day sourdough starter routine. Instead of asking you to trust instinct alone, The Perfect Loaf treats starter care as a sequence of small, observable changes: flour and water, time, refreshment, and a jar that slowly becomes dependable enough to leaven bread.
Why this starter approach works
The appeal of Leo’s page, “7 Easy Steps to Making an Incredible Sourdough Starter from Scratch,” is that it treats the starter like a living system, not a mood swing. Bread baking with sourdough reaches back to ancient times and spans a nearly 6,000-year history across the globe. The American Society for Microbiology’s “The Sourdough Microbiome” and a 2021 review on PubMed Central both define starters as microbial communities of yeasts and lactic acid bacteria.
The Perfect Loaf does not leave you with one isolated recipe either. Leo’s related pages, including “How Do I Feed My Sourdough Starter?”, “Sourdough Starter Maintenance Routine,” and “Frequently Asked Sourdough Starter Questions,” show that the real goal is not to make a jar bubble once, but to teach you how to keep it steady. King Arthur Baking has a sourdough guide, Serious Eats has a starter how-to and science explainer, and Baking Steel calls starter “the simplest thing in baking and the most intimidating.”
Day 1: mix and mark the jar
Start with flour and water and keep the first batch simple. On day one, the visual cue is plainness: a thick paste, maybe a few streaks clinging to the jar, but nothing dramatic yet. A starter that is on track here does not need to look lively immediately; the important thing is that it is hydrated evenly and left in a clean, marked container so you can see movement later.
The smell on day one is usually straightforward too: raw flour, mild grain, maybe a faint wheaty sweetness. If it already smells harsh or sharply alcoholic, that often means the jar is too warm or the mix was left too long without attention.
Day 2: watch for the first tiny signs of life
By the second day, many starters show the first bubbles along the sides or a slightly pocked surface. That is the visual cue to look for, not a dramatic doubling. Smell can start to shift toward yogurt, tang, or mild fruit, though some starters also pass through a cheesy phase before settling into something cleaner.
This is where beginners often hit the false alarm stage. A quiet-looking jar on day two is not dead, and a burst of early bubbles does not mean the starter is ready to bake. The microbiome is still sorting itself out.
Day 3: feed on rhythm, not on panic
By day three, the first big mistake is usually feeding too fast or too often because the jar looks sluggish. If it is in a cool kitchen, activity can crawl; if it is warm, it may spike and fall before you check it. The right visual sign is a starter that begins to rise more clearly, then sinks back a bit after peaking, while the smell becomes more tangy and less raw.
If you are seeing little or no lift, the rescue move is simple: keep feeding consistently, move the jar to a warmer spot, and wait for a fuller cycle. Do not assume the starter has failed just because it has not doubled on your timeline. A starter that is still building strength may smell pleasantly sour long before it looks impressive.
Day 4: look for expansion and a cleaner sour aroma
By the middle of the week, the strongest cue is volume. You want to see the surface doming after feeding, bubbles spreading through the sides, and the starter rising and falling in a pattern you can predict. The smell should be brighter now, less like plain flour and more like fresh acidity, yogurt, or mild fruit.
This is also the point where temperature matters most. Too cold, and the jar stays sleepy; too warm, and it can race through food before the culture has really strengthened.
Day 5: keep feeding after peak, not before it
Feeding timing is the trap that catches a lot of home bakers. If you feed before the starter has reached peak rise, you can dilute the very activity you are trying to build. By day five, a healthier starter should be rising more predictably and showing bubbles throughout, with a smell that is tangy but not unpleasantly harsh.
The rescue move here is restraint. Let the starter climb, observe the high point, and then feed on that rhythm rather than on the clock alone. The simplest visual cue is that the starter should clearly expand after feeding and leave evidence of its rise on the jar walls.
Day 6: judge the starter by its peak, not its mood
A starter that is getting close to bake-ready should rise with more confidence and do so in a repeatable window after feeding. The jar should look lively, with a domed top, visible bubbles, and an aroma that feels clean and balanced instead of sour in a punishing way. If it is sluggish, the most common fix is still boring but effective: steady warmth, regular refreshment, and no dramatic changes in flour or hydration.
Day 7: test for readiness, then move into maintenance
By the end of the first week, the goal is not perfection. The goal is a starter that rises predictably, smells cleanly sour, and responds to feeding in a way you can track from one cycle to the next. That is the moment when The Perfect Loaf’s maintenance resources start to matter, because the next phase is not creating life from scratch but keeping the culture stable enough for consistent bread.
If the starter still looks weak, do not call it dead. False dead-starter alarms are common, especially when the kitchen is cool or the feeding schedule has been erratic. Keep the jar warm, feed on a consistent rhythm, and judge success by repeated rise, steady bubbles, and a smell that says fermentation is moving in the right direction.
This article was produced by Prism’s automated news system from verified source data, official records, and press releases, then run through automated quality and moderation checks before publishing. The system is built and supervised by the people who set the standards it runs under. Read our full AI policy.
Did this article answer your question?