Repair Torn Clothes With Sashiko Stitching, a Beautiful Japanese Mending Technique
Sashiko turns torn clothes into wearable art — this ancient Japanese running-stitch technique makes repairs more beautiful than the original.

That hole in your favorite jeans is not a reason to donate them. It is an invitation.
Sashiko, the centuries-old Japanese running-stitch technique now at the center of the visible mending movement, does something counterintuitive: it makes repairs more beautiful than the original fabric. Where fast fashion tells you to toss and replace, sashiko tells you to slow down, pick up a needle, and stitch something worth looking at. The result is a garment with a history you can read in the thread.
Where Sashiko Comes From
Sashiko began not in a design studio but in the rice paddies and fishing villages of rural Japan, where farmers and fishermen reinforced worn fabric to survive hard winters. The technique uses the running stitch, an elegantly simple construction: the needle passes through fabric in evenly spaced intervals, building lines of stitching that layer into geometric patterns. Over generations, what started as pure utility evolved into a decorative art form practiced worldwide while remaining a treasured tradition in Japan. That dual identity, functional and beautiful, is exactly what makes sashiko so well-suited to the slow fashion moment happening right now.
One approach gaining traction in the visible mending community is Koshi-zashi, a sashiko-inspired method described by Zenstitching as "a structured, grid-like stitch that's both strong and beautiful." If you have never picked up a sashiko needle before, Koshi-zashi is a smart entry point: the grid gives you a clear visual roadmap, and the repetitive motion becomes meditative fast.
What You Need Before You Start
The materials list is refreshingly short. Gather these before you sit down:
- A long sashiko needle (the length lets you load multiple stitches at once)
- Sashiko thread in a color that contrasts or complements your fabric
- A fabric patch cut at least 1 inch (2.5 cm) larger than the hole on all sides
- Safety pins
- Transfer paper or a washable pen for pattern transfer
- A ruler and a sliver of soap or a fabric marker for grid marking
The patch sizing is not arbitrary. Because the fabric surrounding a hole is usually already stressed and prone to further fraying, building in that extra inch of overlap on every side gives the repair the structural foundation it needs to last.
Preparing the Repair
Before a single stitch goes in, take a few minutes with the garment. Press the damaged area flat and assess how far the wear extends beyond the visible hole. That context matters for positioning your patch.
Cut your patch fabric, then fold and press the edges for a neater finished look. Place the patch over the hole so the overlap is even on all sides, then pin it in place. Safety pins are the move here, and Zenstitching explains why plainly: "I like safety pins because they will not fall out, or inadvertently stab you whilst you are mending!" Regular straight pins have a way of migrating at the worst possible moment, so the safety pin recommendation is practical advice, not overthinking.
With the patch pinned, use transfer paper or a washable pen to sketch your sashiko pattern directly onto the fabric surface. For Koshi-zashi, the next step is marking the grid. Using a ruler and a sliver of soap or a fabric marker, measure out a half-inch grid across the entire patch area. Zenstitching notes that working in imperial measurements "allows for a little extra space between stitches, compared with metric," so if you are on the fence between half an inch and one centimeter, the slightly wider imperial spacing gives each stitch room to breathe visually.
How to Stitch
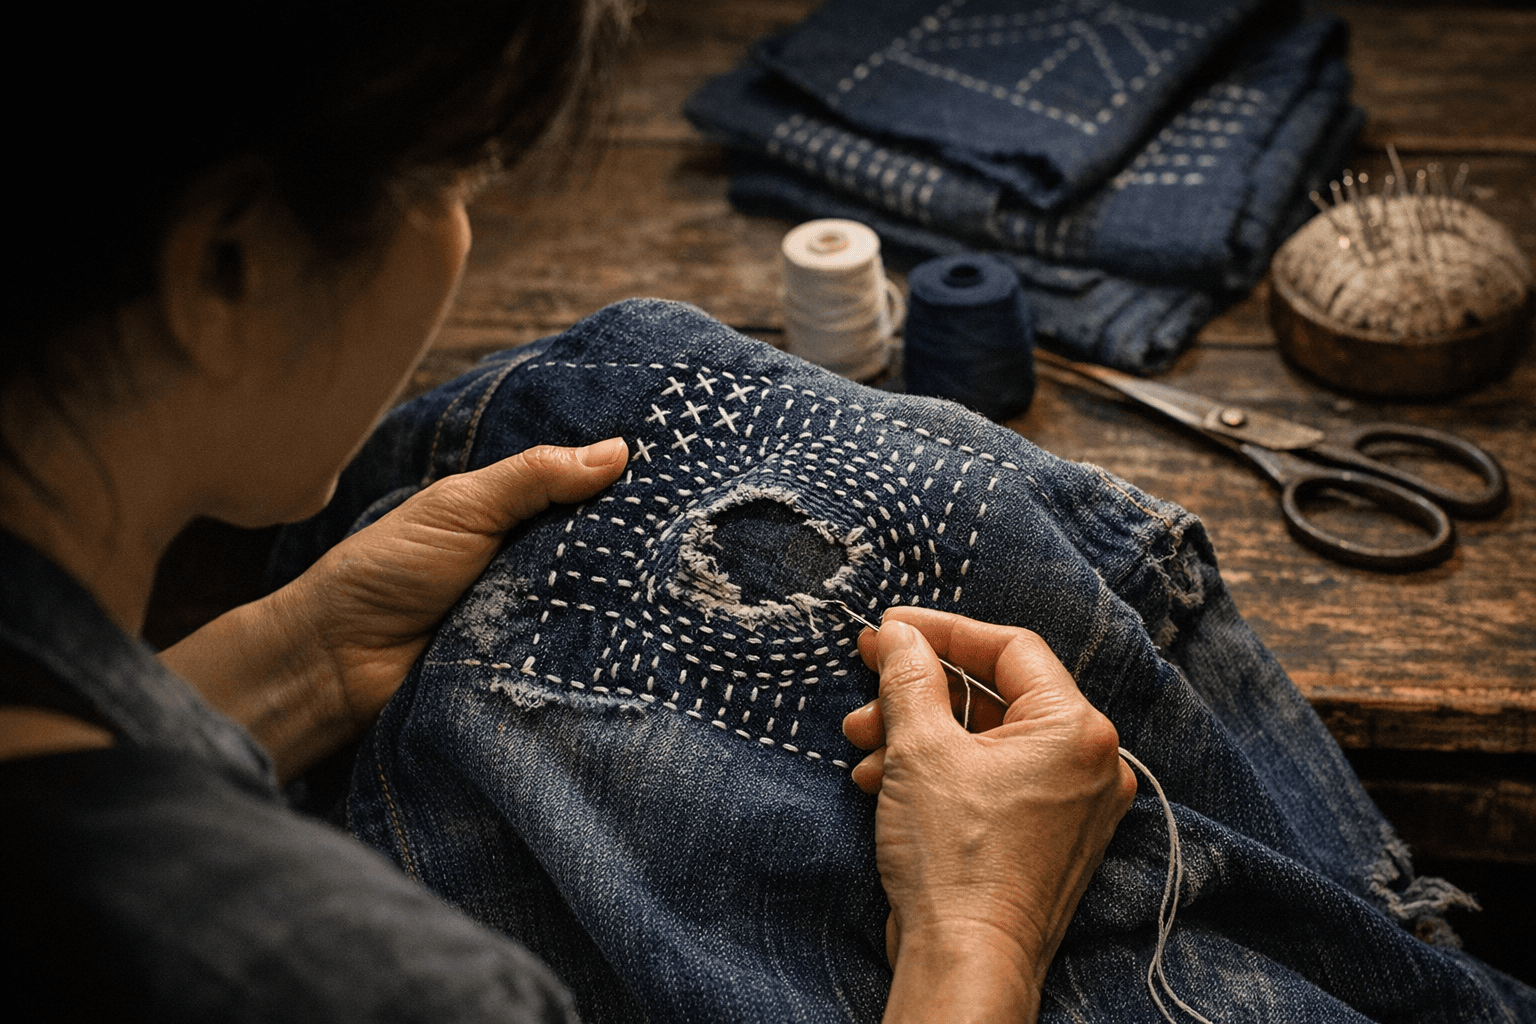
The sashiko running stitch is exactly what it sounds like: evenly spaced stitches moving in a straight or curved line across the fabric. The key tool is the long sashiko needle. Unlike a standard embroidery needle, the length lets you load several stitches onto the needle at once before pulling the thread through, which creates what Dorsali calls "an efficient and calming rhythm." Once you find that rhythm, an hour passes without noticing.
For Koshi-zashi, work row by row across your marked grid, stitching along the horizontal lines first and then the vertical ones to build the characteristic crosshatch. The intersection of those lines is where the stitch gets its structural strength: each row locks into the next, distributing tension across the patch rather than concentrating it at the hole's edge.
The single most important technique note is this one from Dorsali: "Be mindful not to pull the thread too tightly, especially when changing direction, to avoid puckering that can affect both the look and durability of the fabric." Puckering is the most common beginner mistake in sashiko. Tight thread pulls the fabric up around the stitching line, distorting the pattern and creating pressure points that will wear out faster than a relaxed stitch. Let the thread lie naturally against the fabric surface.
If this is your first time working with sashiko, start with a small area before committing to a full patch: embellish a cuff, reinforce a pocket corner, or practice the running stitch on a scrap of similar fabric. The skills transfer directly, and the muscle memory you build on a small test area makes the main repair significantly easier.
Why This Matters Beyond the Garment
There is a larger argument embedded in every sashiko repair. Visible mending, as a practice, does not hide wear. It frames it. The stitching becomes evidence that something was worth saving, and the aesthetic contrast between thread and fabric turns that evidence into a design choice.
Dorsali frames it this way: "This hands-on process not only teaches you a new technique but also aligns with the principles of slow fashion by giving your garments a longer life while adding a unique, personal flair." Brands like dorsaLi, which centers its design philosophy on timeless, high-quality construction, point to sashiko as a natural extension of that thinking: a simple repair becomes a standout design element, and the garment's lifespan extends accordingly.
Zenstitching captures the broader stakes clearly: "By choosing to repair rather than replace, you're not only saving a garment — you're also slowing down the cycle of consumption and honouring the resources that went into making it. Visible mending supports a more sustainable, circular relationship with clothing, where wear and imperfection are seen not as flaws, but as stories worth preserving."
That is the real argument for sashiko in 2026: not just that it is beautiful, though it is, and not just that it is practical, though it absolutely is. It is that the act of sitting down with a needle and a torn pair of jeans and deciding they are worth the time is itself a political act. Every stitch is a vote against the disposability that the fashion industry has spent decades selling.
The imperfection in the fabric is not a problem to be solved. It is the starting point for something better.
This article was produced by Prism’s automated news system from verified source data, official records, and press releases, then run through automated quality and moderation checks before publishing. The system is built and supervised by the people who set the standards it runs under. Read our full AI policy.
Did this article answer your question?