Visible Mending Techniques and Simple Repairs You Can Do at Home
Learn practical visible mending and simple repairs you can do at home, stitch, patch, darn, and reinforce to extend garments and add personality.

1. Why mend: the design vision and sustainable claim
Visible mending is a deliberate design choice as much as a repair technique, a way to celebrate a garment’s life while keeping it in circulation. OurSocialFabric foregrounds that idea simply: “The most sustainable garment is the one you already own.” Visible mending “isn’t about hiding wear and tear. It’s about celebrating it. Each patch, stitch, or darn tells a story and keeps a garment in use for longer, reducing waste and honouring the time and materials that went into making it in the first place.”
2. A brief cultural note: provenance and contemporary makers
This craft has deep roots; Spoonflower reminds us that “visible mending dates back to the Edo period of the history of Japan,” yet it has been freshly reimagined by modern practitioners. Arounna Khounnoraj, author of the 2020 book Visible Mending: A Modern Guide to Darning, Stitching and Patching the Clothes You Love, is one of the contemporary voices who helped make it visible again, and imagery from Khounnoraj’s work appears in recent editorial spreads (image credit line includes “Arounna Khounnoraj, Visible Mending, © BOOKHOU 2023; Nina and Sonya Montenegro; Minttu Wikberg; Lily Fulop”).
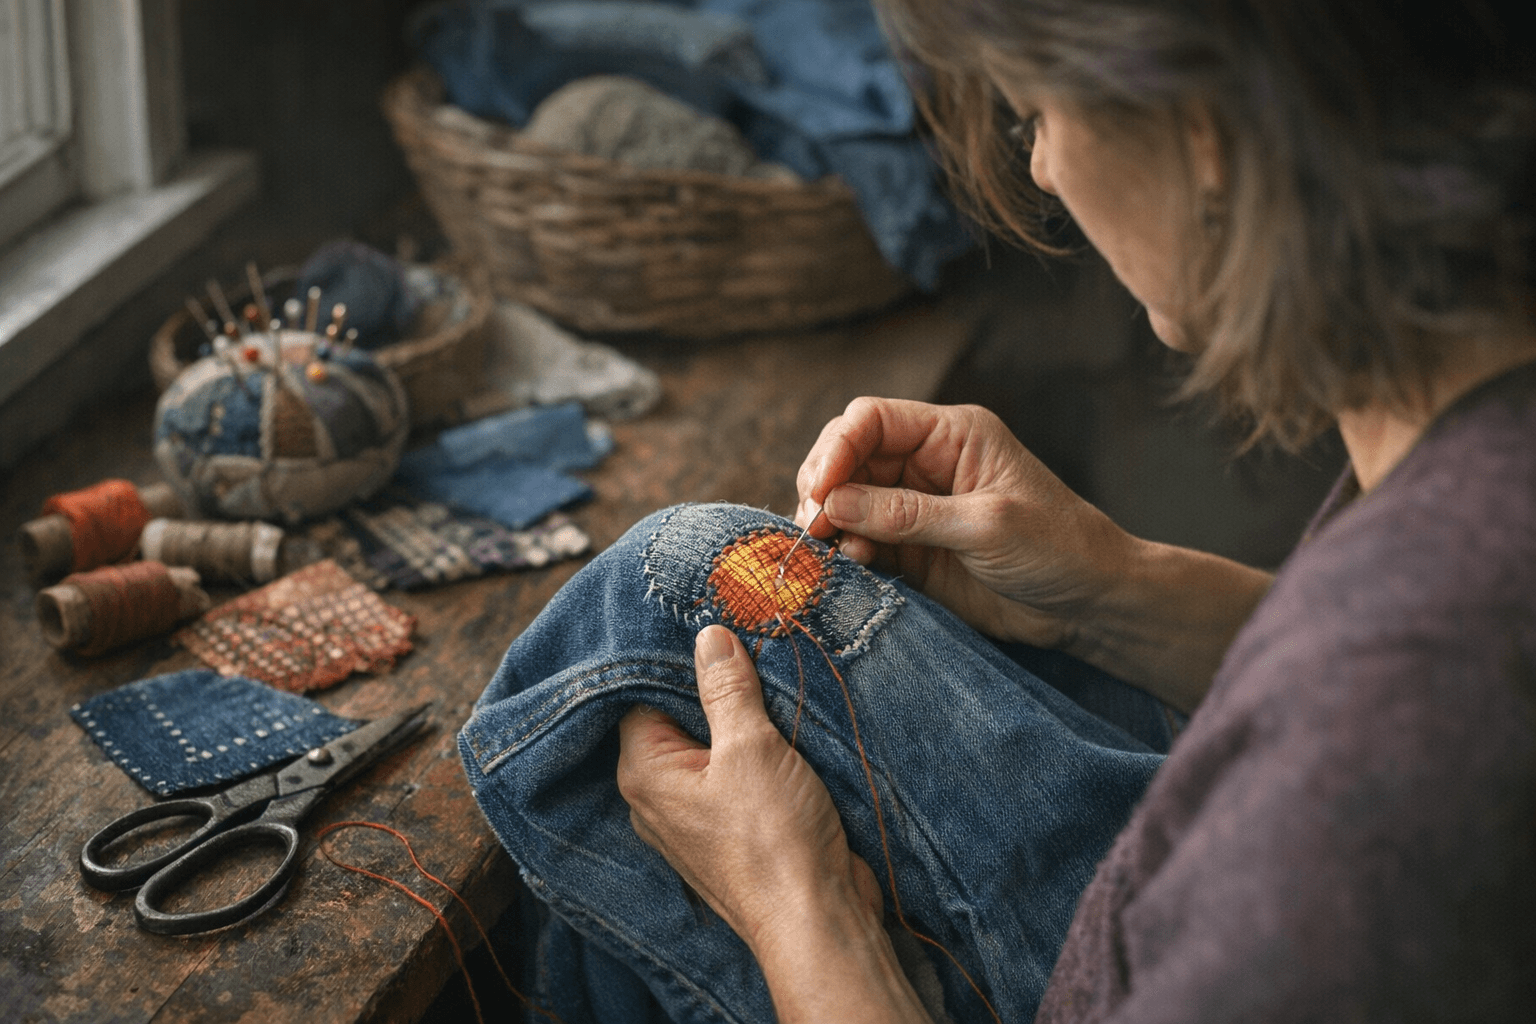
3. The one stitch to know: running stitch
For entry-level patching and darning, NPR advises mastering the running stitch: “For entry‑level patching and darning, you need to know only one simple stitch: the running stitch. It's that classic dotted line made by just pushing the needle up and down in a straight line across the fabric.” It’s the backbone of visible patching, used to anchor patches, create decorative grids, or stitch columns back and forth across reinforcement fabric. Kate Sekules also recommends assessing the whole garment first: “Before starting any mend, look at the whole garment, its shape, texture and colors. Then brings out your supplies, lay them on top of or near the damaged area, and play with different combinations, says Sekules.”
- “Trim away any frayed threads around the hole you’re attempting to mend.”
- “Cut a piece of fusible interfacing that is slightly larger than the hole and iron on to the garment according to the product’s instructions.”
- “Take the fabric that you wish to use for your patch and cut into desired shape, making sure the patch is ½” larger in diameter than the hole. Fold and press the edges of the patch towards the wrong side by ¼”. Pin into place over hole.”
4. Outside patch: Spoonflower’s step sequence
Spoonflower’s practical outside‑patch workflow gives precise, tactile steps you can follow:
Spoonflower uses sturdy woven fabrics in examples, specifically Dogwood Denim® and Linen Cotton Canvas, and demonstrates both inside and outside placements for aesthetic choice.
5. Inside patch: neat reinforcement from the reverse
Spoonflower’s inside‑patch approach follows the same opening instruction: “Trim any frayed threads around the hole that you’re attempting to mend.” Then you “Place the patch on the inside of your garment and pin into place […]”, an economical, less visible option for shirts and jeans that preserves an external silhouette while stabilizing the weave from behind. OurSocialFabric also points readers to jeans and knits as approachable examples for these beginner‑friendly internal mends.
6. Fusible interfacing and stabilizing
Spoonflower explicitly prescribes fusible interfacing as an underlayer: “Cut a piece of fusible interfacing that is slightly larger than the hole and iron on to the garment according to the product’s instructions.” Use interfacing to stabilise thin or knit areas before stitching; combine it with a patch or darning as the structural base. Egausa further suggests stabilizers and an embroidery hoop for fussy darning work, tools that let you treat delicate knits with the same care you give a fine bridal bodice or a tailored blazer.
7. Darning and the “weave mend”
When a hole is best filled rather than covered, NPR’s captioned example of a “weave mend” is instructive: “A basic darn known as a 'weave mend,' where you move your needle across the fabric around the hole, and the hole itself, in a straight line, horizontally and vertically.” The technique recreates missing threads by building a small woven patch of thread or yarn; it works beautifully on elbows, cuffs, or thin knit panels. Egausa highlights that visible mending “can be done by just about anyone using a few basic skills and simple materials,” so darning is both a practical and democratic skill.
8. Reinforcing popped seams
Popped seams are one of the most common quick fixes you’ll encounter. Shoprepurpose gives a clear, repeatable method: “Using the broken thread as your guide, create stitches above and below the popped seam to reinforce your mending. This makes it last longer.” Use matching thread and small backstitches if the aim is durability; choose contrasting thread if you want the repair to read as decoration. Shoprepurpose also reminds menders that matching materials “will give you a longer lasting mend, especially in areas that get more wear.”
9. Hiding stains and making them beautiful
If a garment is blemished rather than torn, visible mending can turn a flaw into a focal point. Shoprepurpose notes: “Mending can also cover stains or imperfections on your garments. In this case, the more visible or ornamental style gives an extra creative look to the finished mend.” Even for decorative covers, “simple hand stitches are enough to get the look you want.” Think of a silk blouse with a sequined patch or a denim jacket screened with contrasting cotton, function becomes fashion.
- Needles (sewing, embroidery, or darning)
- Pins (straight pins or quilting pins)
- Thread (sewing thread, embroidery floss, or even some yarns)
- Fabric (for patches)
- Scissors
- Fabric Pen or Chalk (for marking)
- Ruler
- Embroidery Hoop (for stabilizing fabric)
10. Tools and supplies you should have on hand
You don’t need an atelier to begin. Egausa’s checklist is the clearest inventory to start with:
OurSocialFabric echoes the accessible approach: “You don’t need much to get started. Most of these supplies are things you may already have, or can easily source second‑hand.”
11. Choosing fabric, color, and the match-versus-contrast decision
Style is part craft, part composition. Shoprepurpose sums the choice up: “With darning and patching, the choice of whether to match the garment or provide contrast is up to you.” If longevity is the priority, “matching the materials will give you a longer lasting mend, especially in areas that get more wear.” If you want to make a statement, select bold textures and threads; if you want subtle extension, pick similar-weight woven patches like Dogwood Denim® or Linen Cotton Canvas.
12. Reconciling patch-size advice and a practical hybrid method
Patch‑size guidance varies across practitioners. Spoonflower instructs to make patches “½” larger in diameter than the hole” and to “Fold and press the edges of the patch towards the wrong side by ¼”.” NPR and Kate Sekules recommend a more generous margin: “cut a patch larger than the hole by at least an inch on all sides, then stitch columns of running stitches back and forth across it.” A practical hybrid: fuse an interfacing slightly larger than the hole, cut your patch between ½"–1" larger depending on fabric stress, fold and press raw edges (or finish them), pin in place, then secure with running stitch columns or a reinforcing whip/overcast, combining Spoonflower’s structured prep with NPR’s stitching makes for both stability and hand‑crafted texture.
13. Where to learn, community and continued practice
Visible mending sits at the intersection of sustainability and craft, there are institutions and teams doing the work. Repurpose showcases an upcycling team and spoke with Miyu Shan, named as “Upcycling Design Trainee Summer 2024,” about the design process. OurSocialFabric’s site organizes community resources (sidebar items include DONATE, VOLUNTEER, YOUR IMPACT, Sew Fun(d) Scholarship, Sewing Lessons, Sewing Machine Repair), and Spoonflower ran a seasonal feature titled “Zero Waste January: The Art of Visible Mending” (Spoonflower piece carries an “Updated September 2025” line). For imagery and pattern inspiration, note the photographic credits attached to contemporary visible‑mending books and features: “Arounna Khounnoraj, Visible Mending, © BOOKHOU 2023; Nina and Sonya Montenegro; Minttu Wikberg; Lily Fulop.”
14. Final stitch: why this matters for style and sustainability
Visible mending is both a practical toolkit and a style philosophy: it extends the life of pieces you love while letting you assert a visual signature, whether a discreet inside patch on a beloved shirt or a stitched constellation across a denim jacket. NPR captures the ethos well: “Using noticeable threads, fabrics and decorative techniques, it's a creative and expressive way to show off the mend while extending the life of your clothing.” Breathe new life into the wardrobe, pick up a needle, and let your repairs do the talking, this is where technique, design and conscience meet in the closet.
This article was produced by Prism’s automated news system from verified source data, official records, and press releases, then run through automated quality and moderation checks before publishing. The system is built and supervised by the people who set the standards it runs under. Read our full AI policy.
Did this article answer your question?