Hackaday Maker Builds Cheap Homebrew Tool Changer for 3D Printers
A cheap homebrew tool changer could turn a desktop printer into a true multi-material machine, but the real question is whether the wear and tuning are worth it.
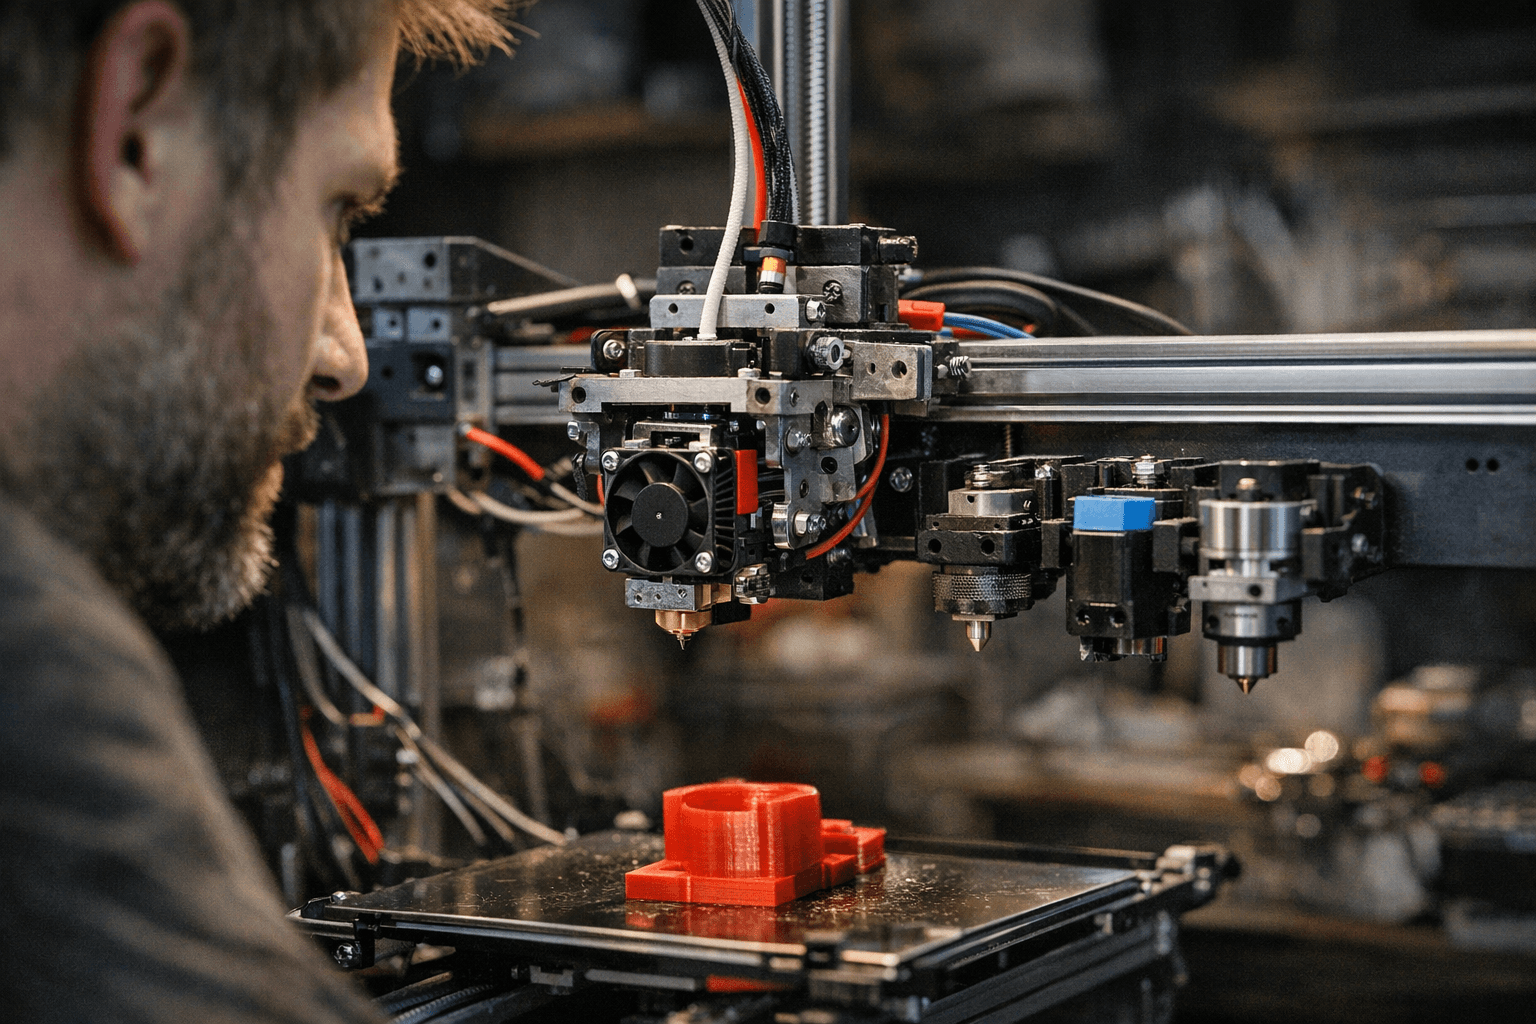
A cheap homebrew tool changer is the kind of project that can turn a normal desktop printer into a small-batch workstation. It promises fewer manual swaps, cleaner multi-material prints, and a path to non-extrusion tools, but it also drags you straight into the hardest part of DIY 3D printing: tolerances, wear, and the kind of tinkering that never really ends.
Why this project matters
The appeal is easy to understand if you have ever fought a purge tower. A tool changer lets one hot end or tool park while another takes over, which opens the door to multicolor parts, more reliable multi-material workflows, and even setups that are not limited to extrusion at all. That is a much bigger deal than it sounds. In a home shop, it can mean moving from one-off showcase prints to faster small-batch runs where you are not standing around swapping filament and babysitting purge waste.
That is also why this Hackaday build hits such a nerve. The project, from Ultimate Tool Changer, is being framed as simple and cheap, but not as magic. It is a real attempt to bring factory-style capability down to a printer you can actually live with at a desk. The twist is that the article does not pretend the hard parts are solved. It points out that the tolerances are tight enough that wear could become a problem over time, which is exactly the kind of detail that separates a fun prototype from a machine you trust on a Tuesday night print job.
The old problem tool changers solve
If you have used a single-nozzle multimaterial system, you already know where the pain comes from. Prusa explains that when you change filament, molten plastic stays in the nozzle, so the printer has to purge until the new filament runs clean. That is not a minor nuisance, it is the core tax you pay for mixing colors or materials through one melt zone.
Prusa also notes that dark-to-light transitions need more purge volume than light-to-dark transitions, and soluble materials can demand even more purging. Bambu Lab makes the same point from a different angle, saying multimaterial prints can be very costly in both time and materials. That is the real reason tool changers keep coming back into the conversation: they attack the purge problem at the hardware level instead of trying to brute-force it with more flushing.
Why this is not a brand-new idea
Tool changing has serious history behind it. E3D announced its motion system and tool-changing printer on March 21, 2018, then said the ToolChanger was out of beta and available to buy on August 20, 2018. Later, E3D said the ToolChanger is now discontinued, which tells you plenty about the gap between technical promise and commercial reality.
The engineering case was always strong. E3D laid out the upside clearly: multi-color printing, complex geometries with soluble support, and functional combinations like carbon-fiber reinforced nylon, flexible materials, and soluble support in one part. It also contrasted tool changing with older approaches such as multiple nozzles on one carriage, single-nozzle multiplexing, and IDEX systems, each of which carries its own tradeoffs in weight, ooze, print volume, or material limits.
The numbers are the part I keep coming back to. E3D said the original servo design struggled to exceed 60,000 tool changes, while the stepper version surpassed 400,000 cycles with no wear found on inspection. It also reported that a 37-hour print of a 25 cm model involved 2,807 tool changes, and those changes were only 5% of the time penalty in its initial calculations. That is the kind of stat that should make any filament-swap skeptic stop and look twice.
What the homebrew route unlocks for desktop makers
The practical upside of a cheap DIY tool changer is not just prettier rainbow prints. It is about workflow. If you can park tools instead of purging through the same nozzle, you can cut down on waste, get cleaner transitions, and move into jobs where different materials need to coexist in one part. That is where the idea starts to feel less like a gadget and more like a production upgrade for an advanced hobby machine.
It also makes a lot more sense on printers built to be modified. Hackaday’s coverage points to Voron builds and older commercial machines as the natural fit, and that tracks with the way the open printer world actually works. Voron Design has become a modification-friendly ecosystem with documentation and community forums that builders lean on when they want to push beyond stock behavior. A sealed plug-and-play machine is a much worse canvas for a tool-changer experiment, because you need room to iterate, mount hardware, and accept that the first version will not be the last.
How it stacks up against today’s commercial options
The commercial field is moving in the same direction, but the tradeoffs are different. Snapmaker is marketing the U1 as a 4-toolhead auto-changer, with toolhead swaps in about five seconds, a starting price of $849, and claims of up to 80% less waste. It is also pitching the machine as five times faster and five times less wasteful than filament-changing systems. That is a serious benchmark for any homebrew project to chase.
Prusa is pushing in a related direction with INDX, which it says supports up to eight materials and is designed for near-zero waste. That matters because it shows where the market pressure is now. The question is no longer whether multimaterial printing is possible, it is whether you can do it without turning your bench into a landfill of purge scraps.
Against those systems, the Hackaday build is less about a polished product and more about proving a point. If you want the simplest path to multicolor or multi-material printing, a commercial system still wins on convenience. If you want to understand the mechanics, save money, and accept the tuning time, the homebrew route is where the interesting work lives.
Where the pain starts
This is the part nobody should gloss over. Tool changers are attractive because they promise less purge waste and more capability, but they are not forgiving. Tight tolerances mean wear can creep in, alignment matters, and every successful swap depends on the repeatability of the whole mechanism. That is why the project feels exciting and slightly dangerous at the same time.
The best way to think about it is this: a cheap homebrew tool changer is not the next step for every desktop printer owner. It is the next step for the builder who already knows why nozzle swapping is wasteful, who understands what 400,000 tool changes implies, and who is willing to trade a clean user experience for a machine that does something most stock printers still cannot.
That is exactly why the project is worth watching. It is not just another clever mod. It is a reminder that the most interesting 3D printing breakthroughs still tend to start where the mainstream machines stop.
This article was produced by Prism’s automated news system from verified source data, official records, and press releases, then run through automated quality and moderation checks before publishing. The system is built and supervised by the people who set the standards it runs under. Read our full AI policy.
Know something we missed? Have a correction or additional information?
Submit a Tip

