How to embed magnets in 3D prints without ruining them
Magnets can make prints snap shut and modular, but one bad cavity, loose fit, or wrong bed setup can wreck the part or the printer.
The magnet trick that feels simple until it isn’t
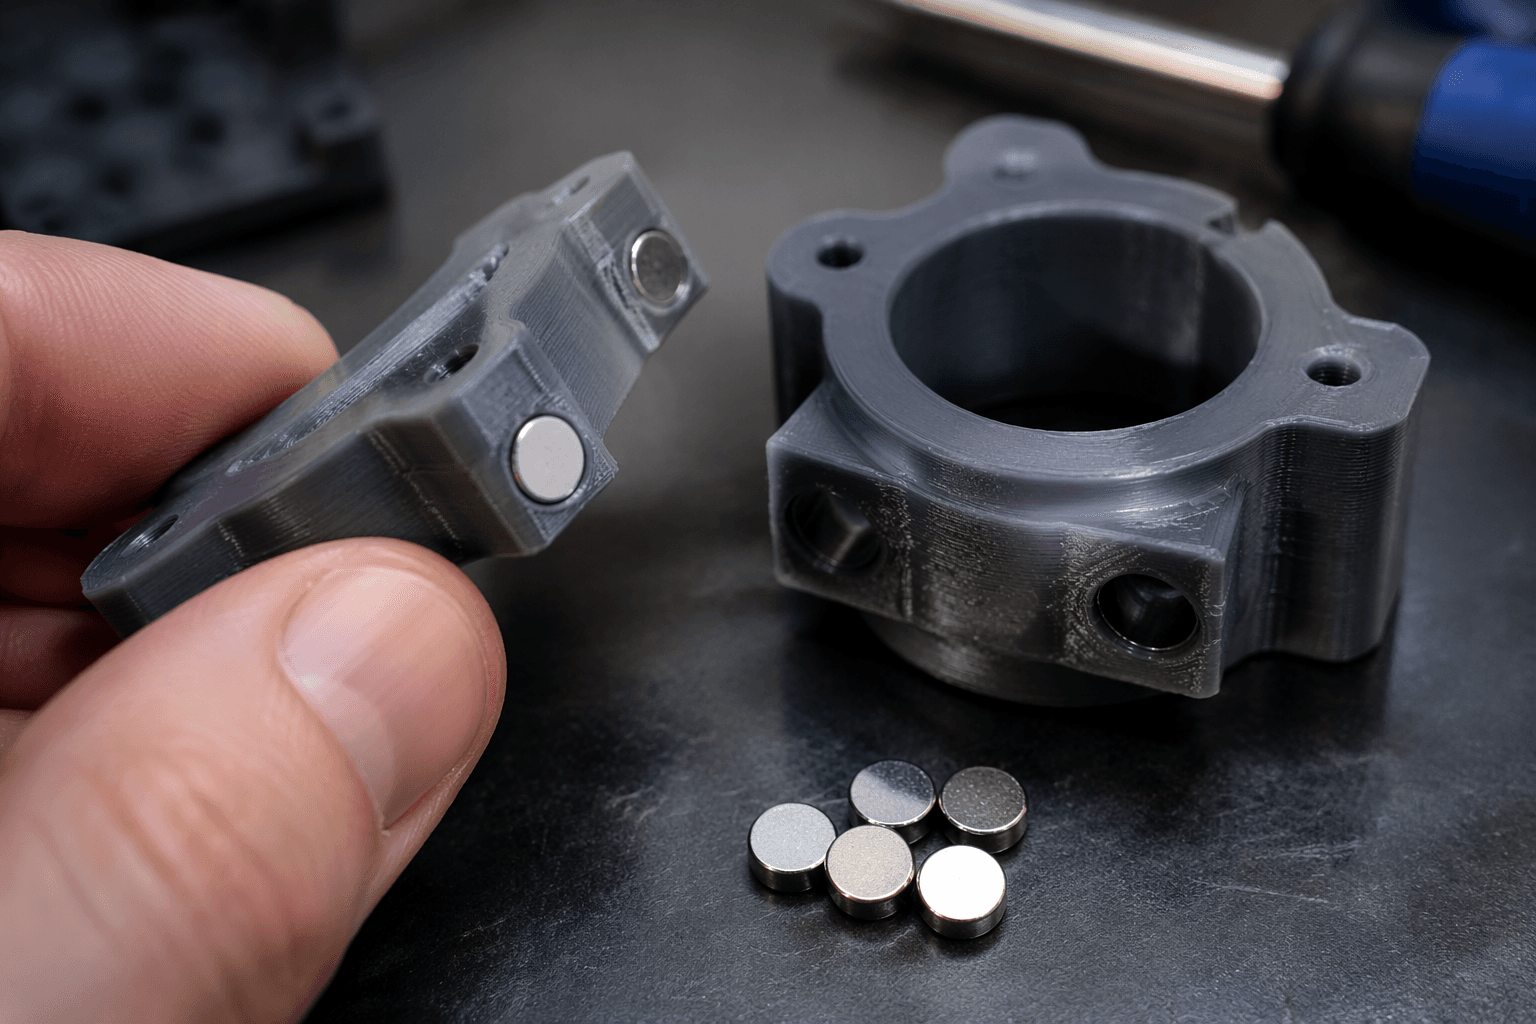
Embedding magnets is one of those 3D printing upgrades that looks almost too easy: pause the print, drop in a disc, let the machine keep going, and suddenly an enclosure, jig, cover, or tool holder gets real snap-fit behavior without extra hardware. That is the appeal Hackaday singled out in its June 4, 2026 look at the technique, and it is why the method has moved from clever demo to everyday functional printing.
The catch is that magnets are not just another insert. Treat them like a heat-set brass insert and you can end up with a nozzle strike, a popped-out magnet, a ruined surface, or a print head that collects the magnet instead of passing cleanly over it. The reward is real, but the execution is unforgiving.
Start with the failure points, not the gimmick
The first mistake is assuming the printer will forgive sloppy placement. Hackaday’s summary of the Lost in Tech video points to the big hazards right away: ferromagnetic nozzles, magnetic beds, and the habit of treating magnets like ordinary inserts. Those are exactly the conditions that turn a neat trick into a messy one.
A magnet that sits too high is the most obvious danger. Community guidance from Bambu Lab users notes that if the magnet surface rises above the cavity, you can get a gap, a collision, or both. That can scar the top layer or knock the magnet loose as the nozzle passes over it. A magnet buried too deeply is the opposite problem: the part may print fine, but the magnetic attraction weakens because the gap between mating magnets grows.
Prusa’s knowledge base adds a more specific warning: magnets need to be firmly seated in their slots, or they can get stuck to the print head as it passes over them. That is not a theoretical edge case. It is the kind of failure that happens when the cavity is generous, the magnet floats during the pause, and the next layer locks in a bad position.
Design the cavity before you design the pause
The cleanest magnet jobs begin in CAD, not in the slicer. The cavity has to match the magnet you actually plan to use, and it has to leave enough room for a firm seat without leaving the magnet proud of the surface. That is why fit matters so much in this workflow: the geometry decides whether the part closes neatly or becomes a collision test.
Prusa recommends either tight slot tolerances or a small drop of super glue to hold magnets in place. That advice is less about convenience than control. A snug cavity keeps the magnet from shifting when the nozzle returns, while a dab of glue can save a part when the fit is slightly loose or the print surface is too slick to hold the disc still.
Community threads also make one point clear: there is no official standard for magnet thickness. That means the disc size you choose has to come from the design goal, not from habit. A Prusa forum discussion says 6 mm and 10 mm diameter disc magnets are especially common in printed projects, which is useful shorthand, but thickness still needs to be checked against the wall height and the depth of the cavity you are building.
Use the pause like a tool, not a guess
The pause step is where many first attempts go wrong. If you resume too soon, the magnet is not seated. If you resume too late, the cavity may cool or the surrounding walls may distort. The goal is to pause at the exact layer where the magnet belongs, set it cleanly into the pocket, and then continue before the print loses its rhythm.
Prusa notes that you need PrusaSlicer 2.2 or newer to use the Insert pause and Insert custom G-code functions. On MK3/S/+ printers, the pause feature also requires firmware 3.9.1 or later. That matters because magnet embedding is not just a modeling problem, it is a workflow problem, and the slicer and firmware have to support the layer-by-layer insertion without improvisation.
This is also where the magnetic bed warning matters most. If the bed, nozzle, or other printer components are themselves magnetic or ferromagnetic, the magnet can be pulled in the wrong direction at the wrong time. That is why Hackaday frames the technique as one worth using carefully, not casually. The real trick is not “pause and place.” It is “pause, place, verify, and only then continue.”
A simple decision tree keeps the job safe
When the cavity is too loose, glue is often the first fix. A small drop of super glue can keep the magnet from floating, tilting, or riding up into the next layer. That is the safer choice when the design is otherwise right and the only problem is retention.
When the magnet sits proud of the surface, pause and redesign before printing again. Trimming the cavity deeper after the fact is a gamble, and a raised magnet is exactly the kind of setup that causes the nozzle-to-bed interference Bambu Lab users warn about. If the top layer has to bridge over a proud magnet, the print is already asking for trouble.
When the magnet sits too deep, the part may look fine but perform badly. That is the moment to size the cavity more carefully, reduce the recess, or swap to a different magnet thickness. The point of embedding magnets is not to hide them at all costs. It is to make them work.
When the part is thin, curved, or already tight around the insert, redesign the geometry instead of forcing the magnet in. A better pocket, a thicker wall, or a slightly larger flat area often solves the problem more cleanly than trying to rescue a marginal cavity. The safest prints are the ones that anticipate the magnet, not the ones that improvise around it.
Why this keeps showing up in real projects
This workflow sticks because it solves a very practical problem. Enclosures close without screws. Jigs reconfigure without hardware. Tool holders, covers, camera mounts, and articulated gadgets get a clean mechanical snap instead of a clunky latch. That is a real upgrade in daily use, not just a neat party trick.
The reason it spreads through maker communities is that the payoff is immediate once the details are right. A well-placed magnet makes a print feel more finished, more reusable, and more like a part you would actually keep on your bench. But the exact same technique can ruin a good print if the cavity is sloppy, the polarity is wrong, the magnet is loose, or the printer is set up to fight the insert.
The final check before you hit resume
The best magnet prints are the ones that respect the physics. Check the cavity depth, confirm the magnet sits flush, make sure polarity is correct, and never assume the printer will ignore a loose disc in its path. If the fit is tight, the timing is right, and the machine is not being asked to plow through a proud insert, magnets become one of the smartest ways to add function without adding clutter.
That is the real lesson here: embedded magnets are not hard because the idea is complicated. They are hard because a tiny error turns a polished snap-fit into a jam, a gap, or a collision. Get the cavity right, seat the magnet firmly, and the trick stops being risky and starts being indispensable.
This article was produced by Prism’s automated news system from verified source data, official records, and press releases, then run through automated quality and moderation checks before publishing. The system is built and supervised by the people who set the standards it runs under. Read our full AI policy.
Know something we missed? Have a correction or additional information?
Submit a Tip

