DIY Candy's $5 Bath Bomb Recipe Makes Six Fizzy Bombs in Minutes
Six bath bombs for $5 and 25 minutes of active work sounds too good, but the chemistry behind the 2:1 ratio is what makes it actually repeatable.
One cup of baking soda. Half a cup of citric acid. Half a cup each of Epsom salt and cornstarch, two tablespoons of coconut oil, and three-quarters of a tablespoon of water. That is the complete dry-and-wet framework for a six-bomb batch that costs roughly $5 total, and understanding why each of those quantities exists is what separates a batch that crumbles from one that drops into the tub and fizzes with actual conviction.
Why the 2:1 Ratio Is Non-Negotiable
The baking soda-to-citric acid relationship is the engine of every bath bomb, and the DIY Candy recipe's 1 cup to 1/2 cup pairing is the standard 2:1 by volume for a reason. Baking soda is a high-pH alkali; citric acid is a low-pH dry acid. They stay inert as long as they remain dry, but introduce moisture and they produce carbon dioxide gas in a rapid acid-base reaction. That fizz is the whole point. Tip the ratio toward too much citric acid and the reaction is violent and short-lived; tip it the other way and you get a sluggish, underwhelming fizzle that disappoints in the tub.
The cornstarch earns its place by moderating that reaction once the bomb hits water. It acts as a physical buffer between baking soda and citric acid particles, extending the CO2 release so the fizz lasts rather than spikes. At 1/2 cup, it also contributes body to the pressed mixture, helping the bomb hold its shape during drying. Epsom salt at the same quantity adds texture, contributes structural mass that keeps bombs from feeling fragile, and brings the mild skin-softening profile that makes the final product feel intentional rather than just decorative.
How to Add Wet Ingredients Without Triggering Early Fizz
The wet mix, two tablespoons of melted coconut oil combined with roughly 3/4 tablespoon of water, plus 15 to 20 drops of essential oil and two to three drops of cosmetic colorant, is where most first batches go wrong. The water content is precisely calibrated to be the minimum needed for binding without activating the citric acid and baking soda prematurely. Add it too fast and you will watch the bowl start to quietly fizz, which means CO2 is escaping before the bomb ever reaches the tub.
The technique: mix oil, water, colorant, and essential oil in a separate small glass first, then introduce that mixture to the dry bowl in a slow, thin stream while whisking continuously. The whisking distributes moisture immediately so no single wet pocket sits against the citric acid long enough to trigger a reaction. If the bowl starts to crackle or expand slightly, slow down further. This is the most skill-dependent step in the process, and it genuinely improves after two or three batches.
Coconut oil functions as both binder and skin conditioner. It solidifies as it cools, which is what gives the bomb structural integrity once pressed into the mold. Without it, you are relying on moisture alone to hold the mixture together, which is a reliable path to crumbling.
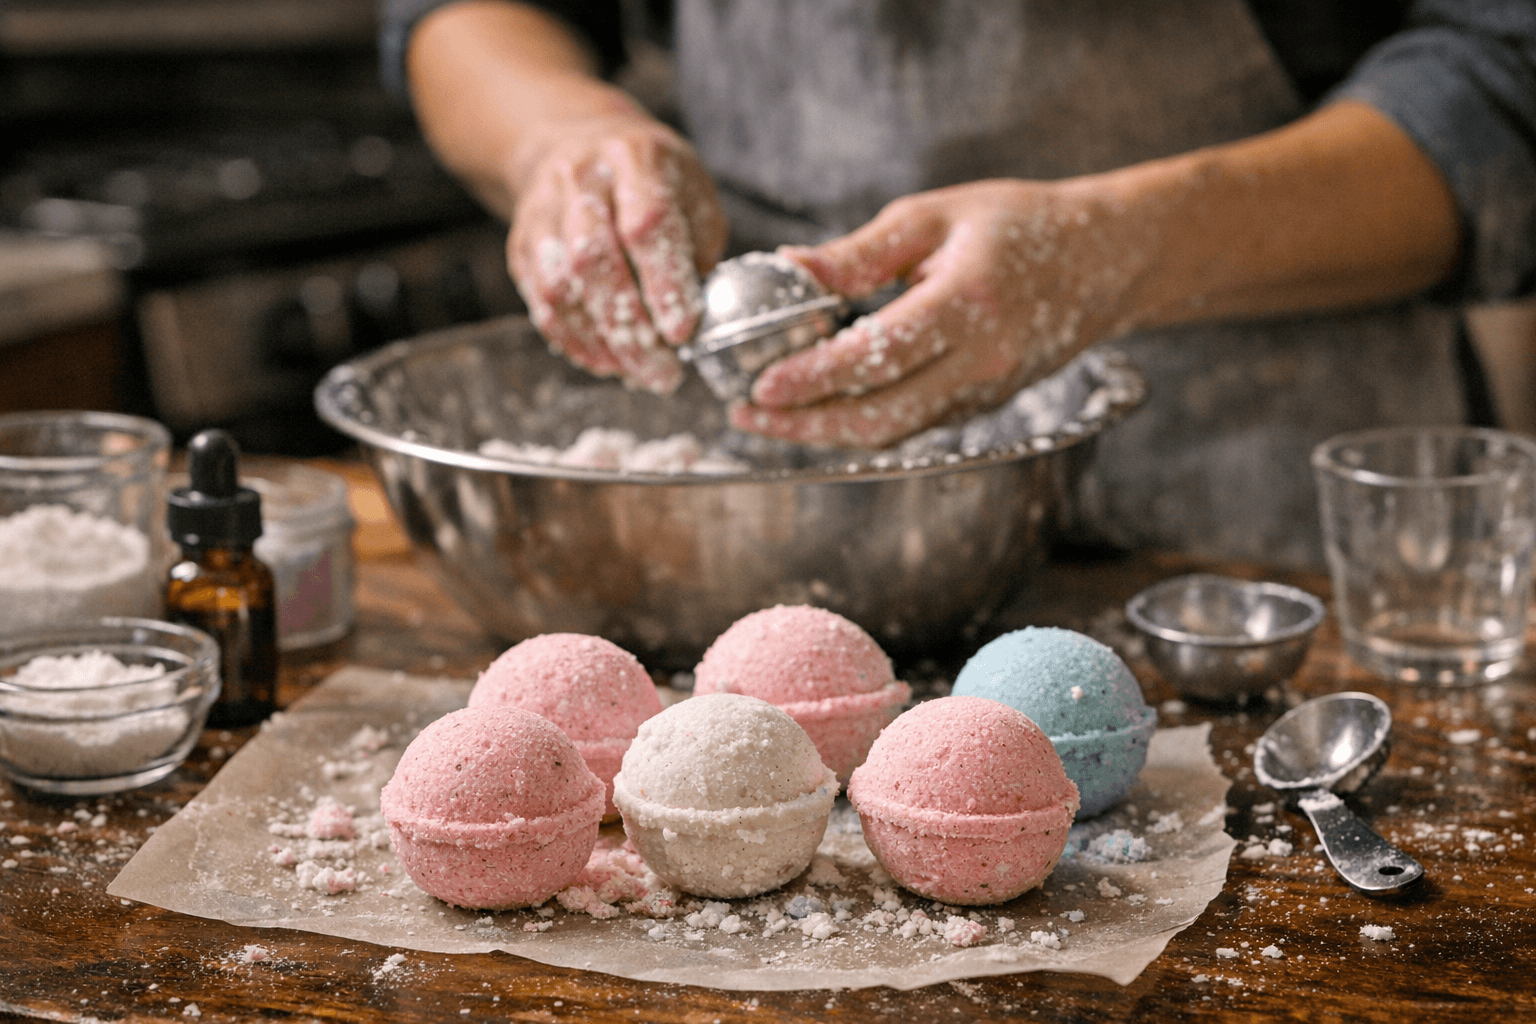
Mold Technique, Drying, and the 24-Hour Rule
DIY Candy uses recycled cups as molds, which keeps costs low and works well given the recipe's volume. The key is firm, even pressing: pack the mixture in layers and compress each before adding the next. Loose packing leads to surface cracking during drying because the exterior sets faster than the interior, creating stress fractures as the whole mass contracts slightly.
The 24-hour drying window is the minimum, not the target. In high-humidity environments, that timeline extends considerably. If your kitchen regularly runs above 60 percent relative humidity, expect 36 to 48 hours before the bombs are stable enough to handle without risking surface crazing.
Troubleshooting by Condition
Here is how to diagnose the most common failures:
- Bomb crumbles out of the mold: The mixture is under-bound. Add a small additional amount of oil, not water, to avoid triggering the reaction. The problem is almost always binding, not moisture.
- Surface pitting or crackling during drying: Humidity is too high. Move to a drier room or run a fan. In consistently humid climates, replace the water in your wet mix with witch hazel, which introduces far less free moisture while still enabling binding.
- Mixture fizzes in the bowl while mixing: The wet mix was added too quickly, or your water measurement crept upward. Start over with fresh dry ingredients, chill the mixing bowl slightly if your kitchen is warm, and slow the pour.
- Bomb fizzes weakly in the tub: Either the citric acid is stale (it absorbs ambient moisture over time and partially pre-reacts in storage) or too much CO2 escaped during mixing. Store citric acid sealed between uses.
- Cracks appearing in low humidity: In very dry conditions, cornstarch can harden the exterior before the interior has settled, creating stress fractures. Reduce cornstarch by two tablespoons and test cohesion.
What Six Bombs for $5 Actually Breaks Down To
At approximately $5 per full batch, each individual bomb costs roughly $0.83. Baking soda, Epsom salt, and cornstarch are genuine pantry staples; citric acid is the one specialist ingredient, but it is widely stocked in grocery canning aisles and bulk food stores. The essential oil is the most variable cost, but at 15 to 20 drops per batch you are drawing from a bottle that carries across many batches. Compare that to retail bath bombs that regularly price between $5 and $10 each, and the economics of making your own, even as occasional gifts, are difficult to argue with.
The hands-on commitment is 5 minutes of setup and 20 minutes of active mixing, with 24 hours of passive drying. The entire active process fits inside a lunch break.
The Luxury Upgrade Worth the Splurge
If one addition reliably elevates the experience from homemade to noticeably refined, it is polysorbate 80. This synthetic emulsifier, derived from oleic acid and sorbitol, solves the most common aesthetic complaint about oil-based bath bombs: coconut oil floating on the tub surface rather than dispersing into the water. Add polysorbate 80 at a 1:1 ratio with your coconut oil (so two tablespoons alongside the original two), and the oil emulsifies fully. Colors disperse more evenly across the water, the oil absorbs into skin rather than leaving a tub ring, and the overall feel shifts from slick to silky. It is available from cosmetic ingredient suppliers for a few dollars and stretches across dozens of batches. For anyone moving beyond occasional hobby use toward gifting or small-scale selling, it is the single most impactful formulation change available at this price point.
A $5 batch that produces six bombs is already a compelling case for making rather than buying. Knowing exactly why the ratios hold, and how to course-correct when they do not, is what turns a one-time experiment into a genuinely repeatable craft.
This article was produced by Prism’s automated news system from verified source data, official records, and press releases, then run through automated quality and moderation checks before publishing. The system is built and supervised by the people who set the standards it runs under. Read our full AI policy.
Did this article answer your question?