Free Crochet Pattern Features Bunny with Dress, Headband, and Raspberry
Martha Miller's free amigurumi bunny pattern on Amigurumi Corner includes a removable dress, headband, and a crocheted raspberry with full accessory instructions.
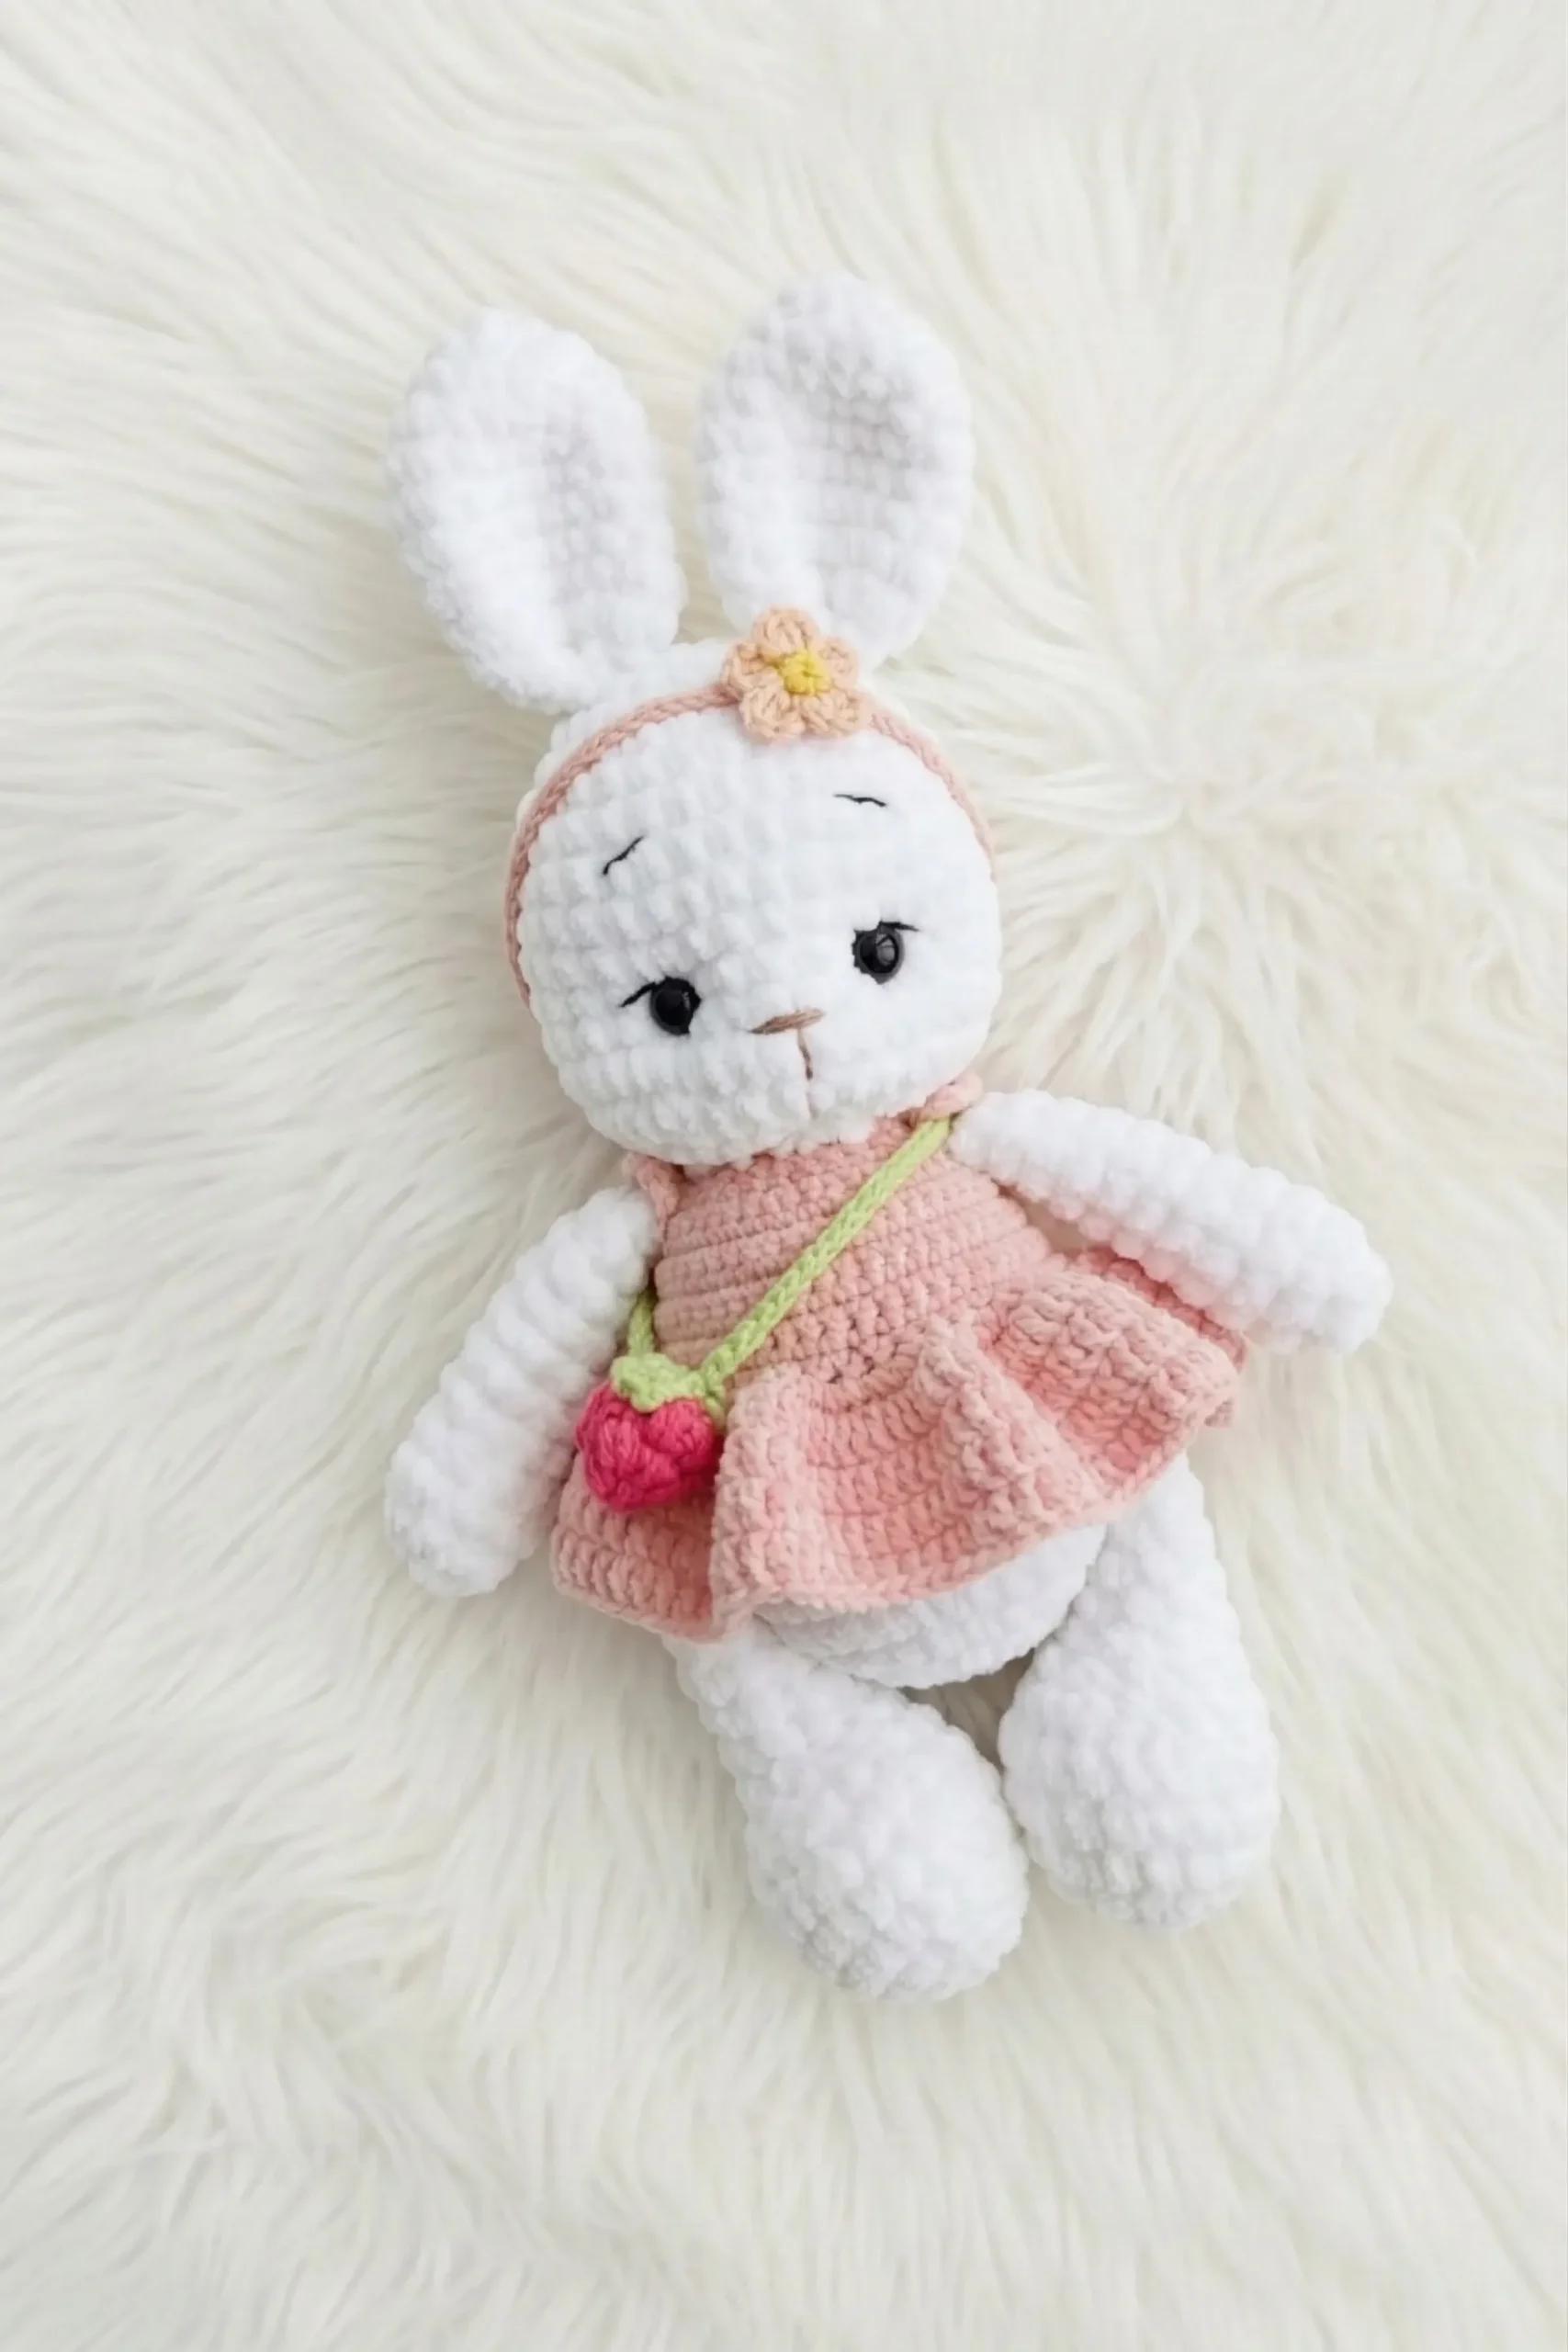
A free pattern from Amigurumi Corner, credited to designer Martha Miller, delivers one of the more thoughtfully constructed amigurumi bunny designs you'll find without a price tag attached. The bunny comes dressed in a removable dress, wears a cute headband, and carries a tiny crocheted raspberry accessory, complete with a leaf and stem. That combination of wearable, removable clothing and a standalone prop accessory is what sets this pattern apart from the standard round-headed-bunny-in-a-fixed-outfit releases that flood the amigurumi space.
As Amigurumi Corner puts it: "Welcome to the delightful world of amigurumi with this charming crochet bunny pattern! Whether you're a seasoned crafter or just starting your amigurumi journey, this project is designed to bring joy and a touch of handmade magic to your day." That welcoming tone reflects the pattern's actual scope: it's ambitious enough to satisfy experienced amigurumi makers while still being presented as approachable for anyone working through their first stuffed toy.
What the Pattern Covers
The full project breaks down into the main bunny body, the removable dress, a headband, and the raspberry accessory cluster. The raspberry itself consists of three separate components: the berry, a set of three leaves, and a stem. There's also a small flower element with petals worked in Light Pink yarn. That's a lot of pieces for a free pattern, and the accessory instructions are detailed enough to follow independently.
The pattern is described by Amigurumi Corner as suitable as "a sweet gift or nursery toy," and the removable dress adds a practical dimension to that: a child can actually undress and redress the bunny, which extends the play value considerably beyond a static display piece. For gifting purposes, that interactivity is a genuine selling point.
The Accessory Instructions in Detail
The accessory components are where the pattern gets genuinely specific, and they're worth walking through carefully because the stitch construction is more interesting than it first appears.
The raspberry is worked with a 2.0 mm hook in Bright Pink yarn. It opens with puff stitches in a magic ring rather than the standard single crochet start you'd use for a typical amigurumi sphere, which gives the berry that characteristic bumpy, textured surface:
Rnd 1: 4 Puff Stitches in mr (4) Rnd 2: 4 inc of Puff Stitches (8) Rnd 3: (1 Puff St, inc of Puff St) x4 (12) Rnd 4-5: Sc in each stitch around (2 rounds) (12) Sl st to join, stuff the berry with fiberfill. Fasten off and weave in ends.
The shift from puff stitches in rounds 1-3 to plain single crochet in rounds 4-5 is a smart structural choice: it keeps the textured dome on top while giving you a cleaner base to attach the leaves and stem. At 2.0 mm with fingering or similarly fine yarn, this berry will be genuinely tiny, which is exactly the right scale for an amigurumi accessory.
The leaf is also worked with a 2.0 mm hook, this time in Lime Green yarn:
Ch 4. In 2nd ch from hook, tr, tr, ch 4, sl st. Repeat this process 2 more times to create 3 leaves. Fasten off, leaving a long tail for sewing.
Three repetitions of that chain-and-treble sequence produces a small, slightly pointed leaf cluster that reads as botanically convincing at amigurumi scale. The long finishing tail is your sewing thread for attaching the leaf grouping to the berry body, so don't trim it short.
The raspberry stem is listed with the same 2.0 mm hook and Lime Green yarn, but the construction steps weren't included in the available pattern excerpt. You'll want to pull those from the full pattern on Amigurumi Corner directly.
The Flower Petals
Separate from the raspberry, the pattern includes a small flower accessory worked in Light Pink yarn. The petal construction is elegant for how simple it is:
Petals (Light Pink yarn): Join Light Pink yarn to any sc of the flower center. In each sc around: (Ch 3, 1 dc, ch 3, sl st). Repeat this petal sequence 5 more times (6 petals total). Fasten off, leaving a long tail for sewing.
That (Ch 3, 1 dc, ch 3, sl st) sequence in each stitch creates a scalloped, slightly dimensional petal rather than a flat loop. Six petals total gives you a symmetrical flower that works as an embellishment on the dress, the headband, or as a standalone prop alongside the raspberry. The pattern excerpt doesn't specify the flower center construction, so again, the full pattern on Amigurumi Corner is your source for the complete picture.
Hook Sizes and Materials
Every accessory component in the supplied instructions calls for a 2.0 mm hook, which is consistent with fine-weight or fingering-weight yarn at amigurumi scale. The specific yarn weights, fiber content, exact color codes, safety eye sizes, and recommended stuffing amounts aren't specified in the available excerpts. The full materials list lives in the complete pattern. If you're planning to use this as a nursery toy, it's worth checking the full pattern for any safety notes around eye attachment, since the nursery toy designation raises legitimate questions about embroidered versus safety eyes for very young children.
Skill Level Considerations
The pattern is pitched as accessible to "a seasoned crafter or just starting your amigurumi journey," but the puff stitch construction on the raspberry does require some prior stitch familiarity. If you've never worked a puff stitch, it's worth practicing the tension on a swatch before starting round 1 of the berry: puff stitches can tighten up aggressively on a small hook, and you need enough give to complete the increase round cleanly. The leaf and petal instructions are straightforward enough for anyone comfortable with basic crochet.
The removable dress and headband aren't detailed in the available excerpts, but constructing removable clothing for amigurumi typically involves working in the round to fit the toy's body measurements, so expect some back-and-forth fitting as you go.
Selling Items Made from the Pattern
Amigurumi Corner includes explicit guidance on commercial use, and it's worth quoting in full: "Unless explicitly stated otherwise by the pattern designer, it is generally acceptable to sell items you personally make from free patterns. However, you should always give credit to the original designer if you do so. The pattern itself, including the instructions and photos, is usually copyrighted and cannot be reproduced or distributed."
That means: sell the finished bunny at your craft fair or in your shop, credit Martha Miller, but don't redistribute the pattern PDF, repost the instructions, or share the photographs. That's standard practice in the amigurumi community, but it's good to see a publisher spell it out clearly rather than leaving makers to guess.
Finding the Full Pattern
The complete pattern, including the main bunny body, dress construction, headband, and the full raspberry stem instructions, is available free on Amigurumi Corner. The excerpts covered here give you a solid preview of the accessory work and the overall scope of the project, but the body and clothing instructions are the bulk of the actual construction. Martha Miller's design, with its removable clothing and botanical accessory detail, is exactly the kind of free pattern worth bookmarking before the next gift-giving occasion rolls around.
This article was produced by Prism’s automated news system from verified source data, official records, and press releases, then run through automated quality and moderation checks before publishing. The system is built and supervised by the people who set the standards it runs under. Read our full AI policy.
Did this article answer your question?