Free Koi Carp Amigurumi Pattern Creates Plush 8-Inch Crocheted Fish
Martha Miller's free koi carp amigurumi pattern on Amigurumi Corner builds a plush 8-inch fish with integrated fins, colorwork, and a sculpted dorsal comb.
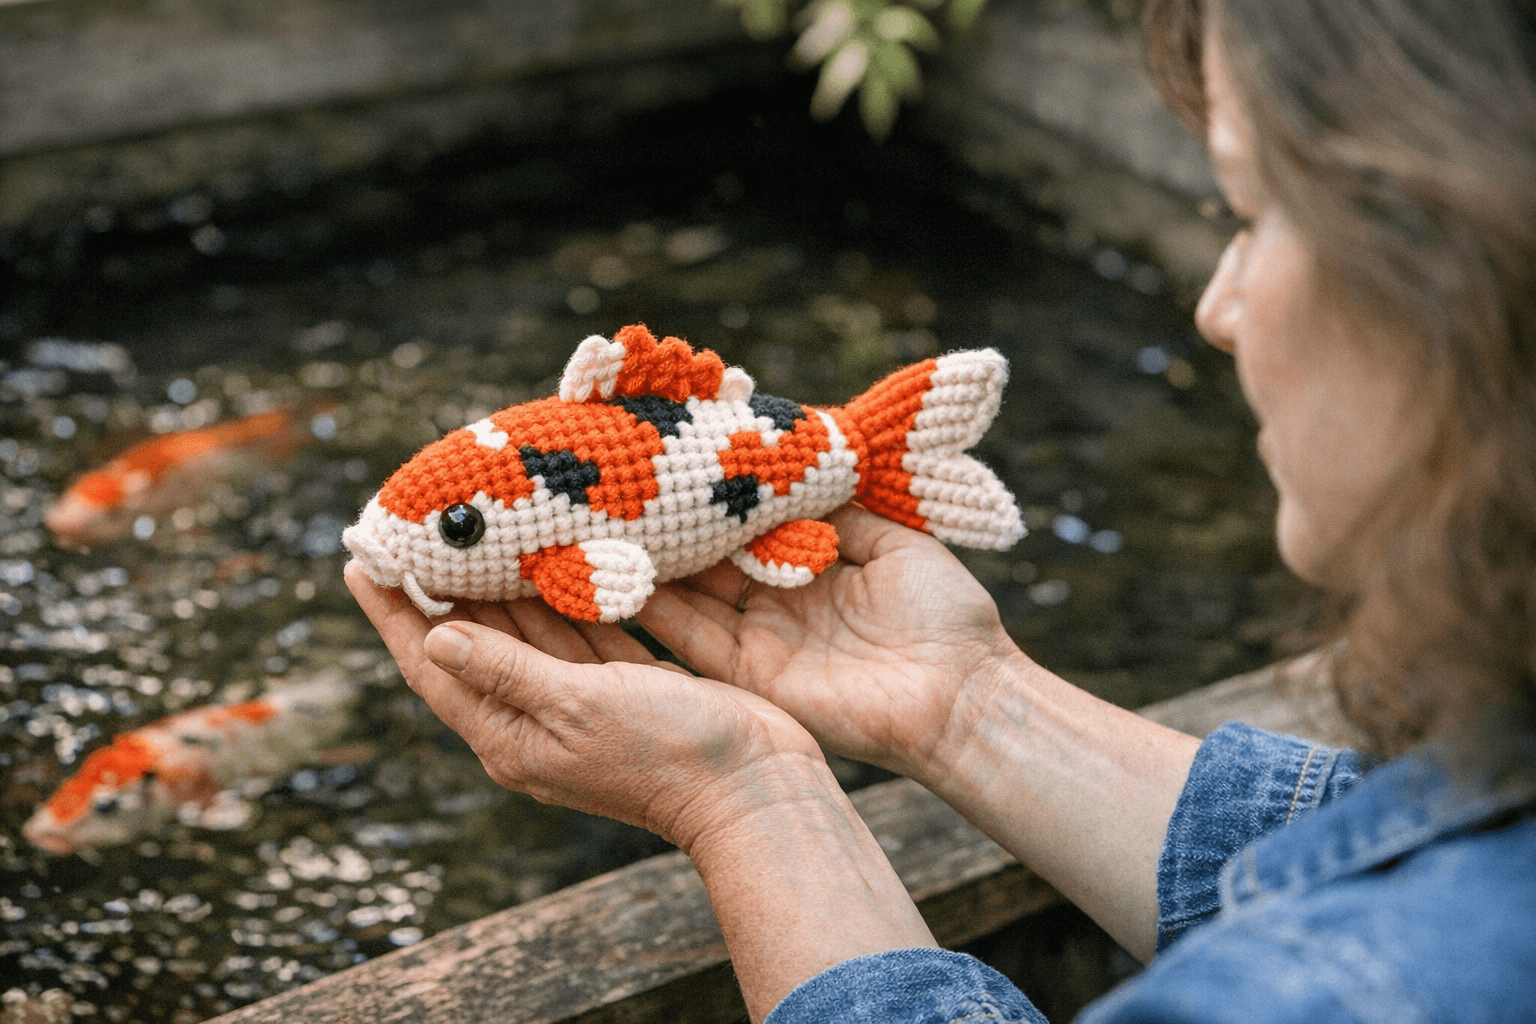
Martha Miller has published a free koi carp amigurumi pattern on Amigurumi Corner that delivers something genuinely satisfying for intermediate crocheters: a fully shaped, stuffed koi fish with integrated fins, two-color body work, a sculpted dorsal comb, and optional whiskers. The finished piece measures approximately 8 inches (20 cm), making it substantial enough to display on a shelf or give as a handmade gift with real presence.
As the pattern description puts it: "Designed for intermediate crocheters familiar with basic stitches and amigurumi construction, this pattern guides you through every step to bring your graceful fish to life. Our detailed instructions ensure a rewarding crafting experience, resulting in a charming Koi Carp Amigurumi that measures approximately 8 inches (20 cm) when finished."
That intermediate designation is accurate. If you've worked magic rings, increases, decreases, and basic color changes, you have the toolkit. The unique challenge here is the structural detailing — the comb, the fin placement, and the two-lobe tail — which push this beyond a simple oval body with appliquéd parts.
What you're building
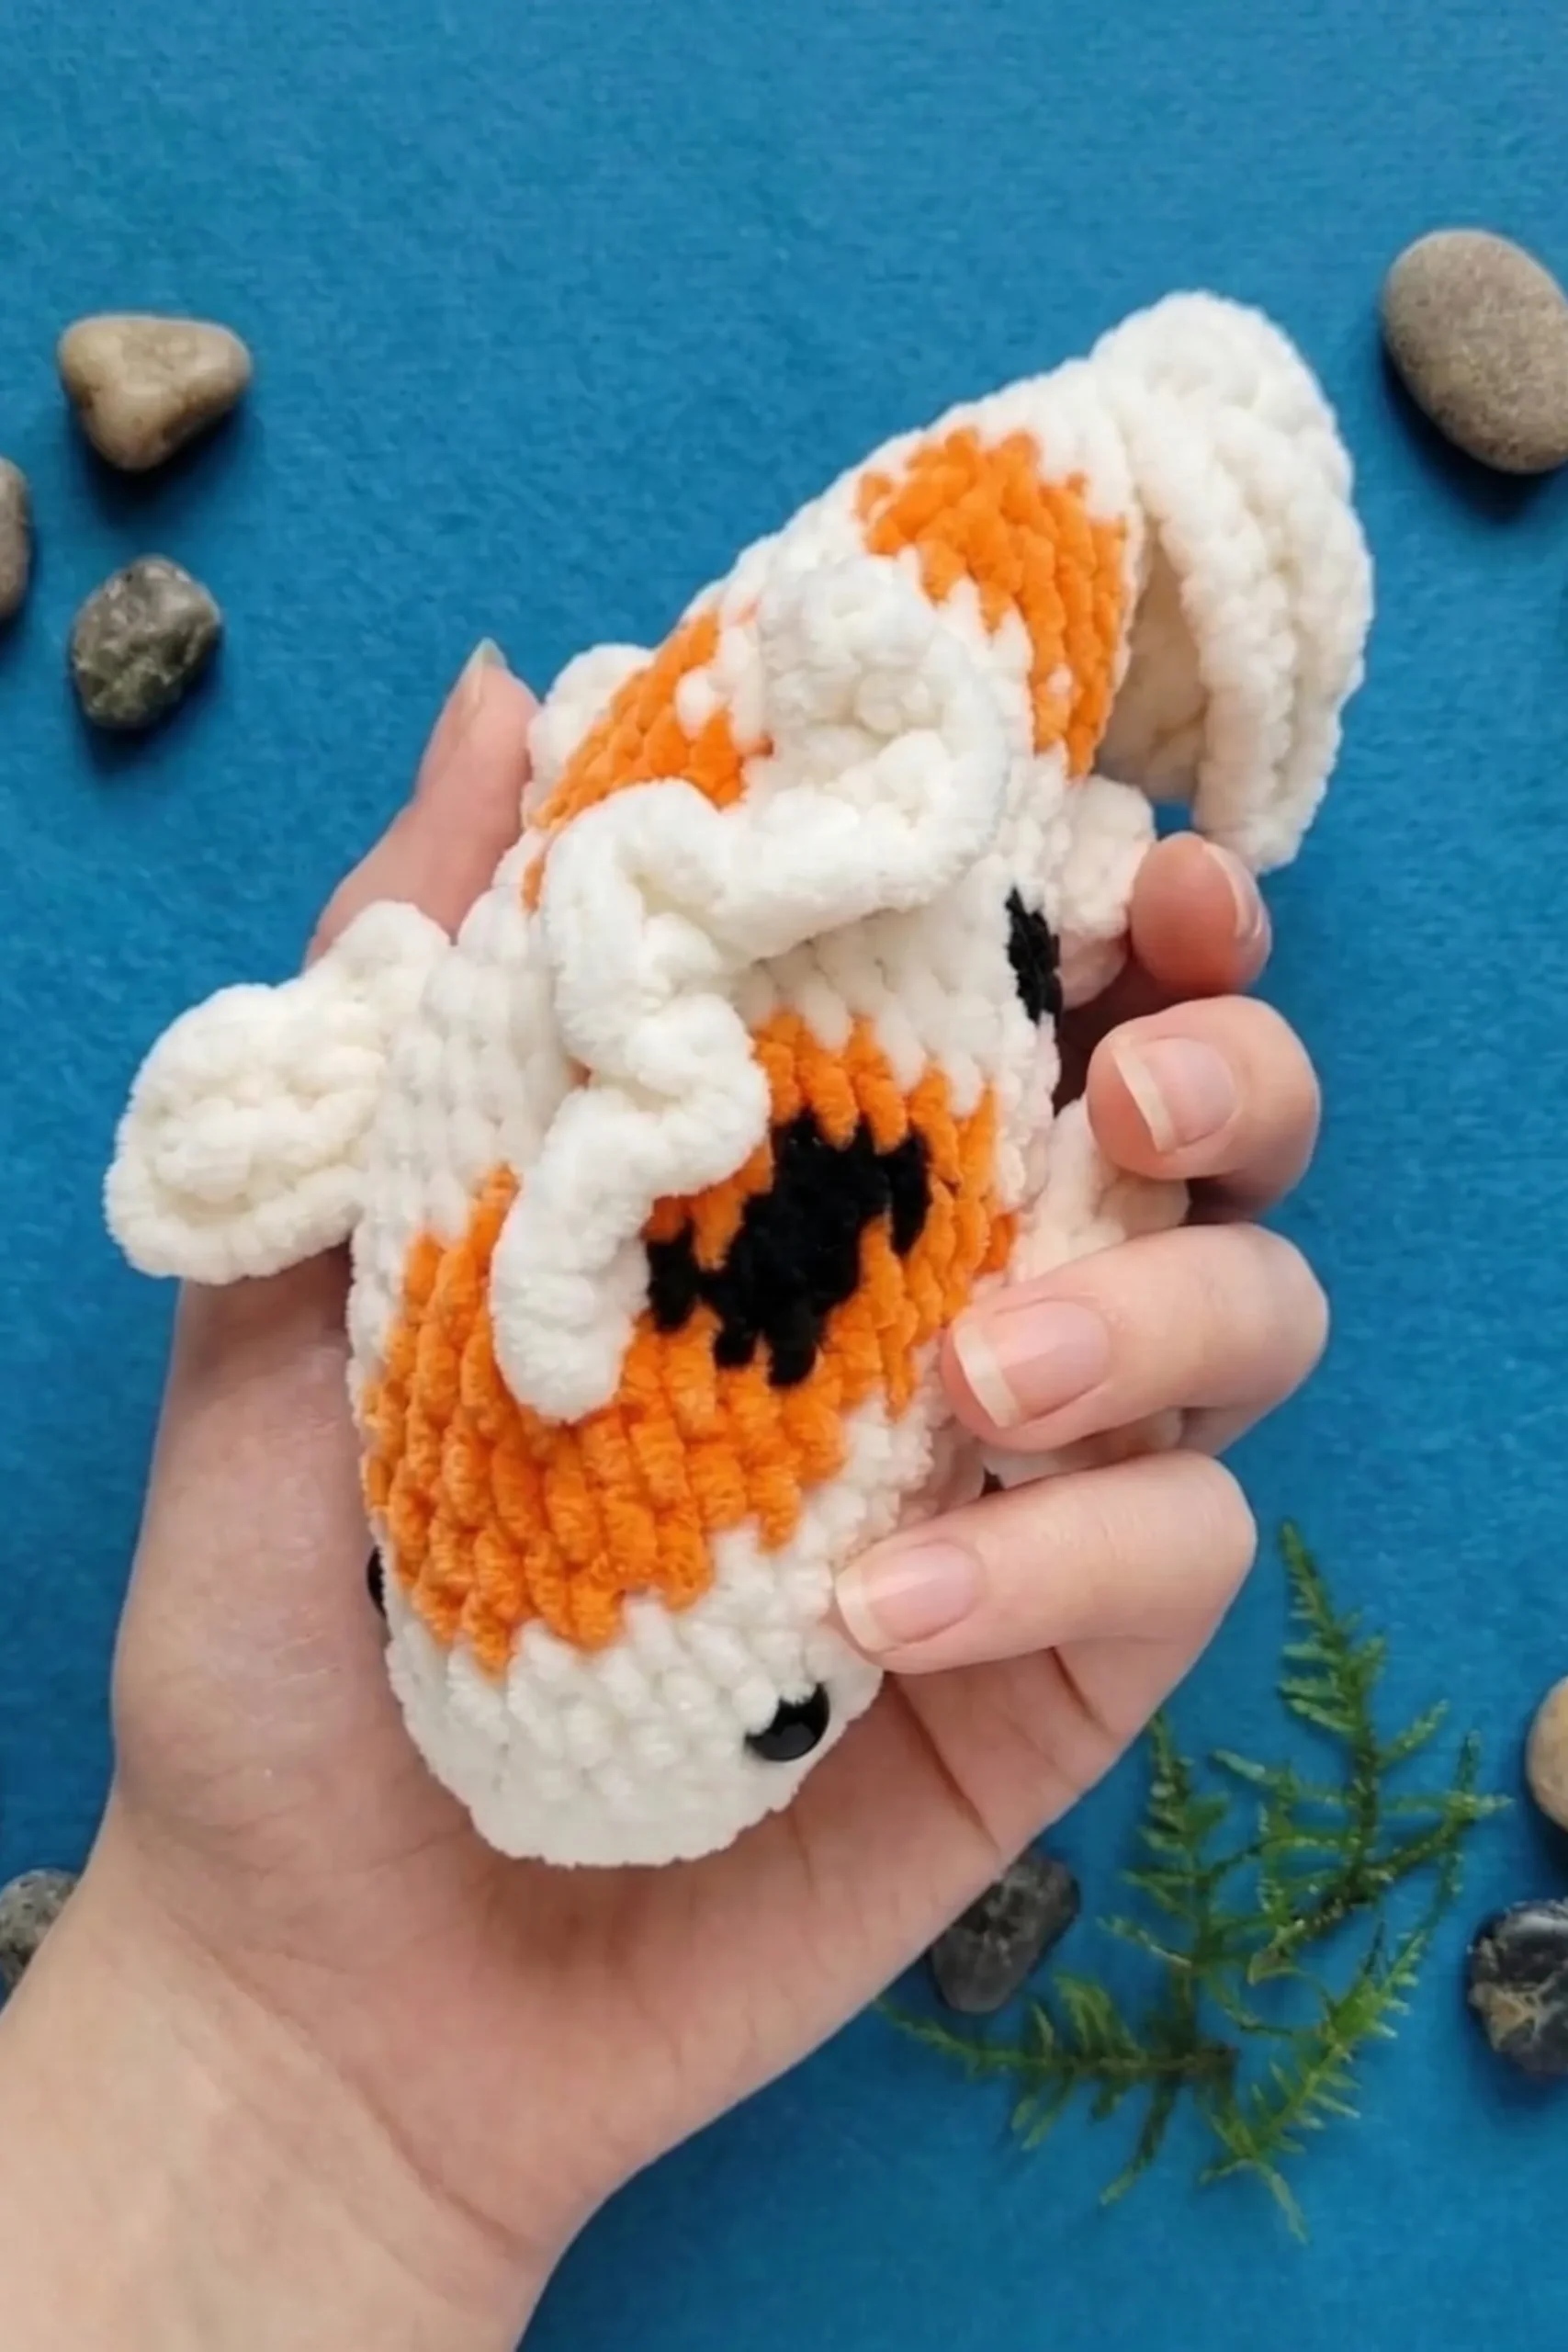
The pattern constructs a koi with a torpedo-shaped body, a large dorsal comb running along the spine, paired large pectoral fins, smaller secondary fins, a split tail with two distinct lobes, and optional whiskers near the mouth. The colorwork runs through the body itself, with color letters W and O appearing throughout the round-by-round instructions. Based on context in the pattern text, W and O track white and orange sections respectively, though you can absolutely swap those for your own color choices. One source note on the pattern encourages exactly that: "The koi's color pattern is written in this pattern, but you can get creative and change colors as you please. This would be such a cool pattern to use crazy colors with! I think it would look really cool with pastels!"
Body construction and shaping
The body is worked in the round with continuous stuffing as you go. The pattern instructs you to "stuff as you go, ensuring even firmness," which matters a lot with a fish shape — uneven stuffing at the tapered tail end will ruin the silhouette. The closing rounds give you a clear picture of the shaping logic:
Round 26 drops from a wider midsection by working decreases across both W and O color sections, pulling the stitch count to 18. Round 27 holds at 18 with a simple color-blocked row: W for 9 stitches, O for 3, W for 6. Round 28 continues the decrease sequence in both colors, landing at 12 stitches. Rounds 29 and 30 hold at 12, working W for 7, O for 2, W for 3. The pattern specifically flags this point: "Stuff the body here. Continue stuffing after each round." Rounds 31 through 33 work single crochet all around in W, maintaining the 12-stitch count. Round 34 decreases all around to 6 stitches, Round 35 holds at 6, and then you finish off leaving a long tail for sewing, close the remaining stitches, and weave in ends.
The tail follows the body, continuing with the main color and working two separate lobes: a First Tail Lobe and a Second Tail Lobe. After completing both, you cut yarn, fasten off, and weave in ends.
Fins and their placement
All fins are worked in the main color. Placement is precise, and getting these right is what separates a polished koi from a lumpy blob with stuck-on appendages.
The large fins position 6 to 7 rounds back from the eye, along the lower edge line. The pattern calls for a Right Fin and a Left Fin worked symmetrically. The small fins sit 5 rounds back from the large fins, approximately 3 single crochets lower, with a First Small Fin and Second Small Fin. Take your time pinning these before you sew; even half a round off will affect the fish's balance.
The large comb: the most distinctive element
The dorsal comb is what makes this koi feel like a koi rather than a generic fish shape. It runs along the spine from Round 11 to Round 21 from the beginning of the head, exactly the midpoint of the body where a real koi's dorsal fin sits.
The construction is a two-row process worked directly onto the body:
1. Row 1: Slip stitch along the body, covering the desired length for the comb base across Rounds 11 to 21.
2. Row 2: Chain 2, turn. Work 3 double crochets into each slip stitch from Row 1. When you reach the end, work 1 half double crochet and 1 slip stitch. Cut yarn, pull through, tie ends together, and weave inside the body.
That triple-dc-per-slip-stitch construction fans the comb out nicely without requiring any separate piece. The result is a textured ridge that mimics the layered fin structure of a real koi dorsal. Weaving the ends inside the body, rather than on the surface, keeps the base clean.
Adding whiskers
The whisker technique comes from a separate how-to tutorial and uses white yarn secured with a small dot of hot glue. The process runs as follows:
1. Cut a long piece of white yarn.
2. Insert your hook above the mouth area.
3. Yarn over with the white yarn and pull it partway through.
4. Yarn over with both ends of yarn and pull through the loop.
5. Tug to tighten.
6. Place a small dot of hot glue under the whiskers, then lay the whisker over the glue. Keep your fingers away from the glue while it sets.
The glue step is the key practical note here. Whiskers attached by yarn alone will migrate and droop over time; the glue dot anchors them flat against the face. Use a toothpick or the back of your hook to position them rather than your fingertips.
Assembly and finishing
Beyond the closing rounds of the body and the fin/comb placement, the assembly section brings together all the sewn-on elements. The pattern includes a dedicated Assembly section on Amigurumi Corner with step-by-step guidance, though the full sequence isn't reproduced here. At minimum, you're sewing the tail lobes, large fins, and small fins onto the completed and stuffed body, then adding the comb in place and finishing with the whiskers.
A few finishing notes worth keeping in mind:
- Stuff firmly and evenly, especially as you work the tapered rear rounds. The body loses structure fast if you under-stuff before the decreases start.
- Weave all yarn ends inside the body wherever possible rather than trimming flush on the surface.
- Pin every fin and the comb position before committing to sewing. A disappearing ink marker works well for marking placement on light-colored yarn.
Where to find the pattern and what else is available
The full pattern is free on Amigurumi Corner, published with a complete materials list, abbreviations, pattern notes, and assembly instructions. A formatted PDF version is also available for purchase, which is useful if you want a printed reference at your hook hand rather than scrolling through a browser window.
Amigurumi Corner's other free patterns sit nearby in the post navigation, including a free Pomeranian amigurumi and a free alligator amigurumi, which gives you a sense of the site's overall style and complexity range. The post has accumulated 25 comments, so there's an active community of makers who've worked through it and can answer questions that come up mid-project.
The koi amigurumi lands in a satisfying middle ground: complex enough to be genuinely interesting, structured enough that the instructions carry you through the hard parts. The comb construction alone is worth the project.
This article was produced by Prism’s automated news system from verified source data, official records, and press releases, then run through automated quality and moderation checks before publishing. The system is built and supervised by the people who set the standards it runs under. Read our full AI policy.
Did this article answer your question?