Free Tiger Ball Amigurumi Pattern Offers Beginners a Quick, Plush Make
Olivia Harper's free Tiger Ball Amigurumi pattern from Amigurumi Corner is a round, chenille-yarn plush that beginners can actually finish in one sitting.
Amigurumi Corner's latest free release is the kind of pattern that makes you want to drop whatever you're doing and pick up a hook. Designed by Olivia Harper, the Tiger Ball Amigurumi is a round, roly-poly tiger toy built for speed and squishiness, worked in super bulky chenille yarn and stuffed with polyester fiberfill. The pattern is written as a step-by-step tutorial pitched at beginners, though Harper frames it as rewarding for experienced makers too: "Embark on a delightful crochet adventure with this adorable Tiger Ball Amigurumi pattern! Perfect for beginners and experienced crocheters alike, this project guides you through creating a charming, squishy tiger that's sure to bring a smile to anyone's face. Utilizing soft, plush chenille yarn, this tiger isn't just a toy; it's a huggable companion, designed to be irresistibly cuddly and a joy to make."
That's marketing copy, sure, but the structure of the pattern backs it up.
What the Pattern Covers
The Tiger Ball Amigurumi is broken into clearly labeled sections: Abbreviations Used, Pattern Notes, and then the actual construction divided into Muzzle, Body, Tail, Ears, and Assembly. Each component is self-contained, which is exactly how you want a beginner pattern organized. You finish the muzzle, set it aside, move to the body, and so on, before bringing everything together at the end.
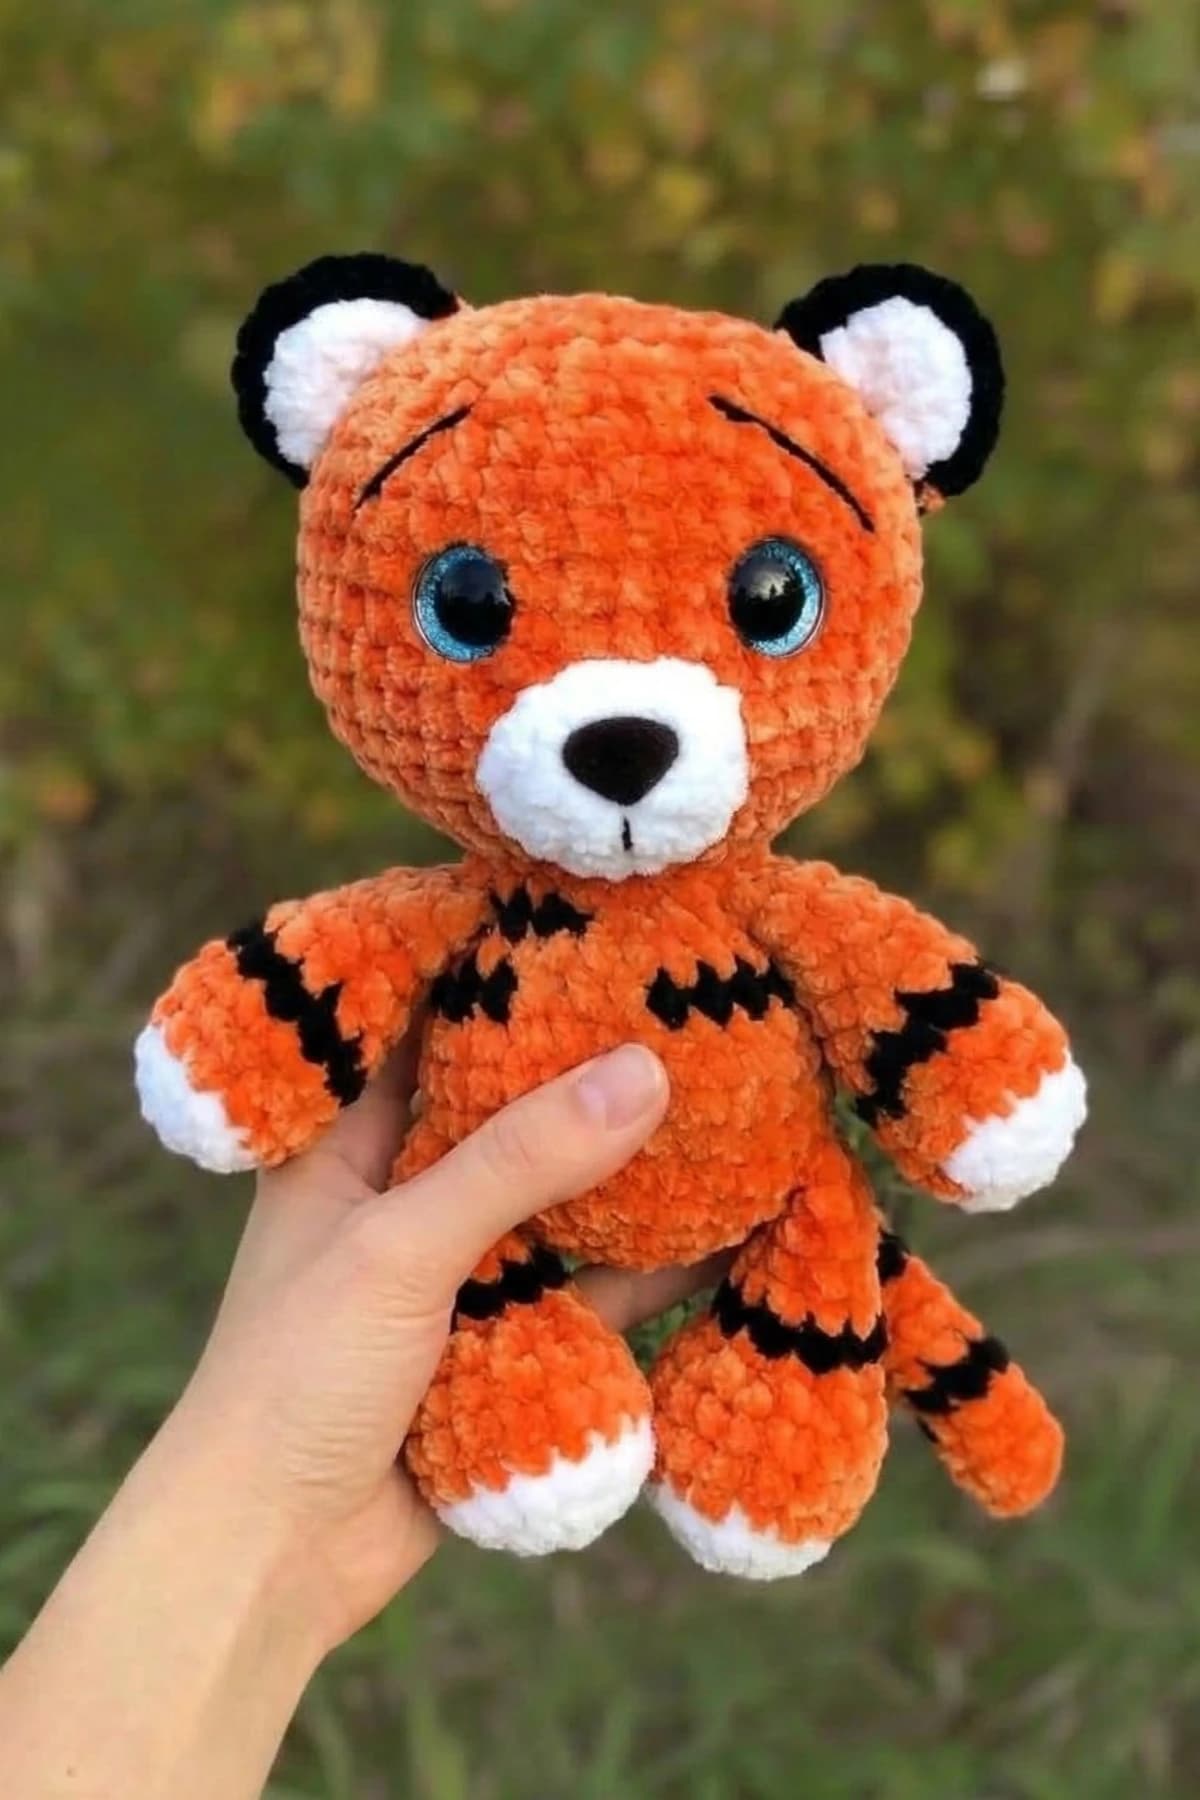
The muzzle opens with a 7-stitch magic ring, expands over three rounds to 21 stitches, works two flat rounds at that count, then transitions to the main color to flow into the body section. The ears are worked flat in turning rows rather than in the round, which is a nice change of texture in an otherwise continuous-round project. You start with 4 stitches in a magic ring, increase twice to reach 12 stitches, then switch to the accent color (black or dark brown) for a final row before fastening off with a long tail for sewing. The tail itself runs 13 rounds in the front loop only at a consistent 6-stitch count, then switches to the accent color for two final rounds worked through both loops before you fasten off and stuff it firmly. That FLO section is what gives the tail its ridged, segmented look.
The accent color throughout is described as black or dark brown, which gives you some flexibility depending on what you have in your stash.
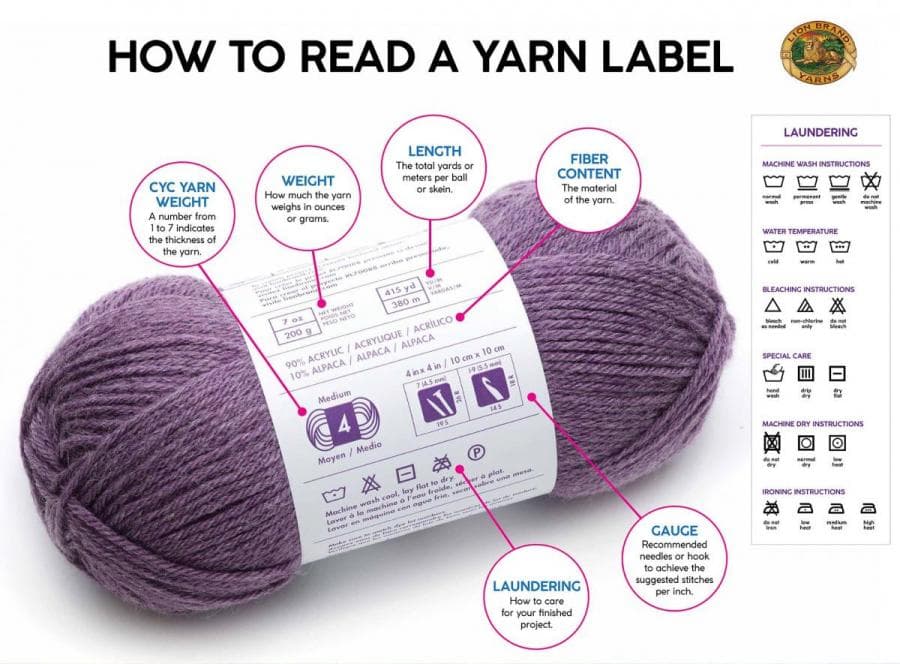
Yarn and Materials
The Amigurumi Corner version calls specifically for super bulky chenille yarn. Chenille at that weight works up fast and produces the dense, velvety texture that makes these ball-shaped amigurumi so appealing as toys and gifts. The stuffing is standard polyester fiberfill. No hook size is explicitly listed in the available pattern notes, which is worth flagging if you're planning to make this one; check the full post on Amigurumi Corner for the complete materials list before you start.
A Note on Skill Level and Notation
The pattern is marketed as beginner-friendly, and for the most part the techniques involved, namely magic rings, single crochet, basic increases, and color changes, support that claim. One thing worth flagging upfront, especially if you're newer to amigurumi: always confirm whether a pattern uses American or British stitch names before you begin. They share names but refer to different stitches, which can derail a project fast. One maker who worked through a tiger plushie pattern described this exact experience: "The first thing I had to do was to figure out whether the pattern followed American or British notation... I managed to figure out that the pattern used American stitch names." Most patterns published on US-based amigurumi blogs use American notation, but it's worth a quick check every time.
The same maker noted that the body worked up easily and became meditative: "The rest of the tiger's body only required one type of stitch and some basic increases and decreases... overall, it was a relaxing process. I even took the project with me to the park to enjoy some fresh air whilst crocheting." That tracks with what super bulky yarn does for a project, the stitch count stays manageable and the fabric grows quickly.
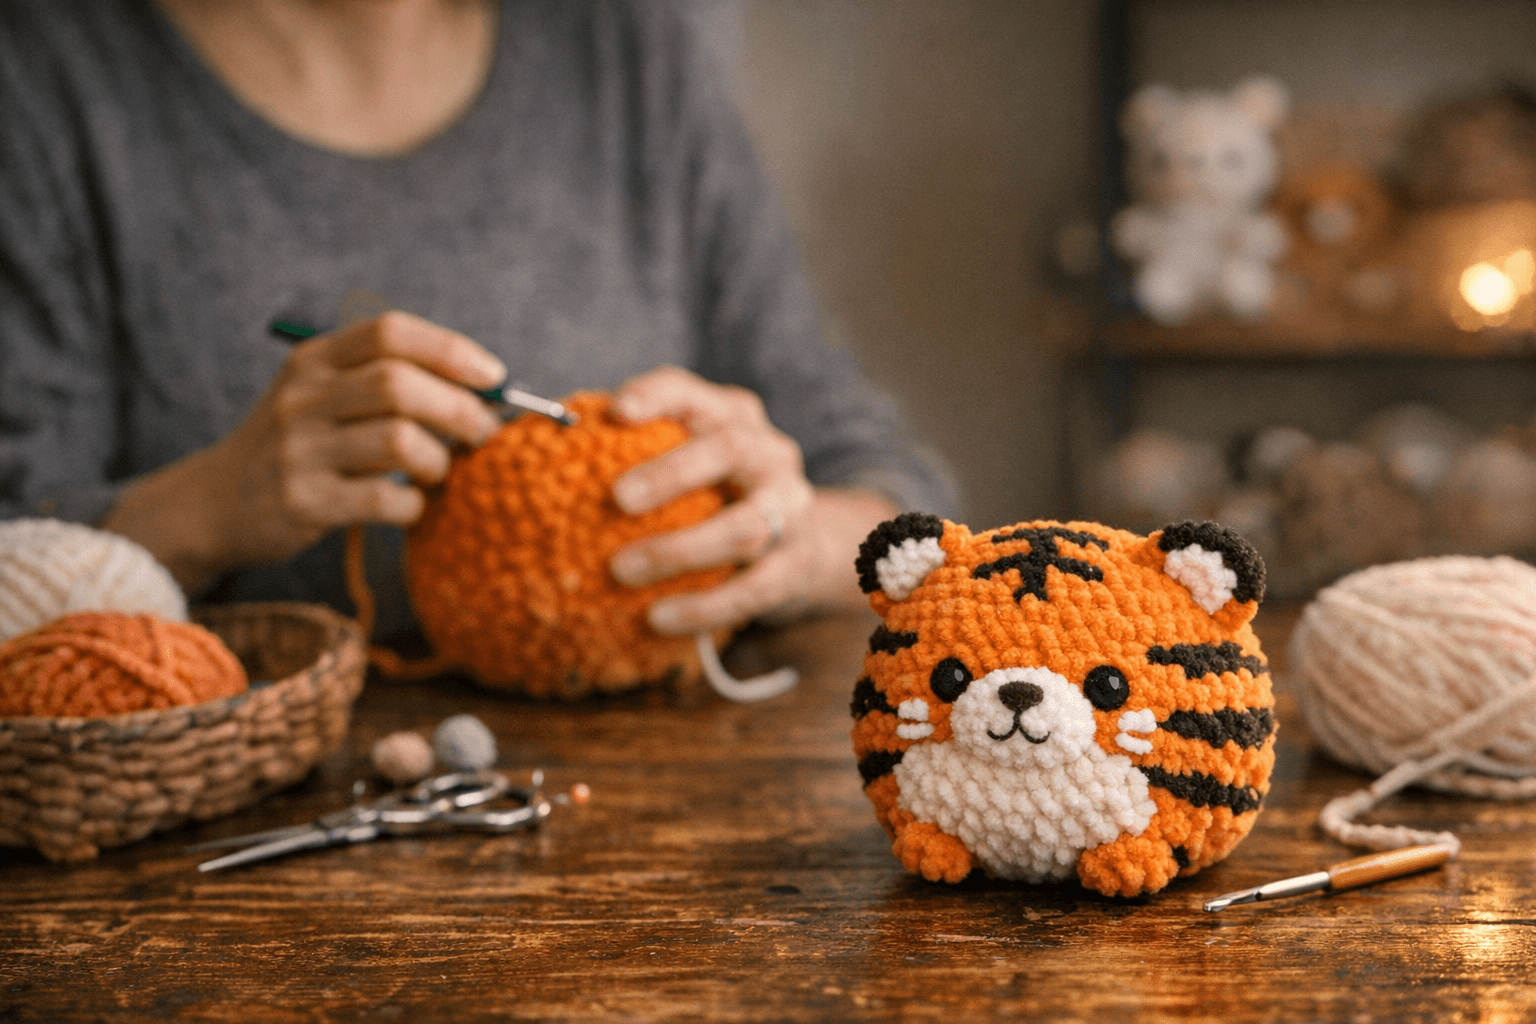
The trickiest part? The tail. Even with a simple stitch pattern, narrow rounds with only 6 stitches across are genuinely awkward to navigate with a hook. As that same maker put it: "The pattern itself was simple... However, because each round was small and the tail was narrow, it was a bit tricky to manoeuvre the hook between the loops." Consider sizing up your hook by half a millimeter for just that section if you're finding it a fight.
Other Free Tiger Patterns Worth Knowing
The Tiger Ball Amigurumi isn't the only free tiger pattern in circulation, and if it doesn't quite fit what you're after, there are solid alternatives.
Wonder Crochet offers a Tigger-specific plush pattern, explicitly framed for Winnie the Pooh fans, using Premier Parfait Chunky yarn for what the designer calls "a soft pastel look." The assembly instructions are unusually clear and worth studying even if you're using a different pattern: ears go between rounds 3 and 5 on the head, arms attach right at the head-body join, and the tail goes to the back bottom of the body. Tiger stripes are created not with color changes during crocheting but by weaving brown medium-weight yarn in and out of the finished plush after the fact, with dark brown medium yarn used separately to embroider eyebrows two rounds up from the eyes. The head is closed by threading a yarn needle through the back loops of the remaining 6 stitches and pulling tight, a standard closure method but described cleanly here. The Wonder Crochet pattern uses American abbreviations (SC, DEC, SLST, FO) throughout.
CuddlystitchesCraft's free tiger pattern sits at a different level entirely. That pattern is explicitly rated "intermediate crochet skills and knowledge" and produces a substantially larger finished toy: 23cm (9 inches) seated, or 31.5cm (12.5 inches) measured from ears to toes. Materials are specifically YarnArt Jeans in Fine Sport weight, a 55% cotton/45% acrylic blend: two 50g/160m balls of orange (colour 77), one ball of black (colour 53), and one ball of white (colour 62). The stripe construction here happens in the round itself, with black and orange yarn worked simultaneously in later rounds using invisible decreases (INV DEC) to shape the tiger's markings. Round 46 is particularly clever: the arms are attached to the body during the round rather than sewn on afterward, and the site links to a dedicated video tutorial for that no-sew attachment method. If seaming puts you off, this approach is worth the extra skill investment.
Budget Entry Point
If you want to test the waters before committing to a full yarn purchase, the TKMaxx approach is genuinely viable. One maker picked up a complete crochet kit there for about £4 that included orange, white, and black yarn, a hook, a stitch marker, stuffing, a tapestry needle, and a printed instruction leaflet. It's not a setup you'd build a long-term practice around, but for a single tiger project it covers every material requirement.
Assembly
All the patterns covered here converge on the same basic assembly logic: smaller components get sewn to the finished body using the long yarn tails left when fastening off. The key is leaving those tails long enough to actually work with, at least 15cm, and using a proper tapestry needle rather than trying to thread a crochet hook. The Amigurumi Corner pattern includes a dedicated Assembly section as part of its structure, so the positioning instructions are in the pattern itself rather than scattered across the tutorial.
The Tiger Ball Amigurumi makes a strong case for itself as a handmade gift: compact, fast to finish, soft enough for small hands, and free to access. The chenille yarn alone does most of the visual heavy lifting, so even a first-time amigurumi maker ends up with something that looks polished.
This article was produced by Prism’s automated news system from verified source data, official records, and press releases, then run through automated quality and moderation checks before publishing. The system is built and supervised by the people who set the standards it runs under. Read our full AI policy.
Did this article answer your question?