Geometric Tattoo Techniques, Drawing, Stenciling, Needles, and Healing Tips
Crisp geometry starts before the needle ever touches skin: better drawings, tighter stencils, and calmer needle control prevent the tiny errors that ruin healed linework.
Build the geometry on paper before it ever reaches skin
Clean geometric tattooing lives or dies in the drawing stage. Start with a precise vector or a carefully scaled hand drawing, then solve symmetry before any stencil goes on. Construction lines, golden-ratio scaffolds, and repeated modular units, such as one petal cell repeated around a center, make the design stable long before the client sits down. Redrawing the piece at 150 to 200 percent of final size is a smart checkpoint, because it exposes proportion problems that would become painfully obvious once the ink heals.
That pre-planning matters because geometric work is unforgiving. A tiny tilt in one line or a slight spacing error in a dot ring can disappear in looser styles, but it stays visible in healed geometric work. The appeal is part of tattoo history itself: Ötzi the Iceman pushed the earliest known tattoos on an actual body back to about 5,200 years ago, and Smithsonian accounts of Polynesian tattoo traditions show how long elaborate geometric forms have carried visual power across large areas of the body. Even the modern conversation around tattoo history, shaped by names like Don Brothwell, Henk Schiffmacher, and Chris Rainier, keeps returning to the same idea: structure is the art.
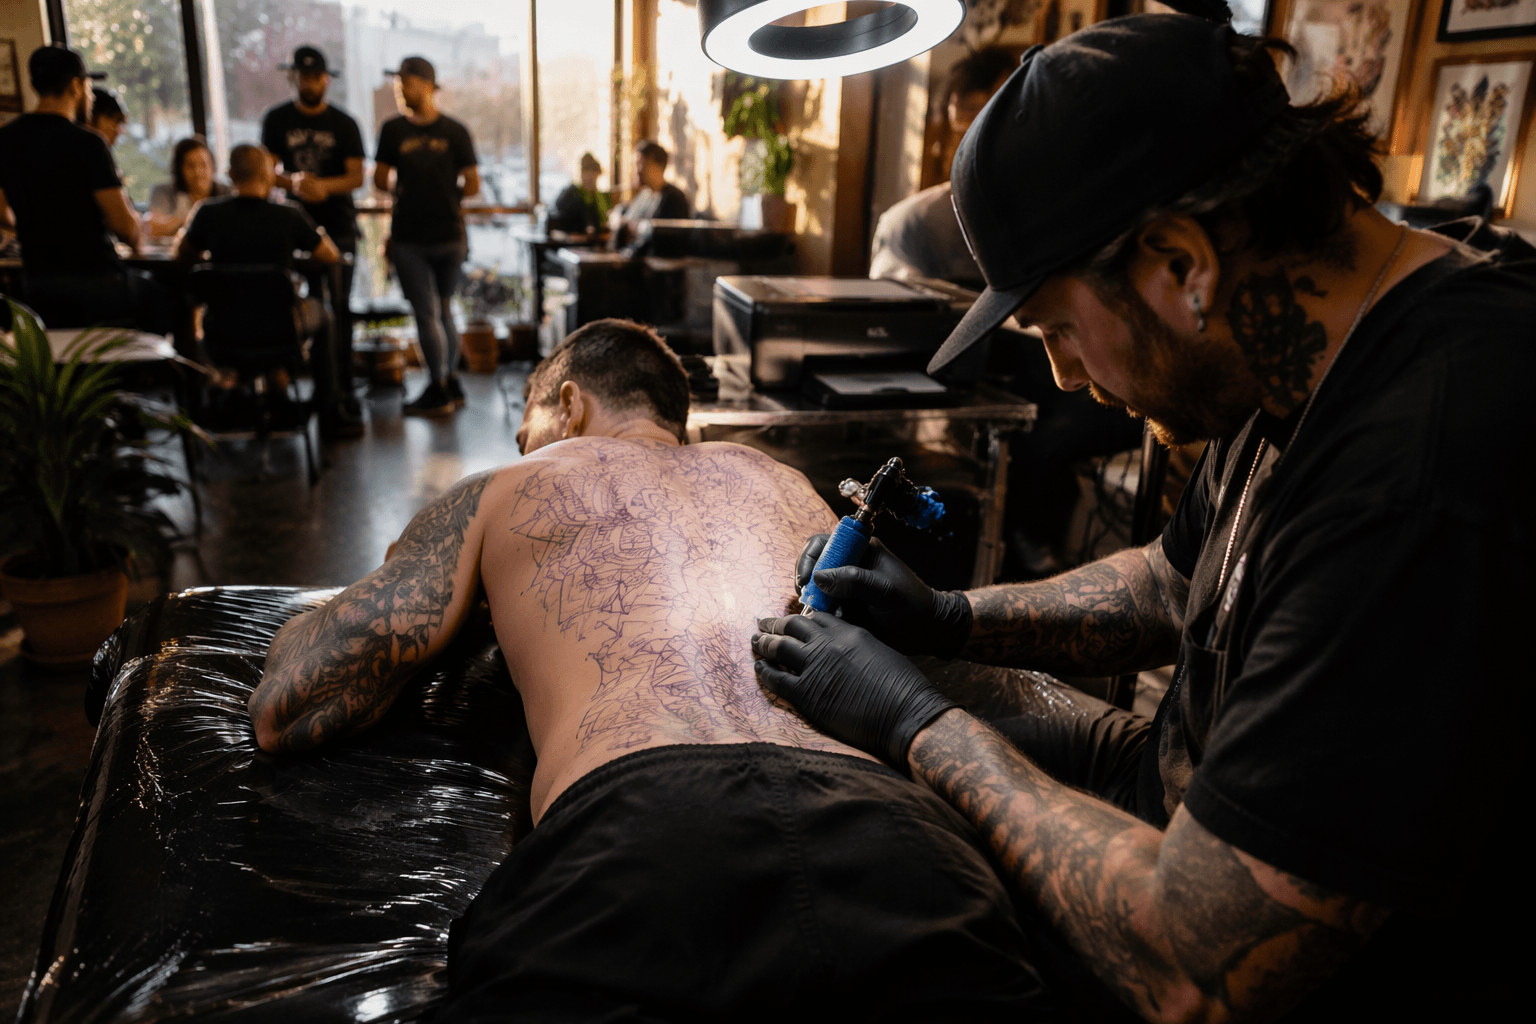
Use stencils as registration tools, not decoration
Once the drawing is locked, the stencil has one job: transfer that plan without distortion. High-quality thermal or digital stencil printers are worth using whenever they are available, especially for mandalas, tessellations, and interlocking geometry. For large pieces, split the design into registered panels so each section can be aligned precisely across multiple sessions instead of trying to force one oversized transfer onto moving skin.
Registration points are what keep the whole composition honest. Mark fixed landmarks, use proportional points on the stencil, and anchor the design to bone prominences or other measurable body markers so you can line it up again after the client changes position. Freehanding a full geometric composition from start to finish is asking for asymmetry unless the hand and eye are already proven at that level. The same disciplined workflow also fits modern safety expectations: the Food and Drug Administration treats tattoo inks as cosmetics, local jurisdictions regulate tattooing practice, and the Centers for Disease Control and Prevention stresses sterile ink products and sterile water to reduce infection risk. Contaminated ink has caused illness before, and a Monroe County, New York outbreak investigated beginning January 4, 2012 is a reminder that precision on skin means nothing without sterile practice.
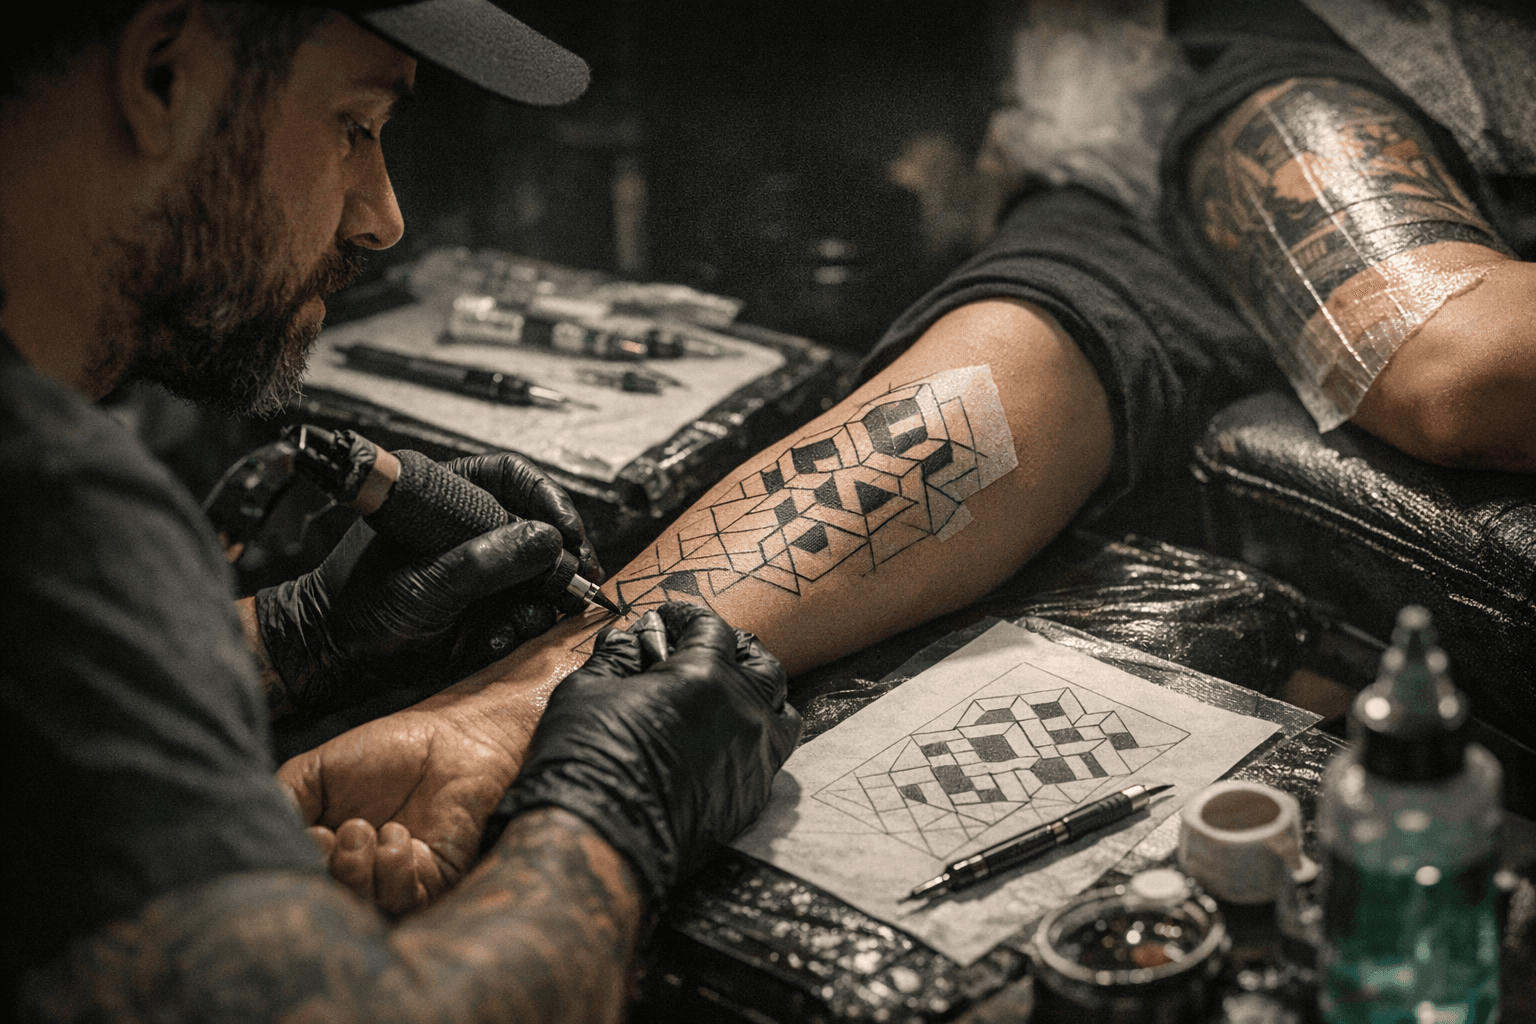
Pick needles for the line, the fill, and the dot
Needle choice should follow the line, not the other way around. Tight round liners are the workhorse for technical work, small lines, and details. Fine single needles and tight liners are especially useful in dotwork and delicate geometry because they give you cleaner control over narrow marks and small transitions. Round shaders handle basic shading and fill, while small magnums or round magnums help when you need subtle gradations or broader shading without destroying the structure.
Machine setup matters just as much as the grouping. Too shallow, and the result can be patchy lines or blown dots; too deep, and you risk scarring and spreading. The safest habit is to tune for consistency before you chase speed, then confirm your depth on practice skin and early passes rather than trying to rescue the result later. FK Irons’ needle guidance follows the same logic: tight packing favors technical detail, while broader groupings are better for fill and shading.
Control dotwork with spacing and rhythm, not force
Dotwork is not just pointillism with a tattoo machine. It is a controlled repetition discipline where gradients come from spacing, timing, and density, not necessarily from changing dot size alone. Use a steady wrist rhythm and build value gradually, starting light and layering density over time rather than trying to reach full contrast in one aggressive pass. If the stencil includes a value map, follow it. High-density areas, midtones, and negative space should all be planned before the first mark is made.
Training spacing on synthetic skin is worth the time because uniformity is hard to fake once the work heals. Grid drills sharpen your sense of distance between dots, and that matters even more in mandalas and large patterned panels where any drift becomes visible across the whole composition. Conservative execution also protects the skin. Cleveland Clinic notes that tattoo healing can take weeks to months depending on size and location, and overworking the area raises the chance of irritation and delayed recovery.
Break large pieces into panels the body can actually hold
Full sleeves, torsos, and back pieces need to be built for movement as much as for symmetry. Break the composition into logical panels that respect muscle flex, joint motion, and body curvature so the linework does not warp every time the client bends or turns. Multiple shorter sessions are usually the right answer when a design depends on perfect alignment across contours. Marathon sittings may sound efficient, but they make consistency harder to protect and comfort harder to maintain.
This is where the technical and the practical meet. Large projects are harder to keep clean, harder to align, and harder to heal if you overwork them in one sitting. Staged planning keeps the design readable, gives you checkpoints for registration, and makes it easier to preserve continuity from panel to panel. That same discipline helps keep infection-control routines tight, which is essential work, not an afterthought.
Photograph every stage, not just the finished piece
Document the stencil placement, mid-session progress, and healed result with consistent lighting. Geometric tattoos are especially dependent on healed photography because the final test is not how sharp the stencil looked, but how the lines settle after healing. Slight blowout, fading, or uneven dot density is much easier to spot once the skin has fully closed, and those photos become your best feedback loop for future work.
Good documentation also protects your portfolio from flattering but misleading first-day images. The healed shot is where spacing, symmetry, and continuity either hold up or fall apart. If the healed work looks clean, you know the drawing, stencil registration, needle choice, and hand speed all worked together.
Aftercare protects the geometry you just built
Aftercare should be conservative and simple: gentle soap, light moisturizing, and enough care to keep the skin calm without smothering it. The American Academy of Dermatology advises water-based lotion or cream for dry tattooed skin and warns that petroleum-based products can fade ink. Cleveland Clinic also points to gentle soaps and breathable clothing as useful ways to avoid complications while the skin settles.
Keep clients away from chlorinated pools until the tattoo is fully healed, and keep them serious about sun protection. CDC sun-safety guidance says UV rays damage skin cells and are strongest in the continental U.S. from 10 a.m. to 4 p.m. daylight saving time, which is exactly when fresh linework can suffer if it is exposed carelessly. Swimming should wait, and so should heavy sun. Cleveland Clinic also notes that tattoo infections can range from superficial problems like impetigo to deeper issues such as cellulitis, erysipelas, or even sepsis, so clean aftercare is part of preserving both health and line integrity.
Geometric tattooing rewards the artist who respects the sequence: draw accurately, stencil with control, choose the right needle, keep the hand steady, split big projects into manageable panels, and heal the piece as carefully as it was built. That is how crisp symmetry stays crisp, and how the healed result still looks intentional months later.
This article was produced by Prism’s automated news system from verified source data, official records, and press releases, then run through automated quality and moderation checks before publishing. The system is built and supervised by the people who set the standards it runs under. Read our full AI policy.
Know something we missed? Have a correction or additional information?
Submit a Tip