Toronto Studio Releases Geometric Sleeve Guide for Artists and Collectors
Five failure modes ruin most geometric sleeves before the final session; 46 Tattoo's new guide reveals what each one is and exactly how to stop it.

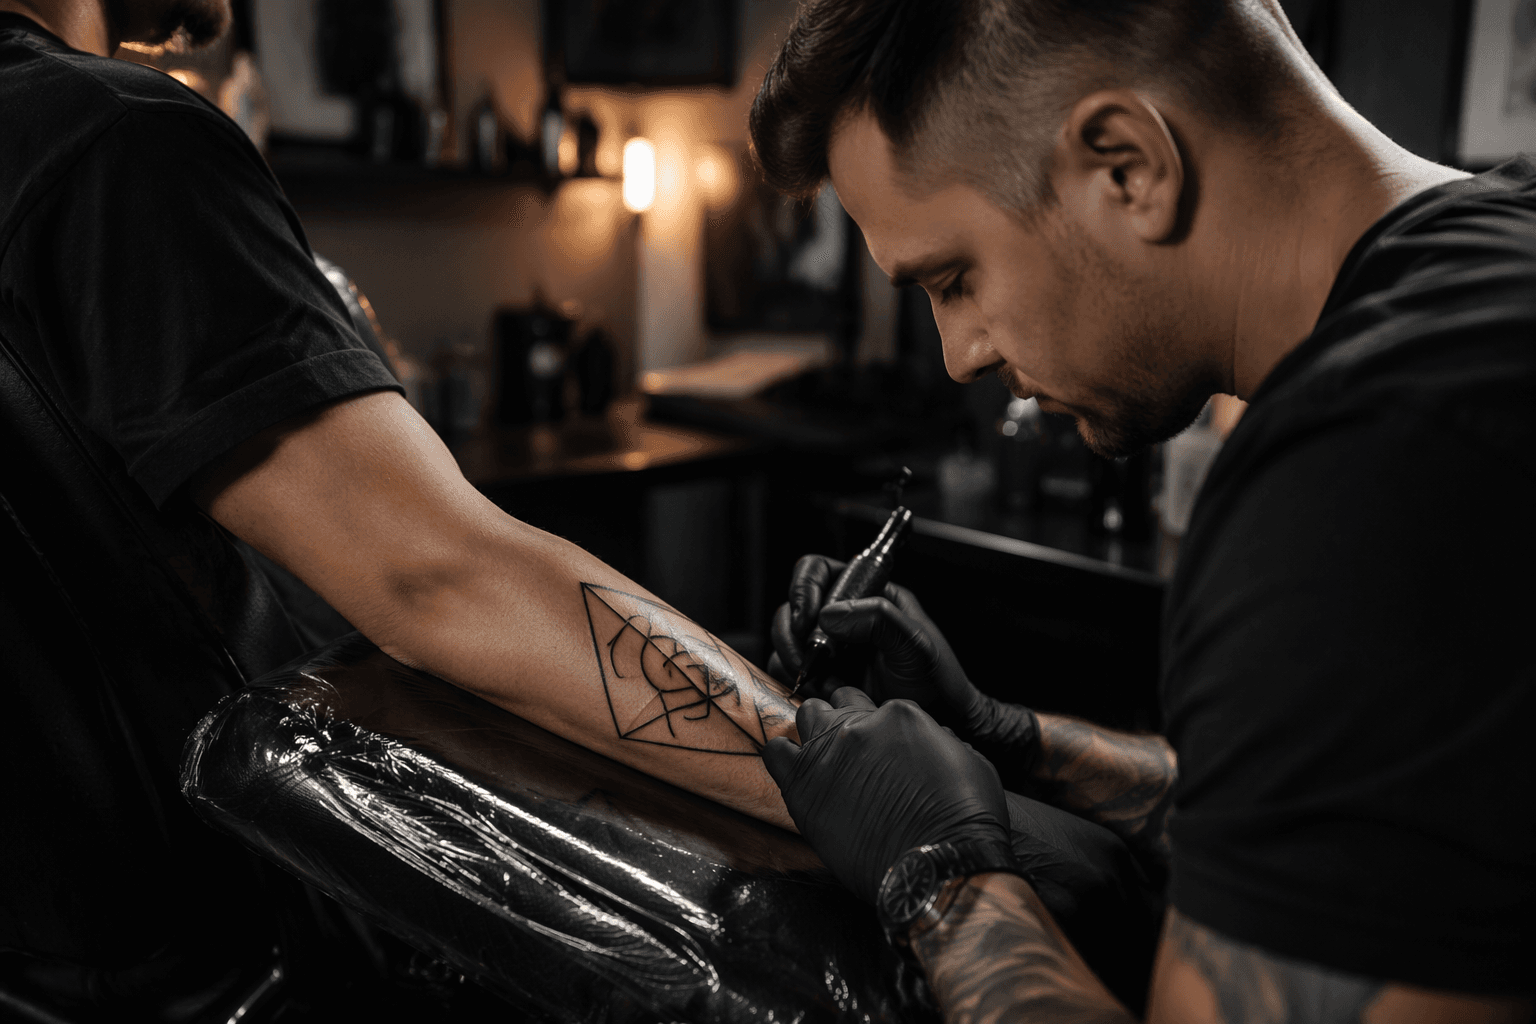
Warping is the first thing that goes wrong. A geometric sleeve that looks immaculate laid flat in a stencil will begin to misread the moment it wraps around the elbow joint. Lines that appear parallel on a flat surface converge or splay as skin stretches and compresses through movement. Repeating grids that measure out cleanly on the outer bicep drift out of rhythm the moment they cross the ditch and continue down the inner arm. The sleeve ends up not as a unified composition but as a series of strong individual panels that don't speak to each other, the most common and demoralizing outcome in geometric tattooing.
That structural problem, and four others like it, sit at the center of the Geometric Sleeve Tattoo Guide published by 46 Tattoo, a Toronto studio with a focus on geometric and dotwork work. Understanding why geometric sleeves fail is, in the guide's framing, as important as knowing how to execute one. The two pieces of knowledge can't be separated.
The Five Failure Modes
- Warping across joints. The elbow is the sleeve's most dangerous terrain. As the arm bends and flexes, skin stretches differently on the outer arm than the inner. Geometric patterns with long continuous lines or repeating radial symmetry are especially vulnerable: what reads as a clean transition in a stencil becomes a distorted pinch or gap in healed skin. The guide's answer is explicit flow mapping before any needle touches skin, plotting exactly how the design traverses joints before committing to anchor elements.
- Line drift between sessions. A full geometric sleeve spans multiple sessions over months. Without a rigorous system for documenting stencil placements, needle sizes, and line weights after each appointment, the artist risks subtle inconsistencies that compound across the project. A 0.5mm line weight in session one, replicated at 0.6mm in session four, creates a visible thickness variation that can't be corrected without heavy overwork. The guide calls for photographing stencil placements with detailed notes after every session, preserving exact parameters so subsequent appointments maintain continuity.
- Dotwork blowout. Dotwork shading is foundational to most geometric sleeves, but it is also the technique most vulnerable to blowout, the spreading of ink beneath the skin's dermis into the hypodermis where it disperses and blurs. The inner arm is high-risk: the skin there is thinner and more delicate than the outer bicep, requiring different machine speed and hand pressure. The guide stresses a grid-system mindset for dotwork, with measured transitions from dense to sparse stippling and technique adjustments calibrated to each placement zone rather than applied uniformly across the sleeve.
- Symmetry loss over time. Mandala-anchored sleeves and sacred geometry pieces rely on precise radial symmetry as their visual foundation. Over years, skin changes as collagen shifts and weight fluctuates, and perfect circles or geometric grids begin to read as subtly oval or pulled. The guide's mitigation is twofold: a black-and-grey palette (which ages more predictably than color) and deliberate negative space used as a structural element, which gives the composition room to breathe and makes minor drift far less perceptible.
- The patchwork effect. Perhaps the most common outcome of sleeves built without a unified plan, the patchwork effect occurs when individually strong panels don't read as a coherent whole. Sacred geometry on the shoulder, a mandala on the forearm, and geometric linework at the wrist, each executed well but without intentional transitions, produces a result that looks assembled rather than designed. The guide's answer is to establish anchor elements first, typically a central hub piece like a shoulder mandala or major geometric form, and build every subsequent session outward from that anchor so transitions are planned as deliberately as the panels themselves.
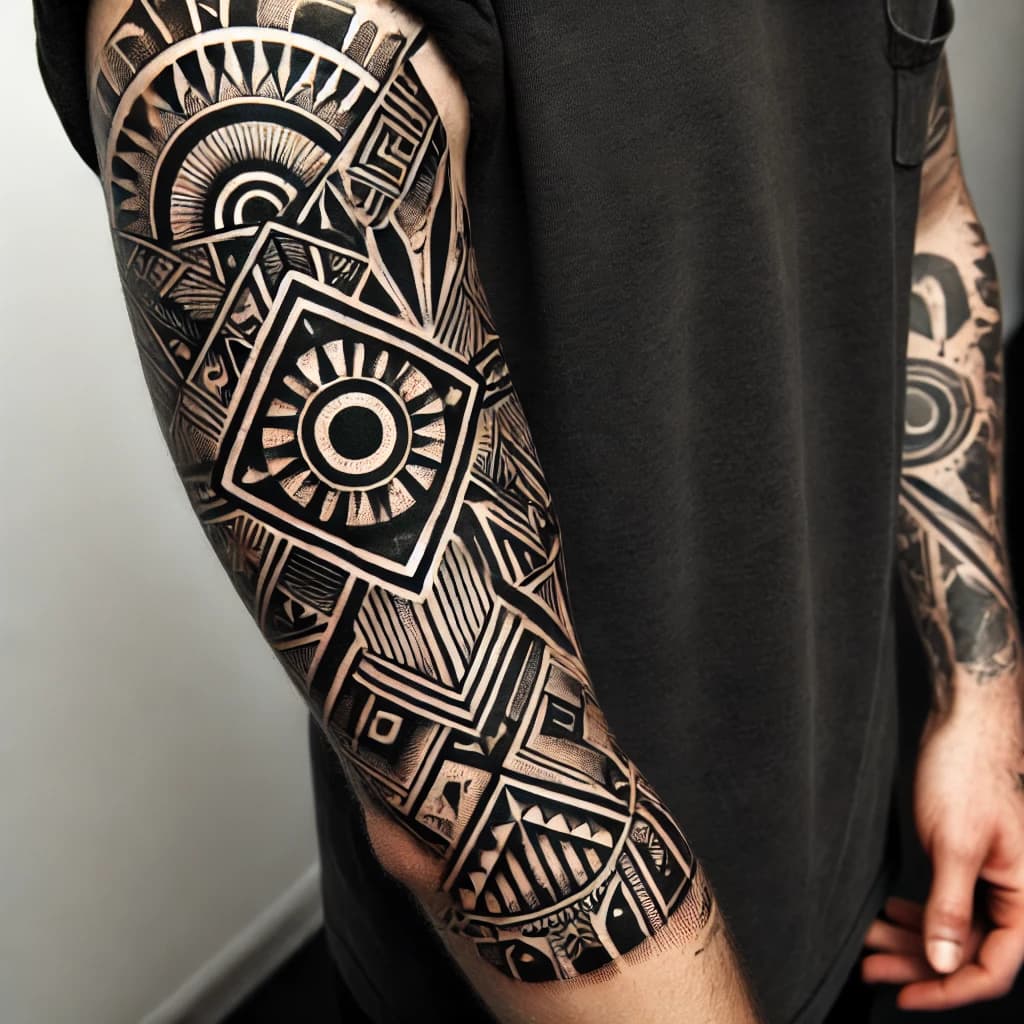
The Three Stylistic Approaches
The guide organizes geometric sleeves into three usable categories, each with its own technical demands:
- Sacred geometry draws on canonical forms: the Flower of Life, Metatron's Cube, Platonic solids. These pieces carry symbolic intent and demand mathematical precision. Any deviation from the underlying geometry is immediately visible, which makes consistent line weight non-negotiable. There is no visual noise to absorb an error.
- Mandala-centered sleeves use radial symmetry as the organizing principle, typically anchoring a major mandala at the shoulder or forearm and radiating repeating elements outward. The circular foundation makes flow mapping particularly important, because the radial structure must be plotted to work with the natural curvature of the arm rather than against it.
- Abstract and architectural geometries use interlocking shapes, hexagonal grids, repeated triangles, and graphic line systems for a contemporary structural look. These sleeves offer the most compositional flexibility but are equally demanding in terms of transition planning and line weight consistency.
The Workflow
The guide lays out a sequential process that treats the sleeve as a single long-form project rather than a series of disconnected appointments:
1. Initial consultation and reference gathering. A thorough session that maps reference imagery, identifies the stylistic category, and surfaces any existing tattoos that need to be integrated or worked around.
2. Grid and flow mapping. Before any stencil is made, the artist plots how the design will wrap the arm: where lines will cross joints, how density transitions from inner to outer arm, and where anchor elements will sit.
3. Stencil iteration and test placement. Multiple versions of key elements are tested and photographed on the arm before any ink is applied, verifying that the composition reads correctly across the arm's three-dimensional form.
4. Anchor-first sessions. The first sessions establish the central hub element. Everything built in subsequent sessions aligns to this anchor, preventing the compositional drift that produces the patchwork effect.
5. Texture and transition passes. Final sessions address dotwork gradients, negative space definition, and the connective transitions between panels that determine whether the finished piece reads as a unified composition or an accumulation of parts.
The Stat That Changes the Conversation
Here is the number most clients outside the geometric community don't fully account for: a complete custom geometric sleeve realistically demands between 15 and 25 hours of total needle time. Across sessions of four to eight hours each, with mandatory healing windows of two to three weeks between appointments, a collector who begins a full geometric sleeve in spring may not see the final texture pass completed until the following year. That timeline is not a function of slow artistry; it is the minimum responsible schedule for work that depends on healed skin to verify line weight and dot density before the next layer is added.
The guide is direct about this. Transparent communication around session count, healing timelines, and pain-placement tradeoffs between the inner arm and outer bicep is not a courtesy extended to nervous clients. It is the infrastructure that separates a project with a great healed outcome from one that gets abandoned or compromised halfway through.
Black-and-Grey as a Strategic Choice
The guide recommends black-and-grey as the default palette for sleeve-scale geometric work, and the reasoning is structural rather than aesthetic. Color ages less predictably than black ink, and geometric tattoos are uniquely punished by uneven aging. A saturated hue that shifts in one panel while another holds creates tonal inconsistency across the composition that no touch-up can fully correct. Black-and-grey, with proper dotwork gradients and deliberate use of negative space, builds the kind of high-contrast tonal field that preserves crispness over years rather than months.
Why the Planning Premium Matters
A geometric sleeve is one of the highest-skill propositions in contemporary tattooing, not because individual geometric forms are impossibly difficult to execute, but because executing them at sleeve scale, across multiple sessions, on a surface that moves and ages, while maintaining the precision that geometric work demands, requires a level of systematic planning that most decorative styles never require. Collectors who treat portfolio review and consultation time as optional extras rather than essential vetting criteria are the ones most likely to encounter the failure modes this guide was written to prevent. The premium for an experienced geometric artist reflects the methodology underneath the work. Staged scheduling, documented stencil placements, flow mapping, and a palette chosen for long-term structural integrity aren't upsells. They are what makes a geometric sleeve worth starting in the first place.
This article was produced by Prism’s automated news system from verified source data, official records, and press releases, then run through automated quality and moderation checks before publishing. The system is built and supervised by the people who set the standards it runs under. Read our full AI policy.
Did this article answer your question?