Army Painter Guide Puts Miniature Prep at Center Stage
The easiest visible upgrade in miniature painting often happens before paint: smarter prep. Army Painter’s new guide shows why organized assembly, clean mould-line removal, and careful cleanup save hours later.

The fastest way to save hours later is to spend a few minutes before the first coat of paint ever touches the model. That is the core idea behind Army Painter’s latest Paint Like a Pro guide, which makes a strong case that miniature prep is where paint jobs are won or lost, not just where kits get taken out of the box.
Prep is the real first coat
The guide, written by studio painter Joachim F. McLaughlin, treats preparation as a serious part of the painting process rather than a throwaway preamble. It frames the work before colour goes on the miniature as the moment that determines whether the rest of the project will be smooth, frustrating, or full of rework. Bad cleanup, sloppy assembly, and weak surface prep can all undermine the finish no matter how good the paint choices are later.
That matters because prep is one of the least glamorous parts of the hobby, yet it has some of the biggest consequences. If a seam is left open, a mould line is ignored, or a delicate part is crushed while clipping, those problems do not stay small. They show up again under primer, under shading, and under varnish, which is exactly why a prep-focused walkthrough like this is so useful for painters who already know how much work a bad model can create.
Start with the workspace, not the clippers
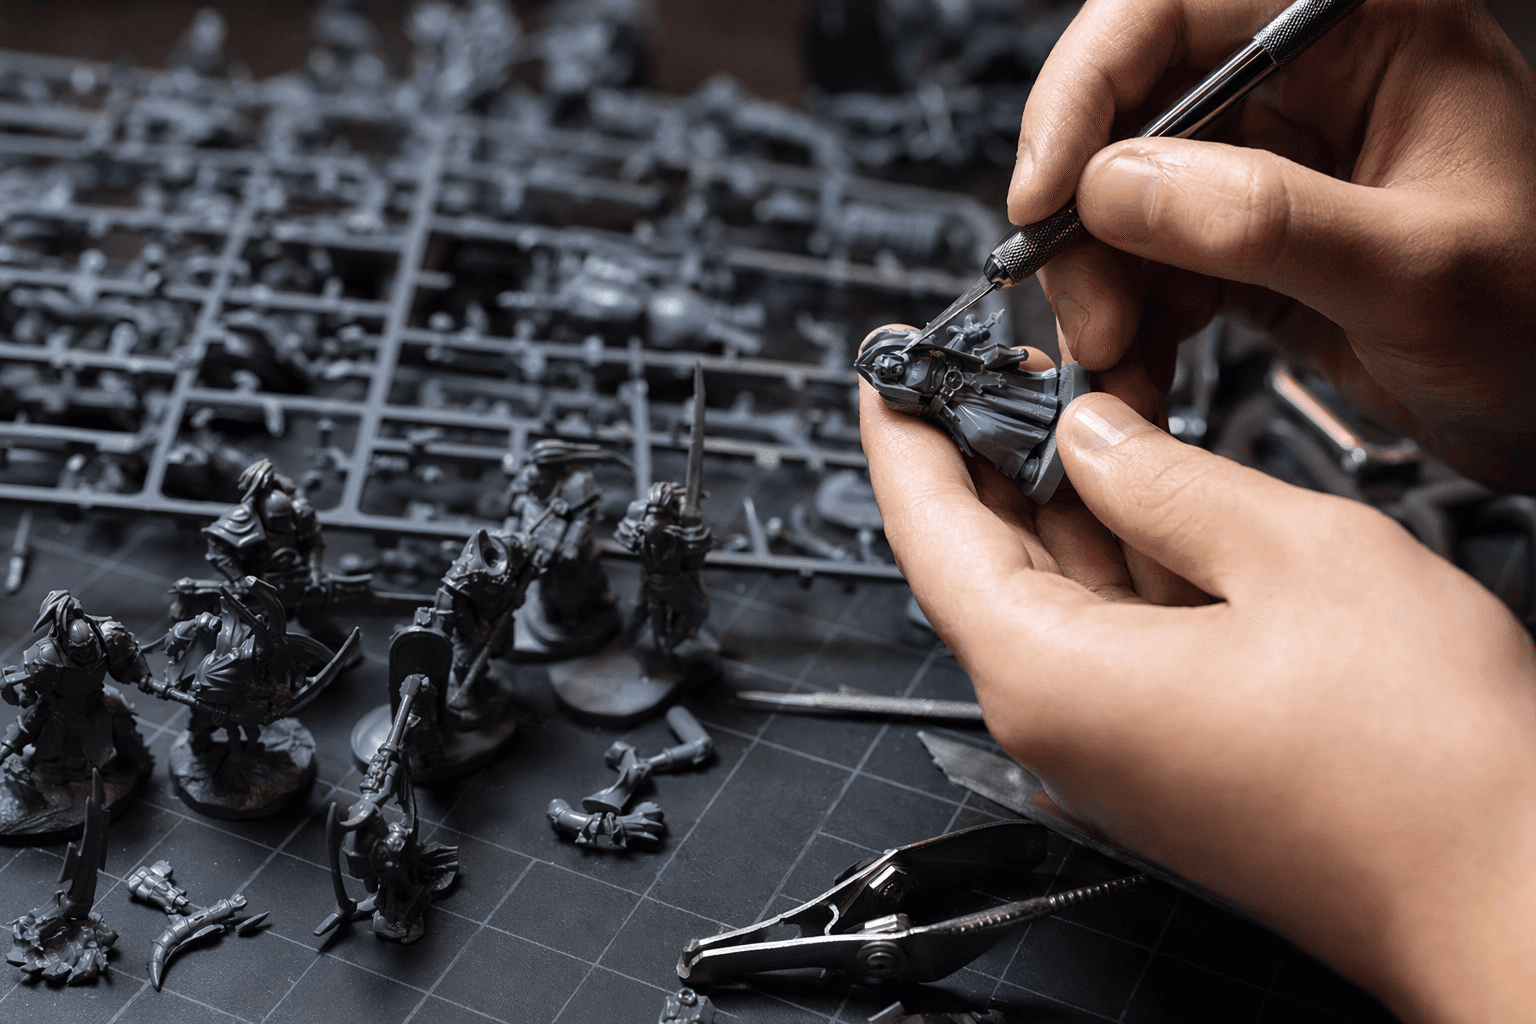
McLaughlin’s first practical move is simple: set up an organized workspace and read the assembly guide before clipping anything from the sprue. That is not just tidy-hobby advice. It prevents the classic mistake of cutting a part free, only to realize later that it would have been easier, safer, or cleaner to leave it attached until a different stage.
He also calls out the direction of the nippers, and this is one of those small habits that saves real headaches. Using the flat side against the part helps avoid crushing fragile details, which is a particular problem on thin weapon tips, banners, horns, and other break-prone pieces. The point is not to clip faster, it is to clip smarter so the kit goes together with less repair work later.
Cleanup is where the biggest visible jump happens
If there is one step in the guide that delivers the most obvious improvement on the tabletop, it is cleanup. Scraping mould lines with the back of a hobby knife, then following up with files or sanding sticks where needed, has an immediate effect on how finished the model looks once it is painted. A miniature with clean edges catches light better, reads more crisply across the table, and looks more intentional even before you start layering colour.
This is where a lot of everyday hobby work gets exposed. A strong paint job can hide some sins, but not all of them. On infantry in particular, a ridge left along a shoulder pad or sword blade can look tiny in the hand and glaring under primer. Remove that line and the whole model looks sharper without changing a single paint colour.
The guide also notes a practical safety point that gets overlooked too often: resin dust is hazardous and should be handled with proper protection. That is the kind of detail that separates real hobby advice from casual internet optimism. It also reinforces the broader message of the piece, which is that prep is not busywork, it is the foundation for both finish quality and safe handling.
Assembly prep is about avoiding problems you cannot paint away
The article does not treat assembly as a separate chore from painting. It links the build stage directly to how the final surface will accept paint, and that connection is the whole game. Clean joins and thoughtful assembly reduce the need for patching, which means fewer rough spots for primer to exaggerate and fewer places where paint pulls away unevenly.
McLaughlin also points out that a little extra thin plastic glue can help smooth minor flaws in plastic kits. That is a useful trick because it turns the assembly phase into part of the finishing phase. Instead of waiting until after priming to discover a seam, you can use the build process itself to make the surface cleaner and more paint-ready.
Metal and resin each bring their own headaches, and the guide acknowledges that too. Metal parts may need extra polishing, while resin demands care because of the dust issue. In practice, that means prep is not one-size-fits-all. A plastic infantry squad, a metal character, and a resin monster all ask for slightly different attention before they are ready for colour.
Why better prep changes the final tabletop result
The most useful thing about this guide is that it stays focused on outcome. Better cleaning, better assembly, and better surface prep do not just make a model look neat on the desk. They improve how later techniques behave, from the way paint grips the surface to how smoothly basing ties the whole miniature together.
That is especially important for painters who care about tabletop quality. If the model is clean, aligned, and free of obvious flaws, batch painting becomes far easier to control, because you are not stopping every few minutes to correct avoidable damage. The same is true when you hit the base at the end. A miniature that has been assembled cleanly and finished properly before priming is much easier to integrate into a cohesive army project.
The bigger lesson here is not that prep should be perfect. It is that the first careful hour can eliminate several frustrating hours later. McLaughlin’s guide makes that argument clearly by connecting the everyday tasks of clipping, scraping, sanding, polishing, and filling to the final result on the table. For painters who want cleaner finishes, more reliable basing, and fewer repair headaches, that is the kind of foundation work that actually pays off.
This article was produced by Prism’s automated news system from verified source data, official records, and press releases, then run through automated quality and moderation checks before publishing. The system is built and supervised by the people who set the standards it runs under. Read our full AI policy.
Did this article answer your question?


