Boat Cleaning Tools Guide Covers Hull, Deck, and Interior Care
Wrong tools leave your hull streaked and your gelcoat unprotected — here's how to build a cleaning kit that actually works from bow to stern.

A boat that looks clean at the dock isn't necessarily a boat that's been cleaned correctly. Use the wrong brush on your gelcoat, skip the right sequence below the waterline, or grab a household mop for your teak deck, and you'll spend twice as long fixing the damage as you did doing the cleaning. The good news is that the right toolkit, used in the right order, turns what feels like a weekend-consuming chore into a manageable, even satisfying routine.
What follows is a practical breakdown of the tools and techniques that cover every zone of your boat: hull, deck, and interior. The goal is an efficient, protective cleaning routine, one that keeps surfaces looking sharp and extends the life of your finishes.
Starting Below the Waterline: Hull Cleaning Tools
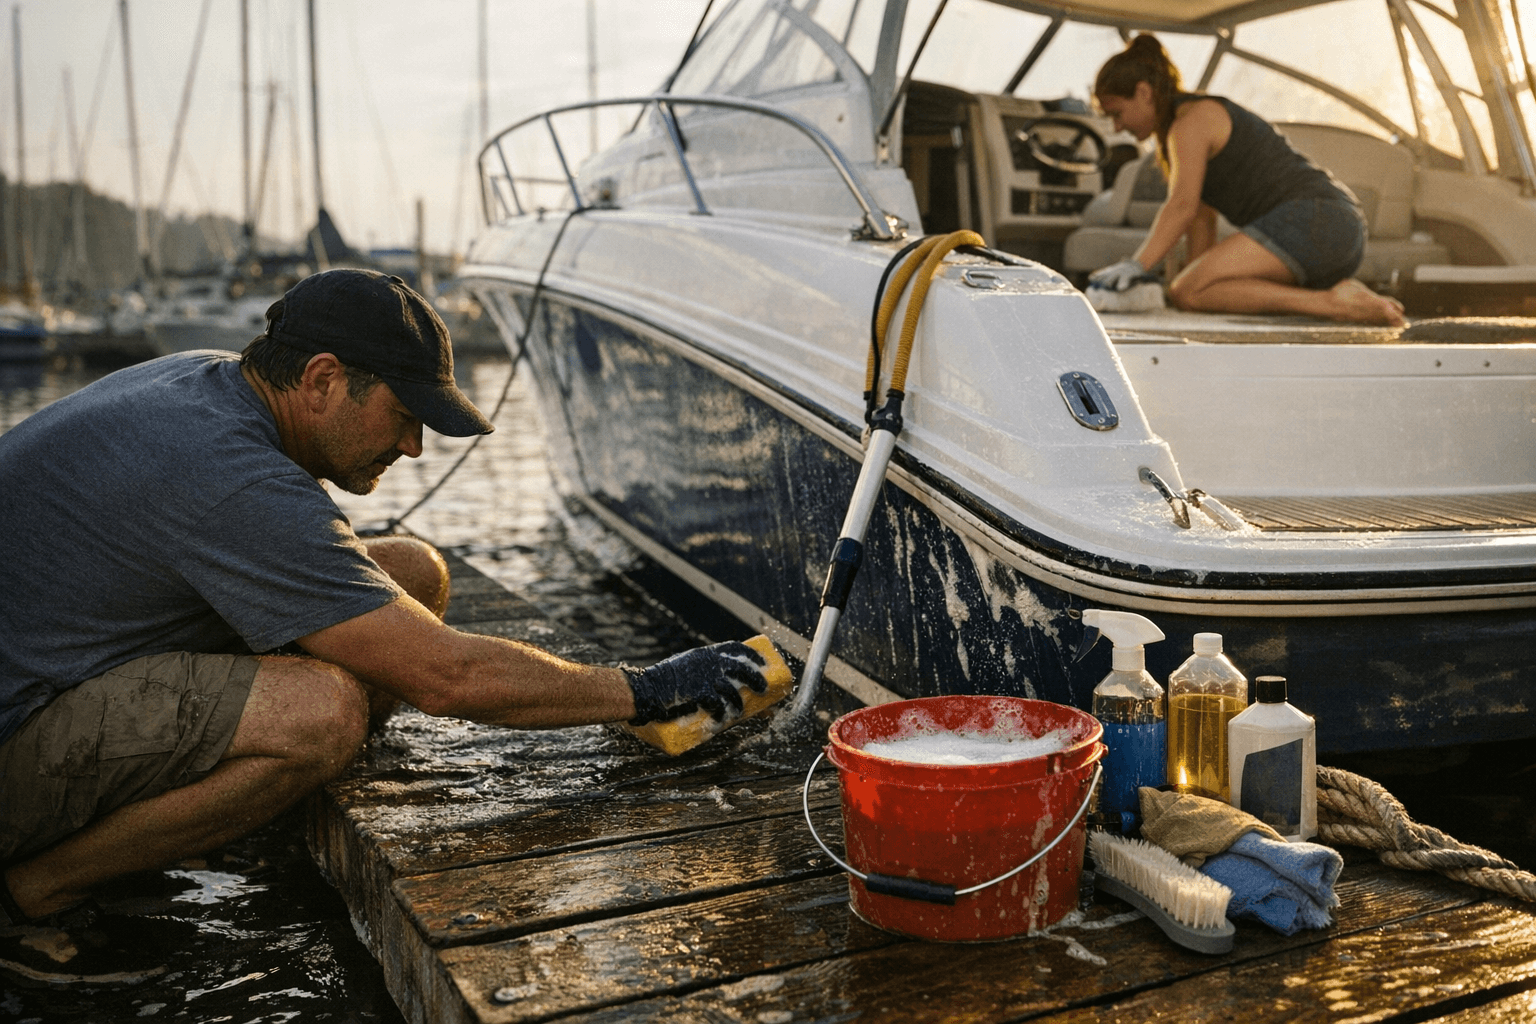
The hull is where the harshest work happens, and it's where tool selection matters most. Soft, single-use sponges won't cut through marine growth, salt deposits, or waterline staining, but an overly aggressive abrasive pad will scratch your gelcoat or antifouling paint into a mess that's expensive to repair.
For the waterline and topsides, a soft-bristle hull brush with a long handle is the baseline tool. It gives you reach without requiring you to hang over the side, and the bristle density is firm enough to agitate cleaning solution without leaving micro-scratches. For anything below the waterline on a trailerable boat or one on the hard, a stiffer bottom scrubber brush designed specifically for antifouling paint is the right call. These are built to handle the barnacle and algae buildup that accumulates on racing and cruising hulls alike without compromising the antifouling coating underneath.
Waterline staining, that brown or rust-colored tide stripe that seems to reappear within days of cleaning, calls for a dedicated waterline eraser pad or a hull polish applicator paired with a targeted stain remover. Applying these by hand with a microfiber applicator gives you control over pressure, which matters when you're working close to the waterline where gelcoat thickness varies.
Deck Cleaning: Surface-Specific Tools for Fiberglass, Teak, and Non-Skid
The deck is three or four different surfaces masquerading as one, and that's where a lot of boat owners go wrong by reaching for a single all-purpose brush and calling it done. Fiberglass decking, teak or synthetic teak, non-skid panels, and stainless hardware all need different approaches.
For fiberglass and painted decks, a medium-bristle deck brush on a telescoping handle is your workhorse. The telescoping handle isn't a luxury; it's a tool that keeps you off your knees and lets you apply consistent, controlled pressure across flat surfaces. Pair it with a bucket and a good marine wash solution diluted to the manufacturer's ratio, not a stronger mix that strips wax and leaves your gel coat dull.
Teak, whether real or synthetic, needs a softer touch. A dedicated teak brush with natural or softer nylon bristles, scrubbing along the grain rather than across it, prevents the wood from raising and splintering. For real teak that's going gray, a two-part teak cleaner applied with a brush and rinsed thoroughly before the wood dries is the standard approach on performance cruisers and classic yachts alike.
Non-skid panels are their own challenge. The textured surface traps dirt and mildew in a way that flat gelcoat doesn't, and a flat sponge or soft cloth barely touches the grime sitting in the recesses. A stiff-bristled scrub brush, short-handled for control, works into the texture effectively. Some sailors swear by a deck brush with angled bristles for this reason. Follow up with a rinse that reaches into the texture, not just over it.
Stainless fittings, cleats, and chainplates get a dedicated metal polish applied with a microfiber cloth. A separate set of cloths for metal work prevents polish residue from contaminating your gelcoat wax at the next stage.
Interior Cleaning: Mold, Moisture, and the Right Tools for Confined Spaces
Below decks is a different environment entirely. Confined spaces, poor ventilation, and the constant presence of moisture create conditions that favor mold and mildew faster than almost any other domestic setting. The tools here are lighter and more targeted than hull gear, but they're just as specific.
A soft-bristle hand brush and a set of microfiber cloths handle most interior surfaces: headliner, upholstery, galley counters, and bulkheads. Microfiber is particularly effective in the interior because it picks up mold spores and fine dust without just redistributing them the way a standard cloth can.
For upholstery, a soft brush attachment on a handheld vacuum removes loose debris before any wet cleaning. Scrubbing wet dirt into marine vinyl is a reliable way to stain it permanently. The sequence matters: vacuum first, then apply a dedicated marine vinyl cleaner with a soft cloth, then wipe and dry thoroughly.
Bilge cleaning calls for a dedicated bilge pump-out routine first, followed by a stiff brush and a bilge cleaner that can handle oil residue, fuel smell, and standing water grime. A long-handled bilge brush that reaches the lowest points of the sump without requiring full contortion is worth having as a single-purpose tool. It's not glamorous, but a clean bilge is also an early-warning system: you'll spot a weeping seal or a slow raw-water leak much faster when the bilge isn't already coated in grease.
Building Your Kit: What to Buy First
If you're starting from scratch or rationalizing a cluttered cleaning locker, prioritize tools in the order you'll use them: hull brushes before deck brushes before interior tools. Buying everything at once often means storing half of it incorrectly, which shortens the life of bristles and pads faster than actual use.
A core kit for most production cruisers and daysailers covers:
- Long-handled soft-bristle hull brush
- Stiff bottom scrubber for antifouling surfaces
- Telescoping deck brush (medium bristle)
- Short-handled non-skid scrub brush
- Teak brush (if applicable)
- Microfiber cloths in two sets: one for gelcoat/glass, one for metal
- Soft hand brush for interior surfaces
- Long-handled bilge brush
- Dedicated microfiber applicator pads for wax and polish
The temptation to substitute household cleaning tools is understandable, but a standard bathroom scrub brush or kitchen sponge isn't built for salt water environments, UV exposure, or the specific surface chemistry of marine finishes. Tools designed for marine use typically have UV-stabilized handles, rust-resistant fittings, and bristle materials rated for repeated saltwater exposure.
Sequence and Storage: Making the Routine Stick
A cleaning routine that follows a logical sequence from the top of the mast down to the bilge does two things: it prevents clean surfaces from being re-dirtied by runoff, and it trains muscle memory so the job gets faster every time you do it. Start at height with a rinse that pushes grime down and off the boat, work your way across the deck, then finish at hull level and below.
Store brushes bristle-up or hanging, never bristle-down in a bucket. Bristles that sit compressed between uses lose their shape and their cleaning effectiveness faster than any other form of wear. Rinse tools thoroughly with fresh water after every saltwater use, and let them dry in ventilated storage before closing the cleaning locker.
A well-maintained cleaning kit is, in the end, part of the same logic as a well-maintained boat: the small investment of care between uses is what makes the tool reliable when you actually need it.
This article was produced by Prism’s automated news system from verified source data, official records, and press releases, then run through automated quality and moderation checks before publishing. The system is built and supervised by the people who set the standards it runs under. Read our full AI policy.
Did this article answer your question?


