Build Your Own Small-Boat Autopilot With Field-Tested DIY Methods
A DIY pypilot build using a Raspberry Pi Zero and an Arduino motor controller costs a fraction of a $2,000–$5,000 commercial unit — and it's ocean-tested.

Skip the sticker shock on a commercial autopilot. Marine autopilot systems start around $1,500 for basic models and climb to $5,000 or more for advanced systems with integrated features, and that's before installation labor. For a shorthanded sailor handling everything from trimming sails to monitoring traffic, that kind of spend is hard to justify when open-source alternatives are not only functional but have been proven on ocean passages. This guide covers how to actually build one, from picking your drive unit to tuning your PID gains on the water.
Why DIY Makes Sense Here
Many commercial autopiloting systems are expensive and when they break, they can be pricey to fix, often requiring a specialist. By building your own with a Raspberry Pi, the price is cut significantly, and being the creator of the project means it's much easier to troubleshoot. That second part matters most when you're three days offshore. A system you built yourself is a system you can diagnose and repair with parts you understand.
In some aspects a DIY system is even superior to current commercial applications. It is completely open source and highly customizable, and its modular design allows it to be adapted to any boat, even by recycling parts of old installations. That last point is worth underlining: if your boat already has a dead autopilot, the electronics may no longer work, but the motor still does. If the motor also doesn't work, you can try purchasing a replacement with the same specifications, as that motor was likely already sized for your boat.
The Software Backbone: Pypilot and OpenPlotter
Pypilot is an open-source autopilot, both hardware and software, written by Sean D'Epagnier. It's the beating heart of most serious DIY small-boat autopilot builds. Pypilot is an open-source, RPi-based marine autopilot for tiller- and wheel-driven boats up to 40 feet, and the software is included in OpenPlotter, designed to work specifically with OpenCPN.
The system is modular, has extremely low power consumption, and can be built and customized by the end user. For a sailboat watching battery reserves, that low power draw is a genuine advantage over legacy systems. Older systems are clunky, take up a ton of space (think bowling ball-sized compass versus a quarter-sized 9-axis IMU chip in modern systems), and are power hungry — fine for a fishing boat motoring all the time, but not ideal for a sailboat watching electrical power consumption.
Pypilot's features include automatic sensor calibration, multiple steering modes (compass, GPS, apparent wind, true wind), SignalK and NMEA 0183 communication protocols, OpenCPN integration, and low power consumption.
The Hardware Stack
Like most autopilots, pypilot consists of an autopilot computer (brain) and a motor controller. The tinypilot computer is a WiFi-enabled mini computer, a Raspberry Pi Zero, programmed with pypilot software and fitted with a 9-axis IMU chip (3 axes of accelerometer data, 3 axes gyroscopic, and 3 axes magnetic compass). The motor controller is an Arduino-based unit that connects to the pilot and controls the tiller or wheel.
One practical builder's approach uses just three modules: a compass and gyroscope (MPU9260/6500), a Raspberry Pi Zero W, and an Arduino Uno motor controller paired with a double BTS7960B H-bridge IBT-2 motor driver, with an 8-button touch interface and LCD display. All parts except the PCB are widely available standard components.
For the motor controller, pypilot offers three tiers to match your drive unit's power requirements:
- Standard pypilot motor controller: continuous output up to 7A (15A peak), 12V
- Mid-power motor controller: up to 15A continuous (25A peak), 12/24V
- High-power motor controller: up to 30A continuous (50A peak), 12/24V
Choosing Your Drive Unit
The actuator, or drive unit, is likely going to be the most expensive component in your DIY autopilot, so it makes sense to design the system from the actuator outward. This is the one place not to cut corners.
Pypilot typically drives a brushed DC motor that moves the rudder from -30 to +30 degrees in 6–8 seconds; faster is usually better and slower is usually worse. Any type of 12 or 24 volt reversing drive up to 30 amps is supported.
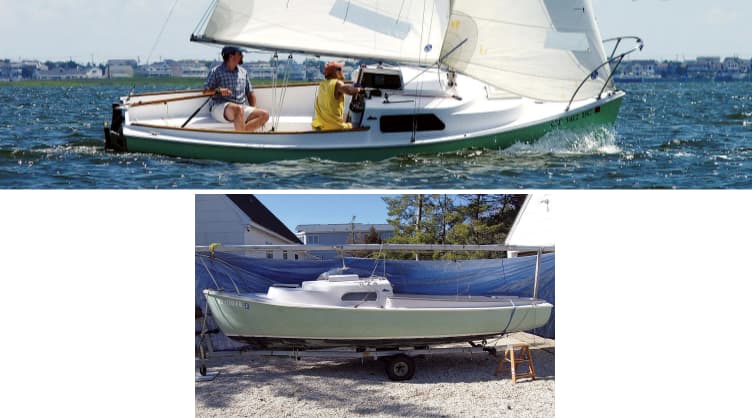
For a budget tiller build, you can build a marine autopilot system using a 12V linear actuator and Arduino for under $350. Outboard motors and tillers can require significant force to turn, especially at higher speeds or in rough water, and a deluxe model actuator typically offers 200–400 lbs of force, which is appropriate for most recreational boat applications.
For wheel-steered boats, the situation is more involved. Autopilots made for fixed installation (not tiller-mounted, where you disconnect the actuator when not in use) tend to be very expensive because some kind of release mechanism or clutch needs to be in the system. Factor that into your mechanical planning before buying anything.
Wiring It Up
Start with initial wiring using dupont wires and a breadboard. For this step, use the comments contained in the file "motor.ino," the program to inject into the Arduino. Details are in the documentation and on the forums. Making a schematic diagram before permanent installation is useful to avoid forgetting anything about the wiring.

The Raspberry Pi and the 9-axis motion sensor are located in the control housing. This requires a fixed installation of the control unit to ensure a fixed alignment of the motion sensor to the boat. Don't mount it to a panel you'll move around. Mount it once, mount it solid, and don't move it.
The biggest concern for mounting location is magnetic interference. The effect is related to the cube of the distance, so proximity is the biggest concern. Keep the IMU well away from speakers, motor cables, and anything that draws dynamic current.
Calibration: The Step That Actually Matters
Sailors often rush calibration and spend weeks wondering why their boat wanders. Don't. There are three distinct calibration steps and skipping any one of them breaks the whole system.
1. Accelerometer calibration: To calibrate the accelerometer bias, you must be on a mostly stable platform.
It may be impossible to do at anchor if the boat is moving too much, so do this in flat water or on land.
2. Alignment: Ensure the boat is level and in relatively calm water, then click the "boat is level" option in any of the control interfaces under calibration.
Correct alignment must be performed before the compass calibration can begin. As one pypilot workbook puts it plainly: if you don't level it, there is no error message but the pypilot will steer like a goat.
3. Compass calibration: The compass calibration is mostly automatic.
If the accelerometer and alignment are calibrated, you just need to sail turning more than 180 degrees to calibrate the compass. Compass calibration is continuous and always updates unless locked.
For the rudder feedback sensor, the rudder range should first be set to the maximum angle the autopilot is allowed to move the rudder, and the angle is needed to provide accurate rudder feedback measurements.
Tuning PID Gains
The basic pilot is by far the most widely used and proven pilot, using an extended PID filter to incorporate square root and second order feedback. The basic autopilot uses an enhanced PID filter to form a feedback loop, and various gains can be adjusted to improve performance — they vary depending on the boat, sea state, and rudder drive motor.
It is recommended to use the OpenCPN plugin or pypilot_control for tuning the gains because visual feedback is provided. To get started retuning from scratch or on a new boat, set all of the gains to zero except the P and D gains.
Expect to spend real time on this underway. It will take many hours of sailing to know how to adapt the gains and the software configuration to the boat's behavior. Little by little, you will be able to adopt the right reflexes to optimize the pilot's reactions according to speed, sea state, and wind.
Steering Modes and Integration
Once calibrated and tuned, pypilot offers several steering modes worth understanding:
- Compass mode: the default — holds a magnetic heading
- GPS mode: the course is based on true north rather than magnetic north, with the IMU compass heading continuously corrected by the COG from the GPS. This corrects for drift and current.
- Wind mode: steers to apparent or true wind angle, essential for performance sailing
- Route following: if APB messages from a plotter are regularly sent, pypilot will follow a track with the heading continuously updated from the plotter. You can create a route in OpenCPN, activate it, and pypilot will pick it up and automatically enable GPS mode.
You can engage or disengage the autopilot, steer via compass, GPS, or wind (true or apparent) by clicking buttons in an OpenCPN plugin or app from the nav station.
The Bottom Line
Pypilot is a serious tool that really works. It has been tested on ocean crossings, adapted to hydraulic systems, and built by sailors with everything from engineering backgrounds to raw curiosity and a willingness to read forum threads. The community at openmarine.net is active, and Sean D'Epagnier, the author of the project, participates by giving updates and answering questions. If you get stuck, someone has been stuck in exactly the same place before you. The documentation exists. The parts are affordable. The only thing standing between you and a working autopilot is doing the work.
Know something we missed? Have a correction or additional information?
Submit a Tip