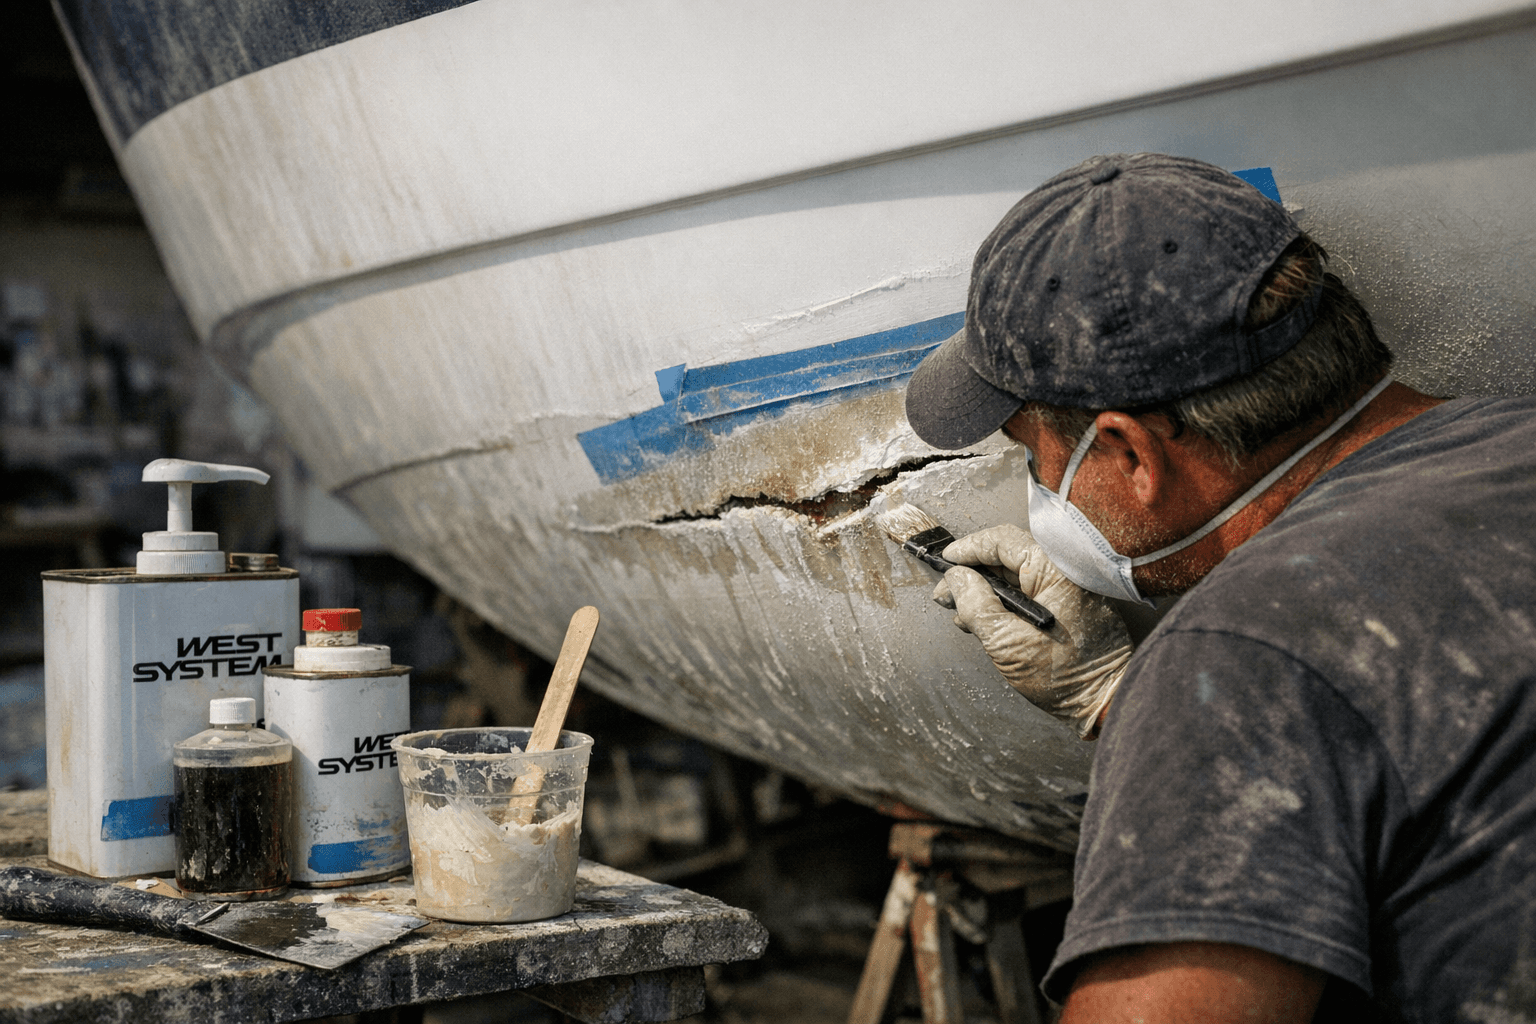
Fix Your Fiberglass Hull with WEST SYSTEM Epoxy Repair Techniques
Treating a structural crack the same as a surface scratch is the fastest way to turn a manageable repair into a boatyard bill. Here's the complete WEST SYSTEM epoxy workflow for getting it right.

Fiberglass is a forgiving material — until you treat a structural crack like a cosmetic scratch. Sand it flush, brush on some gelcoat, and within a season the crack is back, wider, and potentially admitting water into the laminate core. Most of the repair jobs found on fiberglass boats are cosmetic in nature — cracking or crazing of the gelcoat and scrapes and dings account for much of the repair work done in boat shops — and permanent repairs to those types of damage can absolutely be made with WEST SYSTEM Epoxy, which when properly applied affords an extremely durable, water-resistant result that offers an excellent base for various finishes. The problem is knowing when "cosmetic" tips over into "structural," and what your next move is when it does.
Deep cracks extending into the woven fabric of the laminate require a structural repair before any cosmetic gelcoat work begins. If the crack extends into or through the woven fabric of the skin, the repair procedure escalates significantly. This guide walks you through the full spectrum — from minor crack fills to laminated patch repairs, delamination, gelcoat blisters, and the finishing sequence — using the WEST SYSTEM 105 Epoxy Resin System as the backbone throughout.
Why WEST SYSTEM Epoxy Outperforms Polyester for Repairs
The vast majority of fiberglass boats in use today are built with polyester resin. That creates an important asymmetry: unsaturated polyester resins perform fairly well during construction when all layers are applied and allowed to cure together — that's a primary bond. Problems occur when trying to bond polyester resin to a cured laminate, as is necessary in every repair application.
Unlike polyester resin, which can shrink from 5% to 8% and create stress concentrations at the repair joint, epoxy doesn't shrink. It's also a more effective moisture barrier, forming a tenacious mechanical bond with cured polyester and other materials in secondary bonding. The practical upshot: epoxy is more durable than polyester, meaning the repaired section may actually end up stronger than the original structure, and WEST SYSTEM is an excellent choice given the ease and practicality of application, availability, and access to technical assistance.
For most fiberglass repair projects, WEST SYSTEM recommends the 105 Epoxy Resin System for its strength and versatility. Hardener selection shapes the working window. 205 Fast Hardener is a medium-viscosity curing agent used in most situations, at lower temperatures, and to produce a rapid cure that develops physical properties quickly at room temperature. For larger repairs or warm conditions, 206 Slow Hardener is a low-viscosity curing agent for use when extended working and cure time is needed or to provide adequate working time at higher temperatures. In both cases, the mix ratio is five parts resin to one part hardener, producing a rigid, high-strength, moisture-resistant solid.
Diagnosing the Damage Before You Touch a Grinder
To effectively repair damage typical of fiberglass boats, the repair material must be a superior structural adhesive, capable of bonding not only to polyester resin, but also to the surrounding laminate. Study and become familiar with all steps in a procedure before beginning a repair.
Scrapes, dings, and impact cracks are easy to account for, but the causes of flex cracking or crazing may not be as obvious. Most cracks or crazing that appear gradually and get worse over time are the result of flexing and are most often found in areas of solid laminate. They often appear near a bulkhead, deck-to-cabin curve, or window. Pressing on the hull or deck surface is the first delamination test: exerting pressure on the skin that yields a soft feel before contact with the core indicates a gap between the skin and core.
Delamination is a common deck and hull construction problem that tends to get worse if left unattended. Eventually, it can reach a point where the overall structural integrity of the hull and deck may be compromised. Catching it early is the difference between a weekend repair and a major rebuild.
Repairing Minor Cracks and Surface Damage
For cracks that haven't breached the woven fabric layers, the process is straightforward:
1. Prep the area using a "V"-shaped scraper to dig out the damaged material. Feather the edges with the scraper or sandpaper and clean up any dust or loose debris.
2. Wet the cracks by soaking them with a straight resin/hardener mix.
3. Fill the cracks by thickening the resin/hardener mix with 404 High Density Filler or 406 Colloidal Silica Filler until it's about the consistency of peanut butter. Fill the cracks with the thickened epoxy, smoothing it out with a mixing stick or squeegee, then let it cure completely.
4. Sand with 100-grit sandpaper to remove bumps or ridges, then wet-sand with 220-grit and finish with gelcoat or paint.
Structural Hole and Skin Repairs
Impact damage often results in holed decks, hulls, bulkheads, or cabin tops requiring both structural and cosmetic repair. The repair geometry matters enormously here.
Cut away all loose or damaged material, trying to maintain a circular or oval shape that exposes solid laminate. Inspect internal structural members for damage as well. Dry the area thoroughly, then sand or grind to a 12-to-1 bevel from the edge of the repair area. That bevel is critical: it creates the stepped, overlapping surface area that restores load continuity across the repair.
If necessary, provide backing for the repair by bracing plastic-covered plywood over the inside of the hole. When laminating the patch, fabric selection and layering discipline determine the final strength. The ultimate aim is to repair the skin to approximately its original thickness. Multiple layers of lightweight cloth will be as strong or stronger than a single layer of heavy cloth — using WEST SYSTEM 739 450g/m² Biaxial Fabric, each layer is approximately 0.5mm thick, so a 6mm laminate requires around 12 layers of fabric.
For repairs of around 20cm diameter or smaller, it's usually easier to bond layers of fiberglass together away from the boat, wetting out a complete single patch on a piece of clear plastic before bonding it to the hull. For larger repairs, each layer must be applied to the boat individually, wetting out each one with epoxy. Either way, stop after laminating a maximum of 3mm of fabric due to the heat generated. Applying peel ply means you can continue working once the first 3mm has cured.
After the lay-up reaches its initial cure, apply two or three coats of epoxy to fill the weave of the cloth. To avoid sanding between coats, apply each coat before the previous coat becomes tack free. WEST SYSTEM epoxies are ready to overcoat when a finger pressed into the surface marks it but comes away dry.
Addressing Delamination in Cored Panels
Repairing the blister or delamination with epoxy and then coating the hull with an epoxy barrier coat is presently the most dependable solution and prevention for this problem.
For cored sections where the skin has separated from the core, after the epoxy is completely cured, sand the surface fair with 80-grit sandpaper. Any remaining low spots may be filled with epoxy and 411 Microsphere Blend mixed to a "mayonnaise" consistency. Sand when cured and coat with unthickened epoxy.
Tackling Gelcoat Blisters Below the Waterline
Blistering of below-the-waterline gelcoat surfaces, along with the resulting interlaminate failure, has become an increasingly widespread problem. If left unattended, blistering can lead to serious structural damage.
The treatment protocol:
1. Prepare the hull for drying by opening all blisters and abrading the bottom with 50-grit sandpaper. For extensive blistering, grinding or sandblasting the gelcoat surface down to the fiberglass laminate may be necessary. The entire surface below the waterline should be sanded to a dull finish with all bottom paint removed.
2. After the blisters have been opened and the hull sanded, allow the hull's moisture content to stabilize.
3. Within 6 to 8 hours of applying the first epoxy coat, trowel a non-sagging fairing mixture of epoxy and 411 Microsphere Blend into the blister cavities. After 24 hours, sand the entire surface to a dull, smooth finish with 80-grit sandpaper.
Final Fairing and Finishing
Use 80-grit sandpaper to level any ridges or bumps, then wet-sand fair with 220-grit paper. For high-gloss finishes, continue wet-sanding down to 400-grit. Gelcoat or a two-part polyurethane paint both provide the ultraviolet protection required for epoxy. Marine-grade enamels work well on interior surfaces. Note that epoxy itself has no UV resistance; a topcoat isn't optional, it's the layer keeping your repair intact.
Choosing a Kit for Smaller Jobs
The WEST SYSTEM 105-K Fiberglass Boat Repair Kit handles cracks and scrapes, gelcoat blisters, loose hardware, delaminated decks and panels, damaged keels, and holes up to 1" diameter in solid laminates up to ¼" thick, as well as smaller holes in thicker laminates. Each kit contains eight pre-measured packets of 105 Epoxy Resin and 205 Fast Hardener, fiberglass fabric, adhesive filler, fairing filler, glue brushes, mixing cups, a reusable mixing stick, an application syringe, three pairs of protective gloves, and illustrated instructions. All components are contained in a sturdy, resealable package that can be easily stowed aboard your boat — which means no excuse for not having the materials on hand when you haul and find something that needs attention.
Safety and Skin Sensitivity
People occasionally report sensitivity problems with epoxy materials even when wearing gloves. Glove sensitivity is often the underlying problem, and changing to a different glove material may be the solution. Work in well-ventilated conditions, change gloves frequently, and never use solvents to clean epoxy off your skin — soap and water is the correct approach.
The WEST SYSTEM *Fiberglass Boat Repair & Maintenance* manual, recently revised and expanded to 156 pages in its third edition, covers every scenario touched on here in far greater depth. All WEST SYSTEM print publications are available as free downloads, making it the most cost-effective reference you'll ever keep in the nav station. The skill that separates a sailor who fears every impact from one who doesn't is simply knowing exactly what they're dealing with — and having a tested, systematic answer for it.
Know something we missed? Have a correction or additional information?
Submit a Tip