How one cruiser cast homemade deck prisms to solve leaks
A cracked deck prism became a dry, durable retrofit on Nine of Cups, and the fix has stayed watertight through five hard cruising years.
The old deck prisms on Nine of Cups had turned a nice idea into a leak, and that is the kind of problem that makes an older boat feel tired fast. On David Lynn’s 1986 Liberty cutter, the prisms were chipped, cracked, and no longer sitting neatly with the deck after the teak came off, so he faced a real decision: remove them, fill and fair the openings, or replace them with something lower-profile and better sealed.
When a leak becomes a retrofit
Lynn was in Ecuador when the hunt for replacements began, which is exactly when a simple repair becomes a scavenger hunt. He checked the internet, catalogs, and consignment shops, but the right-size prisms were not turning up locally. That dead end matters for older-boat owners, because it is often not the idea that fails, it is the parts availability.
What broke the stalemate was another cruiser’s tip about a craftsman in Trinidad who had made replacement prisms from clear resin. That suggestion changed the problem from “find the part” to “recreate the part,” and for a boat like Nine of Cups that is often the more realistic route. When a legacy fitting is no longer on the shelf, home casting can be the difference between living with a leak and turning it into a useful upgrade.
Why the homemade route made sense
Lynn did not treat the project like a miracle fix. He researched mold making, casting, and resin choices before deciding the process looked simple enough to try, and that is the right attitude for this kind of work. The point was not to chase perfection for its own sake, but to make a part that fit, passed light, and stayed dry in real cruising conditions.
He also made a practical material choice. Urethane mold compound won out because it was cheaper and cured in 24 hours, while silicone was described as more optically perfect but more expensive and slower to cure. For a cruiser doing the job far from a chandlery, that trade-off is familiar: you choose the material that gets the boat back in service without dragging the project out forever.
The article in Good Old Boat’s Issue 84, May/June 2012, also frames the project the way older-boat owners think about these things: not as decorative glasswork, but as a clear resin deck prism that brings light into the cabin without creating a hazard on deck. That is the sweet spot. If the light is good and the deck stays safe, the retrofit earns its keep.
How the casting process actually works
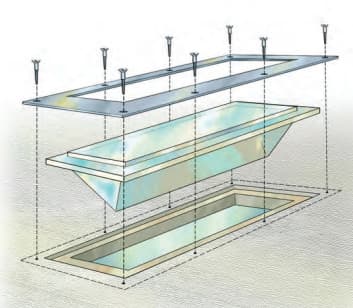
The basic sequence is straightforward, but the simplicity is misleading. First you create a mold, then you mix the casting resin, pour it, let it cure, pop out the prism, and polish it before installation. On paper that sounds almost too easy, which is why Lynn was candid that it is an oversimplification.
The important lesson is that casting a deck prism is not a one-shot pour and pray exercise. Lynn says there were a few attempts before the results were satisfactory, and that is exactly the kind of detail a DIY sailor should pay attention to. The first casting that looks fine in the bucket may not be the one you actually want in the deck.
The practical takeaway is that the mold is as important as the resin. If the mold is wrong, the finished prism is wrong, and if the finish is rough, you lose the clean optical effect that makes a deck prism worth the trouble in the first place. For an older boat, that means measuring carefully, accepting trial and error, and being willing to refine the process until the part is both clear and usable.
The sealing lesson that matters most
A homemade deck prism succeeds or fails at the deck edge, not on the workbench. Lynn’s starting point was a leaking, chipped, cracked fitting that no longer sat cleanly after the teak deck removal, so the repair had to solve both the light issue and the leak path. That is the key lesson for anyone trying to copy this on a classic cruiser: do not think of the prism as a drop-in cosmetic replacement when the surrounding opening and surface condition have already changed.
The choice is often between patching over the old problem or rebuilding the fit so the new part belongs in the deck again. On Nine of Cups, the homemade solution worked because it answered the whole problem, not just the visible crack. More than five years later, the replacement prisms had survived tropical heat, hard equatorial sun, and the cold, wet stretch of Tierra del Fuego without leaking, which is the kind of field test that matters more than bench-top prettiness.
Why deck prisms were worth saving in the first place
Deck prisms have a long job description. Before electric lighting, they were used to provide natural light below decks, especially on wooden ships carrying hazardous cargo where candles or oil lamps were a fire risk. Mystic Seaport Museum notes that the earliest known hexagonal cone-style deck lights date from the 1840s, and the concept was always about spreading light sideways below decks instead of making one harsh bright spot.
That history also explains why the old hardware so often failed. Early deck lights were commonly cemented in place, and the cement could crack and loosen over time, leading to breakage and leaks. In 1861, Henry Lanergan patented a threaded deck light that could be screwed into a brass frame for easier replacement, which was a serious improvement for maintenance. The Charles W. Morgan restoration, carried out from 1977 to 1984, went a step further: molds were taken from the original prisms and hand-cast replicas were produced when some originals were found cracked and damaged.
The design still has reach beyond the boat. The deck-prism idea later influenced urban vault lights, sometimes called pavement lights, which tells you how effective the basic optical trick really was. It is an old solution that kept finding new uses because it worked.
What an older-boat owner can copy
This is the part worth stealing for your own boat: if the fitting is no longer available, if the replacements are wrong, and if the old one is already leaking, make the problem into a retrofit. Use a mold compound that fits your budget and timeline, accept that the first casting may not be the final one, and build the part for the conditions the boat actually sees, not the conditions you hope for.
That is why Lynn’s project is more than a neat trick. It took a leaking nuisance on Nine of Cups and turned it into a durable source of cabin light, and the proof is in the five hard years that followed. When a deck prism stops leaking in Ecuador, in tropical heat, and down near Tierra del Fuego, that is no longer a hobby experiment. That is a repair worth trusting.
This article was produced by Prism’s automated news system from verified source data, official records, and press releases, then run through automated quality and moderation checks before publishing. The system is built and supervised by the people who set the standards it runs under. Read our full AI policy.
Did this article answer your question?


