How to Install and Maintain Your Electric Trolling Motor Step by Step
A proper trolling motor install can transform how you move through the water; here's everything you need to get it right the first time.

Electric trolling motors occupy a unique space in the small-boat world. They're quiet enough to sneak up on a fishing hole, powerful enough to hold position in a current, and simple enough that a motivated DIYer can install and maintain one without a marine technician. But "simple enough" doesn't mean "figure it out as you go." A sloppy installation creates electrical hazards, drains your battery faster than it should, and puts unnecessary stress on the motor housing. Getting it right means understanding what type of motor suits your boat, how to mount it correctly, and what ongoing maintenance actually looks like.
Choosing the Right Motor for Your Setup
The first decision is mount style, and it shapes everything downstream. Bow-mount motors attach to the front of the boat and pull it through the water, giving you precise steering control that's especially valuable when you're fishing structure or working along a weed edge. Transom-mount motors attach to the stern, push from behind, and tend to be simpler to install, making them a popular choice for jon boats, canoes, and small aluminum fishing boats. Engine-mount motors are designed to attach directly to a gas outboard's bracket, which saves deck space and keeps the bow clear on boats where you need that room.
Each style has a different weight rating, shaft length requirement, and power range. Matching the motor's thrust rating to your boat's size and typical load is critical. Too little thrust and you'll be fighting wind and current all day; too much motor on a small hull creates handling problems and wastes battery capacity. A general rule of thumb is two pounds of thrust per hundred pounds of loaded boat weight, though conditions like heavy current or consistent headwinds push that number higher.
What You'll Need Before You Start
Gather your materials before you touch the boat. A proper installation requires:
- Marine-grade wire in the correct gauge for your motor's amperage draw
- Waterproof connectors and heat-shrink tubing
- A circuit breaker or fuse rated for your motor
- Stainless steel hardware (bolts, washers, lock nuts)
- A drill with marine-appropriate bits
- Silicone sealant rated for below-waterline use
- A multimeter for testing connections
Resist the temptation to use automotive wire or hardware-store connectors. The marine environment is genuinely hostile to anything not rated for it, and a connection that looks fine at the dock will corrode and fail on the water.
Installing a Transom-Mount Motor
Transom-mount installations are the most common starting point for DIYers, and the process is straightforward if you work methodically.
1. Position the motor bracket on the transom so the motor's lower unit hangs at the correct depth.
The cavitation plate (the horizontal plate just above the propeller) should sit roughly even with the bottom of the hull. Too shallow and the prop ventilates; too deep and you create unnecessary drag.
2. Mark your mounting holes carefully and drill through the transom.
Apply silicone sealant into each hole before inserting the bolts to prevent water intrusion into the transom core.
3. Secure the bracket with stainless steel hardware.
Tighten to firm, not over-torqued. Composite and fiberglass transoms can crack under excessive force.
4. Run your power wire from the motor toward the battery, keeping it away from any moving parts and securing it with marine wire clips every 18 inches or so.
5. Connect to a dedicated circuit breaker before reaching the battery terminals.
Never run a trolling motor wire directly to the battery without overcurrent protection.
6. Use marine-grade ring terminals crimped (not soldered alone) and sealed with heat shrink at every connection point.
7. Test the motor at low speed before heading out, watching for any unusual vibration or wire movement.
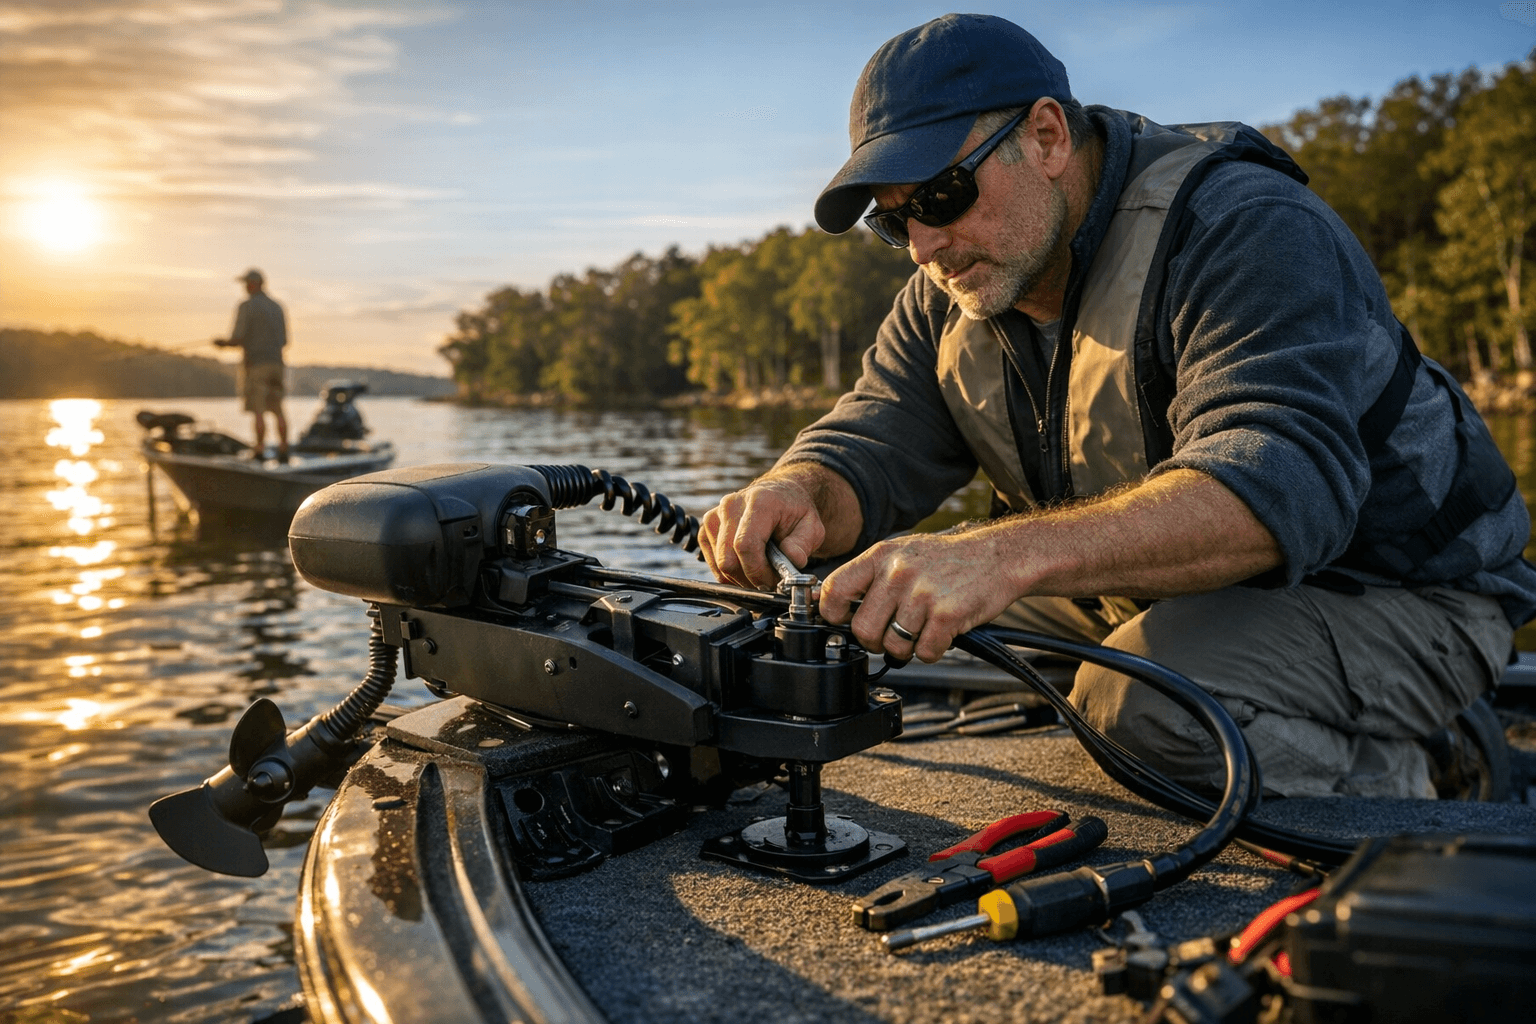
Installing a Bow-Mount Motor
Bow-mount installations require more planning because they live on a surface that sees constant foot traffic and spray. The mounting plate needs to be positioned so the motor can swing freely through its full steering range without hitting the bow rail or anchor locker. Most bow-mount motors come with a mounting template; use it. The bolt pattern matters, and guessing introduces misalignment that puts side-load stress on the motor shaft.
Wiring a bow-mount motor typically means running a longer cable run back to the battery, which requires stepping up your wire gauge to compensate for voltage drop over distance. A motor pulling 40 amps over a 12-foot run needs heavier wire than the same motor running 4 feet from the battery. Use a voltage drop calculator before you buy wire, not after.
Electrical Safety Fundamentals
The electrical side of a trolling motor installation deserves serious attention. A 12-volt system doesn't sound dangerous, but at high amperage it can start a fire or cause a battery explosion if something goes wrong. Every trolling motor circuit needs a fuse or circuit breaker as close to the battery as practical, ideally within 7 inches of the positive terminal. That breaker should be rated at 125 percent of the motor's maximum amperage draw, not exactly at the draw, so it handles surge loads without nuisance tripping.
Use a dedicated deep-cycle marine battery for your trolling motor, never the starting battery. Running your trolling motor off the starting battery is a reliable way to strand yourself with a dead engine. A group 27 or group 31 deep-cycle battery gives you solid capacity for a full day of fishing.
Ongoing Maintenance That Actually Matters
Installation is a one-time event. Maintenance is what keeps the motor working for seasons instead of months. After every outing in saltwater, flush the lower unit with fresh water and wipe down the shaft. Salt accelerates corrosion on aluminum components faster than most people expect.
Check the propeller before every trip. A nicked or bent prop causes vibration that works its way into the motor bearings over time. Replacing a damaged prop is a five-minute job; replacing bearings is not.
Inspect every electrical connection at least once a season. Look for green corrosion at the terminals, brittle heat shrink, or wires that have chafed against an edge. Clean corroded terminals with a wire brush and apply corrosion inhibitor spray. A connection that passes a visual inspection should also pass a voltage drop test under load.
Lubricate the tilt and lock mechanism on your bracket according to the manufacturer's schedule. Dry pivot points wear quickly and can seize in cold weather, which is exactly when you need the motor to deploy smoothly.
Store the battery charged to at least 50 percent if the boat is sitting for more than a few weeks. Deep-cycle batteries that sit fully discharged sulfate internally and lose capacity permanently. A simple battery maintainer on a timer solves this problem for the cost of a couple of decent lures.
A well-installed, well-maintained trolling motor becomes one of the most dependable tools on the water. The work you put in at the dock pays back every time you slip into position on a flat without spooking a fish or hold steady in a crosswind without touching the throttle on your outboard.
Know something we missed? Have a correction or additional information?
Submit a Tip