Sailor Shares Hard-Won Lessons on Replacing a Seawater Pump
Two people, 100Nm of torque, and the drive gear still wouldn't move: Mike Attree's seawater pump swap exposes the traps that catch even well-prepared DIYers.
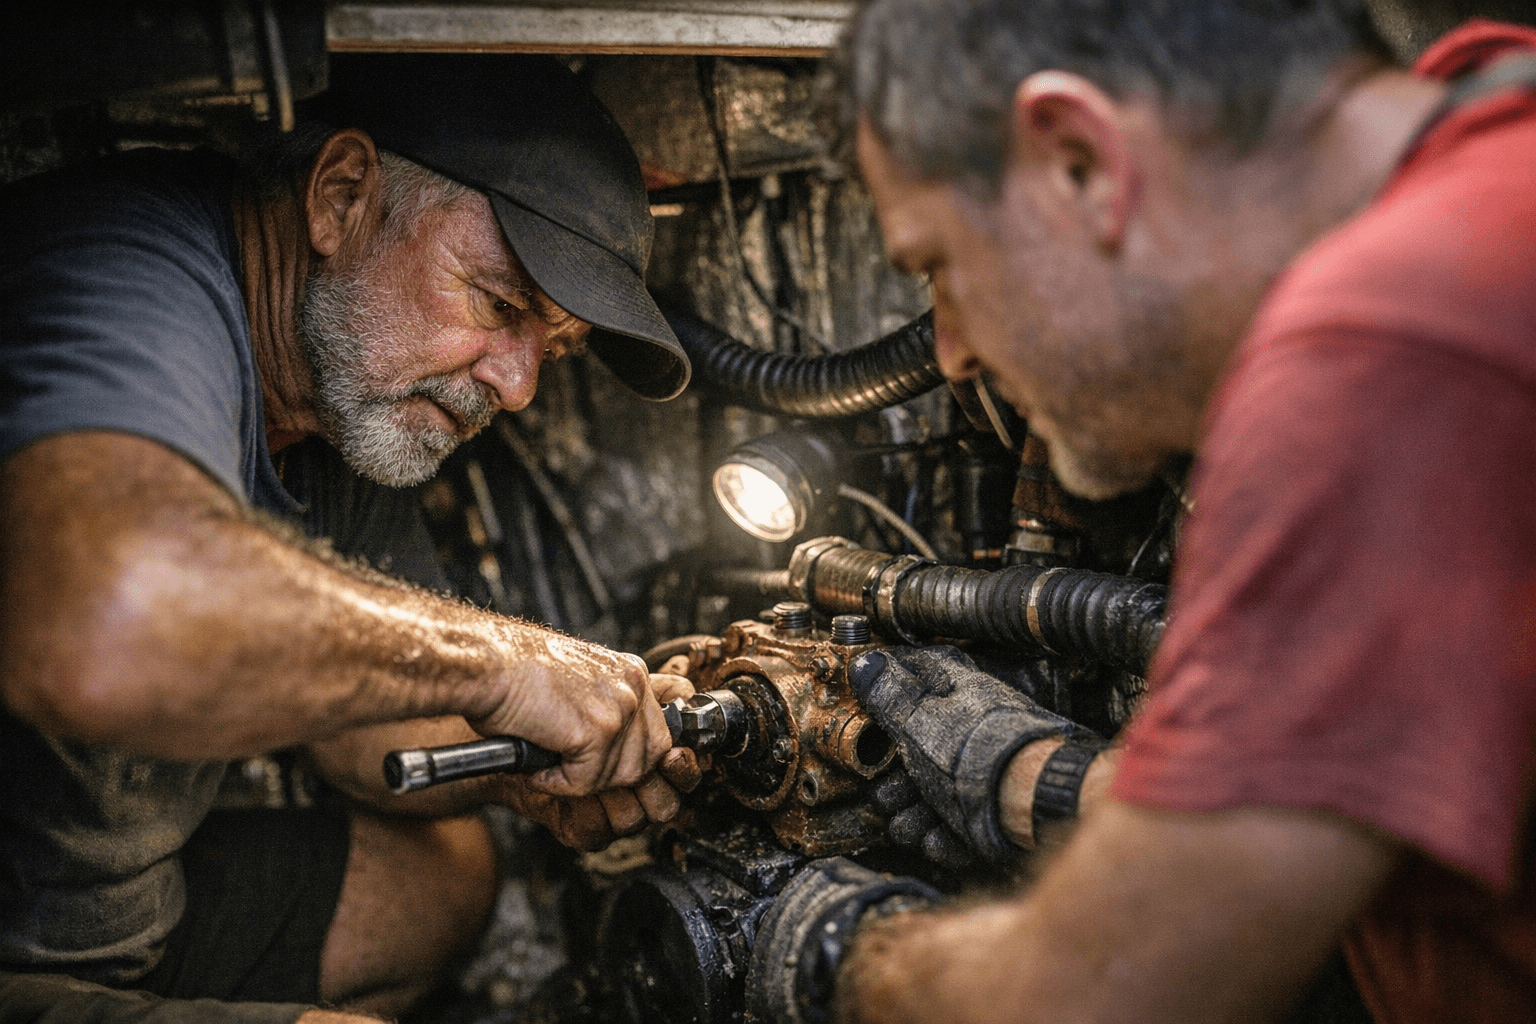
Replacing a seawater pump sounds like an afternoon job. It is not. When Mike Attree set off for his boat armed with a new pump, a portable workbench, and a heavy-duty gear puller, he had done his preparation. What he hadn't fully reckoned with was the drive gear pressed onto a plain tapered shaft with no splines or keyways, relying entirely on an interference fit to stay put. Writing in Practical Boat Owner, Attree described clamping the pump firmly in the workbench and slowly winding the gear puller "tighter and tighter, all the while tapping away at the pump shaft and gear with a hammer; it wouldn't budge." He enlisted a fellow pontoon dweller, and together "we gave the puller the beans (probably around 100Nm); the gear still wouldn't come off."
That is the part the manuals underplay. The rest of the pump job has its own landmines. Here is where they are, how they show up underway, and how to stop them from happening twice.
The Drive Gear: Why a Plain Tapered Shaft Humbles Good Mechanics
The drive gear on many marine engine seawater pumps cannot be ordered with the replacement pump. It lives on the old unit and must be transferred. It sits on what Attree accurately described as "a plain tapered shaft without splines or keyways," meaning the only thing holding the gear in place under load is the press-fit taper itself. That design makes slippage almost impossible in service, and removal a different matter entirely.
He had been warned ahead of time that "they can be a bit of a pig to remove, and that the job is not for the faint-hearted." That caution is worth absorbing before you are already on the dock with the old pump apart.
The standard sequence: clamp the pump body solidly in a vise or portable workbench, position a heavy-duty gear puller behind the gear face, and apply progressive steady tension while tapping the shaft end sharply with a hammer. The tapping matters as much as the pulling. Steady load alone rarely breaks a tapered interference fit; shock loading the shaft interrupts the grip. If the gear refuses at moderate force, apply penetrating oil around the shaft-to-gear junction and leave it overnight. Low heat from a heat gun directed at the gear body, not the pump housing, causes differential thermal expansion and frequently releases a taper that brute mechanical force cannot. Do not escalate force indiscriminately: beyond a certain point you risk bending the puller arms, damaging the pump body, or distorting the gear face.
Worn Cam and Impeller: The Failure You Won't See Coming
Most people know the impeller needs changing. Fewer pay attention to the cam, a crescent-shaped brass insert over which the impeller blades ride and are deflected to generate pumping action. Both components are wear items. The cam dezincifies and wears away over time; a visibly grooved or corroded cam will destroy a new impeller faster than the old one it replaced.
Underway symptom: coolant temperature climbing slowly, exhaust water flow reduced but not absent. That gradual onset is exactly what makes a worn impeller dangerous: it rarely triggers an immediate alarm before real damage begins.
The diagnostic flow: 1. If engine temperature rises and the seacock and raw water strainer are clear, open the pump cover. 2. Inspect every blade for cracks, permanent set, or missing sections. 3. If any blades are missing, locate them before fitting a new impeller. They typically lodge at the inlet side of the heat exchanger and must be recovered, or the cooling system remains partially blocked. 4. Check the cam for worn brass and scoring. If it is visibly degraded, replace it alongside the impeller.
Annual impeller replacement, regardless of apparent condition, is the right call before any extended passage. Mark the date inside the pump cover with a paint marker so the service history is always on the pump itself, not in a notebook ashore.
Scored Cover Plate: The Small Mistake That Creates a Persistent Air Leak
One of the most common causes of a pump failing immediately after service is damage caused during impeller removal. The pump body on most marine engines is brass. Using a standard screwdriver as a pry lever gouges the cover-plate sealing surface. That shallow score creates an air leak path that is nearly invisible on inspection but catastrophic to pump performance: air intrusion causes the impeller to lose prime, run intermittently dry, and degrade within hours.
Underway symptom: intermittent overheating, inconsistent exhaust water flow, engine that runs fine in the harbour but overheats under sustained load at sea.
Use a plastic pry bar or a dedicated impeller puller for removal. If the sealing surface is already scored, a replacement cover plate is inexpensive and far simpler than attempting to lap a curved brass surface back to flat.
For the gasket, avoid standard silicone RTV. It contaminates sealing surfaces and can interfere with future removal. Flexible non-curing sealants such as ThreeBond 1104 are the preferred choice: a skim coat only, applied to both mating faces. Align the gasket by threading two bolts finger-tight through it before installing the remaining fasteners, then torque all bolts in a crisscross pattern. The specified value for most marine pump covers is a light figure measured in inch-pounds rather than foot-pounds: over-tightening distorts the plate and recreates the leak.
Misaligned Seals and Shaft Wear
Seawater weeping from the underside of the pump after reassembly means the mechanical seal has either not seated correctly or was damaged during installation. Bearings on a rebuilt pump must be pressed from the engine side of the shaft. Pressing from the impeller end risks marring the shaft surface, and a marred surface ruins a new seal before the engine is even started.
Underway symptom: a persistent salt-water drip under the engine, accelerating bearing corrosion, and eventual shaft wobble that causes erratic pump output.
Once a weep-hole leak is confirmed, the engine should not run until the pump is removed and the seal reinstalled. Salt water tracking into an unsealed bearing destroys it quickly and turns a cheap seal replacement into a full pump rebuild.
Blocked Intake: The Problem That Mimics Everything Else
Before pulling the pump cover, close the seacock and remove the raw water strainer. A partially blocked strainer starves the pump of flow and produces overheating symptoms indistinguishable from impeller failure. Seagrass, plastic debris, and crustaceans are all frequent culprits, particularly in marina berths and after a passage through weed-laden water.
Underway symptom: sudden or rapid overheating, rather than the gradual temperature rise associated with impeller wear.
Clean the strainer, reopen the seacock, and observe the temperature at idle for several minutes before assuming the pump needs to come apart. Also confirm from outside, when conditions allow, that the intake through-hull is not fouled at the hull surface.
Priming After Reassembly
Never start the engine immediately after closing the pump without confirming the system is primed. A rubber impeller running dry begins to degrade within seconds and can be destroyed in under a minute of dry running. Before starting, prime by filling the intake hose using a syringe or squeeze bottle, or by cracking the inlet hose at the pump and pouring water in directly. On a boat with the intake below the waterline, opening the seacock and allowing the system to self-fill for 30 seconds is normally sufficient.
Confirm exhaust water flow within 30 seconds of start-up. No water from the exhaust means shut down immediately.
Spare Parts for a Cruising Boat
The seawater pump is not a component you want to be sourcing at anchor in a remote anchorage. A proper cruising spares kit should include:
- A spare impeller, matched to the specific pump
- The correct cover plate gasket
- A spare cover plate
- Replacement shaft seals
- A tube of flexible gasket sealant (ThreeBond 1104 or equivalent)
- A plastic impeller puller or pry bar
- A heavy-duty gear puller, if your pump design requires drive gear transfer
Fitting an exhaust overheat alarm is the single highest-value addition to the cooling system monitoring on a diesel auxiliary. It triggers before the main temperature gauge has time to respond, giving enough warning to shut down before damage occurs.
Attree opened his account with the observation that "before we bought a yacht, I hadn't realised that boat parts wore out so quickly, much less my engine's sea water pump." The seawater pump is the clearest illustration of that truth: simple in construction, unforgiving in a harsh environment, and critical to every hour the engine runs. Knowing precisely where it fails, and building the tools and parts to deal with each failure mode before it happens, is what keeps a straightforward maintenance job from becoming an emergency.
This article was produced by Prism’s automated news system from verified source data, official records, and press releases, then run through automated quality and moderation checks before publishing. The system is built and supervised by the people who set the standards it runs under. Read our full AI policy.
Did this article answer your question?


